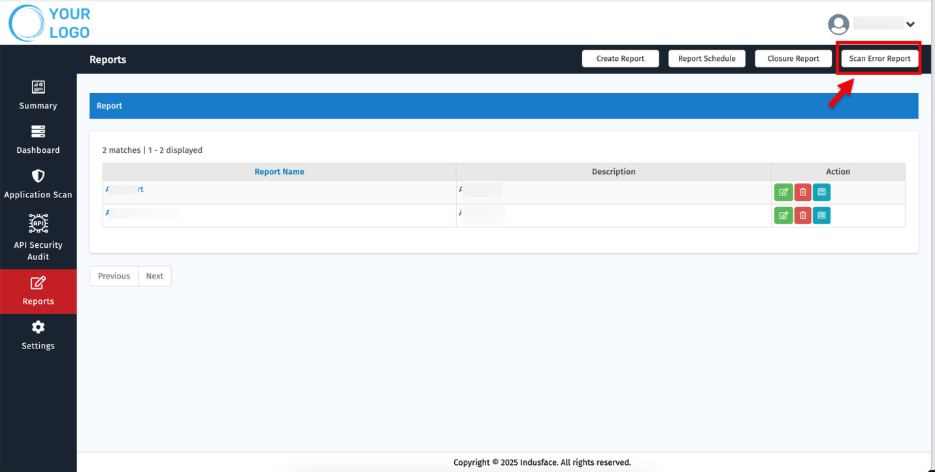
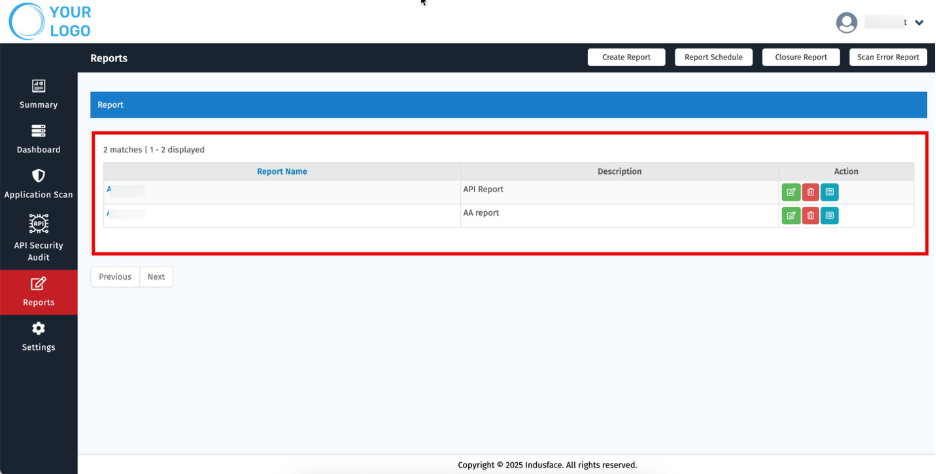
Reports
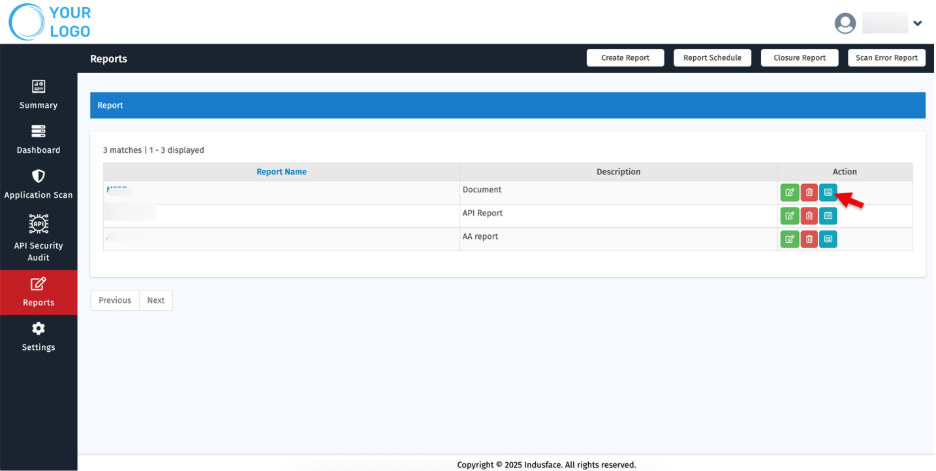
The Reports tab allows you to view and manage all existing reports. Each report is listed with its Name, Description, and available Actions
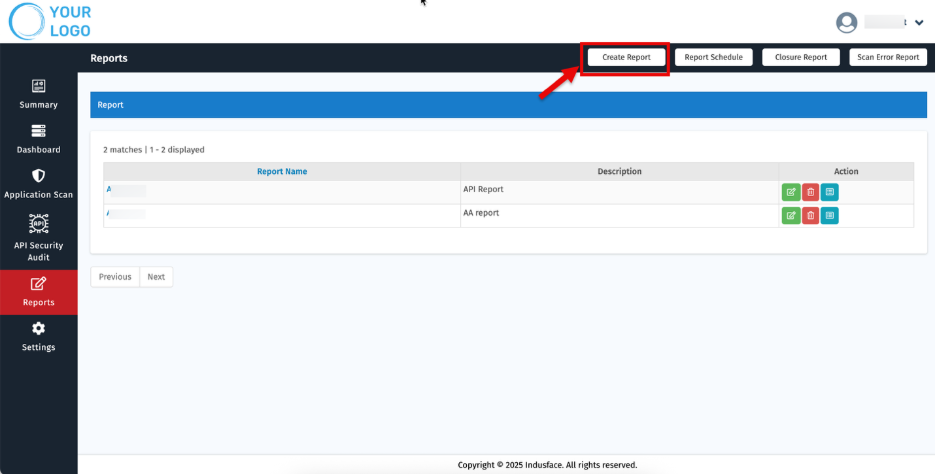
Creating a Report
- Click the Create Report tab
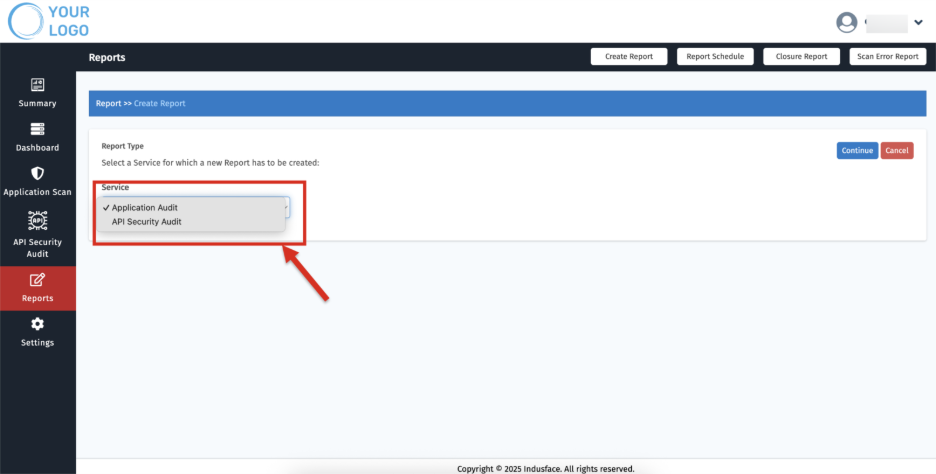
- Select Service Type
- From the Service dropdown, select the desired service type (Application Audit/ API Security Audit).
- Click Continue.
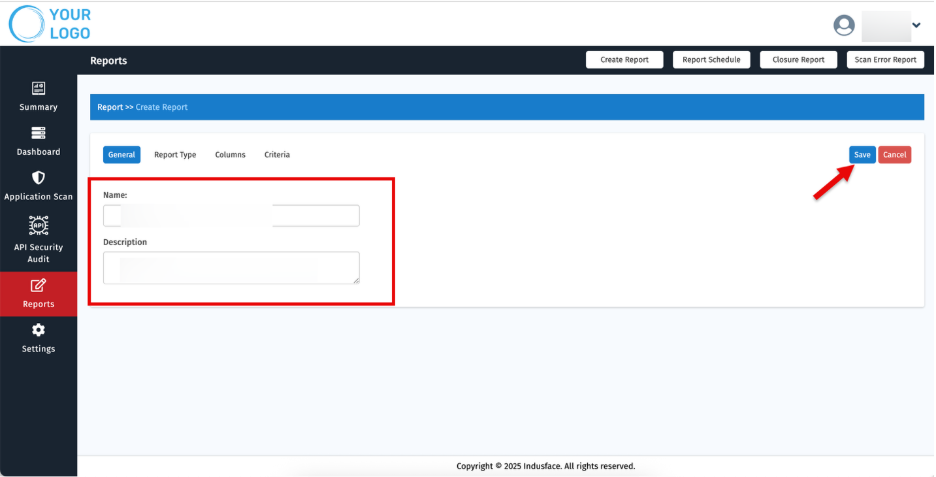
- Provide the Report Name and Description.
- Click Save.
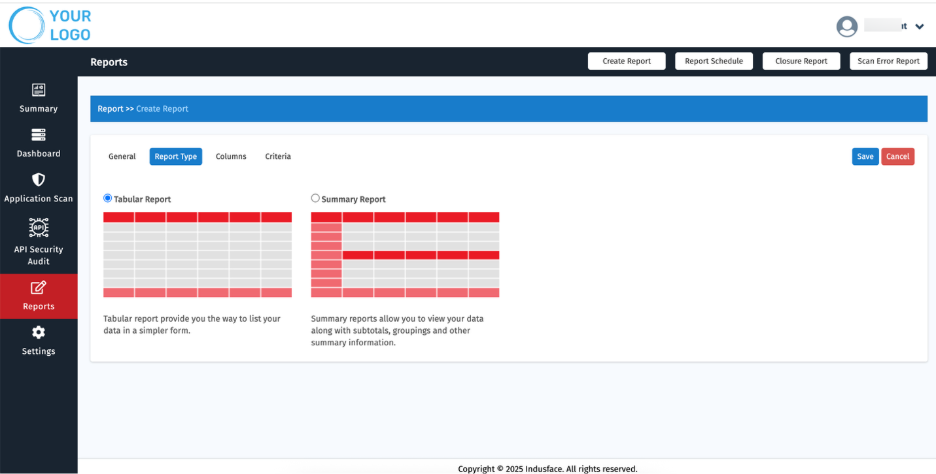
Option | Description |
| Tabular Report | Displays detailed results in a table format, including all selected fields. |
| Summary Report | Displays a high-level overview of findings, focusing on aggregated data and key insights. |
3. Click Save.
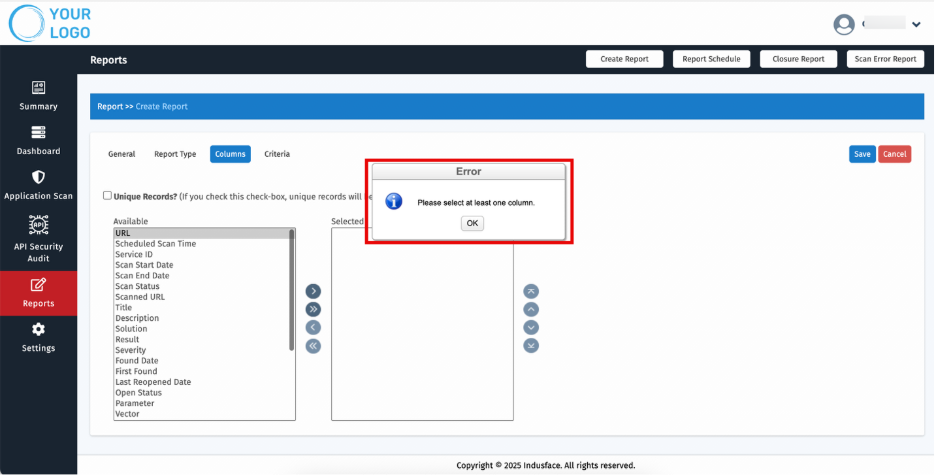
3. Select Columns
As no columns are selected at the begining, an error message appears: “Please select at least one column.”
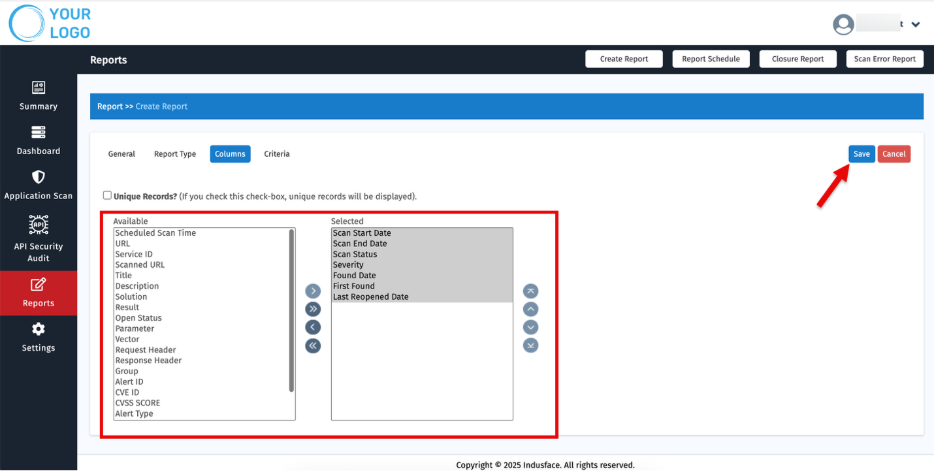
Column Selection Controls
When selecting report columns, the following arrow controls are available to help organize options:
Control | Description |
| Add Selected | Moves the highlighted option(s) from the Available list to the Selected list. |
| Add All | Moves all options from the Available list to the Selected list. |
| Remove Selected | Removes the highlighted option(s) from the Selected list and returns them to Available. |
| Remove All | Removes all options from the Selected list and returns them to Available. |
| Move on Top (Selected Option) | Moves the chosen option(s) in the Selected list to the very top position. |
| Move Up (Selected Option) | Moves the highlighted option(s) up by one position in the Selected list. |
| Move Down (Selected Option) | Moves the highlighted option(s) down by one position in the Selected list. |
| Move on Bottom (Selected Option) | Moves the chosen option(s) in the Selected list to the very bottom position. |
- Select the required options and Click Save.
As no criteria are set at the begining, an error message appears: “Please select criteria.”

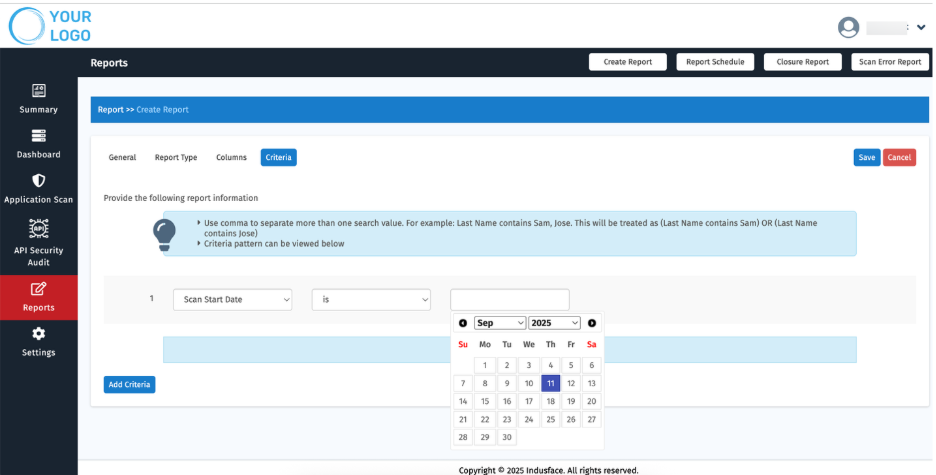
- In the Select Criteria section, choose fields from the dropdown.
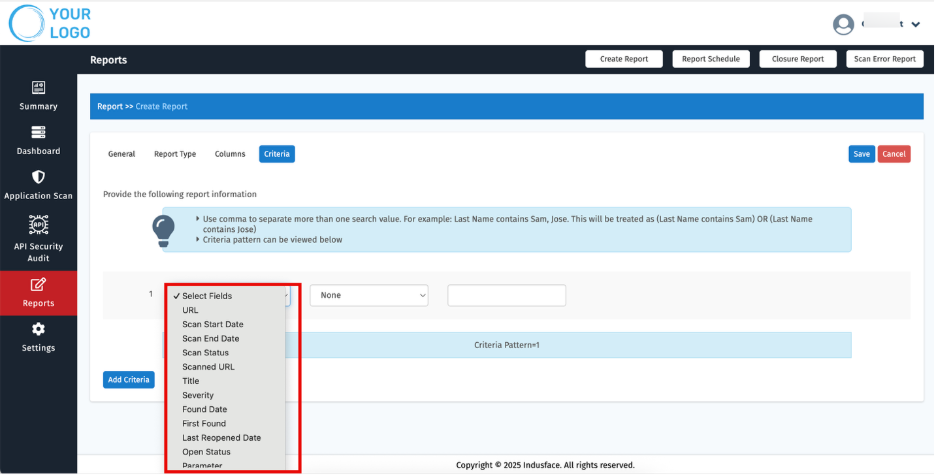
- Configure the criteria as needed.
- Click Add Criteria to include a new condition.
- Configure the criteria as needed.
- If a condition is no longer required, use the Delete option to remove it.

- Click Save to apply.
- A success message appears: “Report Created Successfully.”
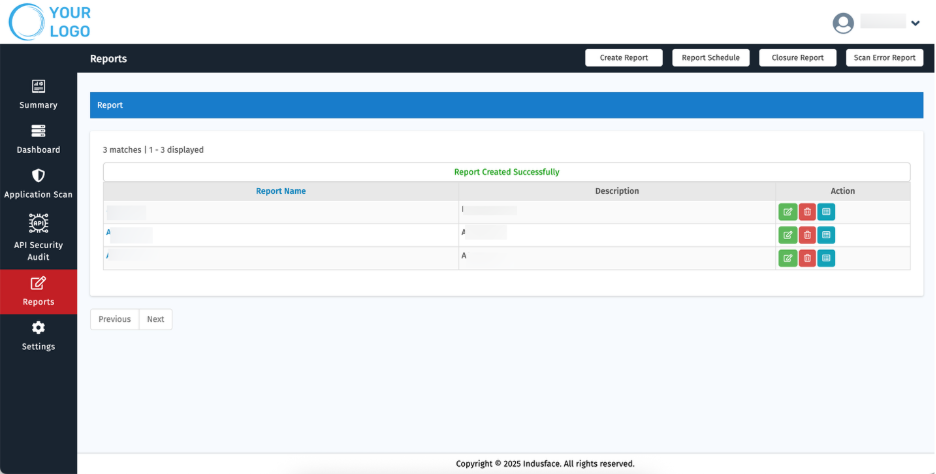
- The new report is now displayed under the Reports tab with the existing reports.
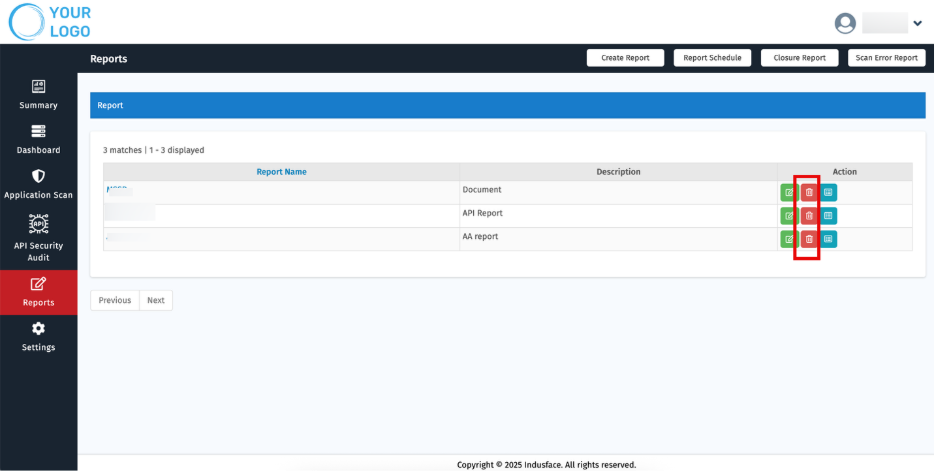
Edit a Report
- Modify the details or configuration of an existing report.

Delete a Report
- Permanently remove a report from the list.
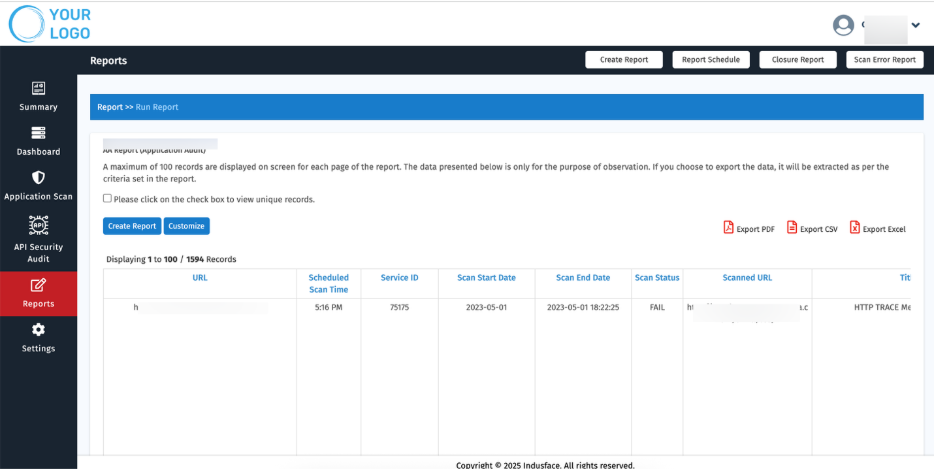
Run a Report
- The Run Report feature allows users to execute, view, and export reports based on the predefined criteria.
- Displays the report data according to the criteria defined during report creation.
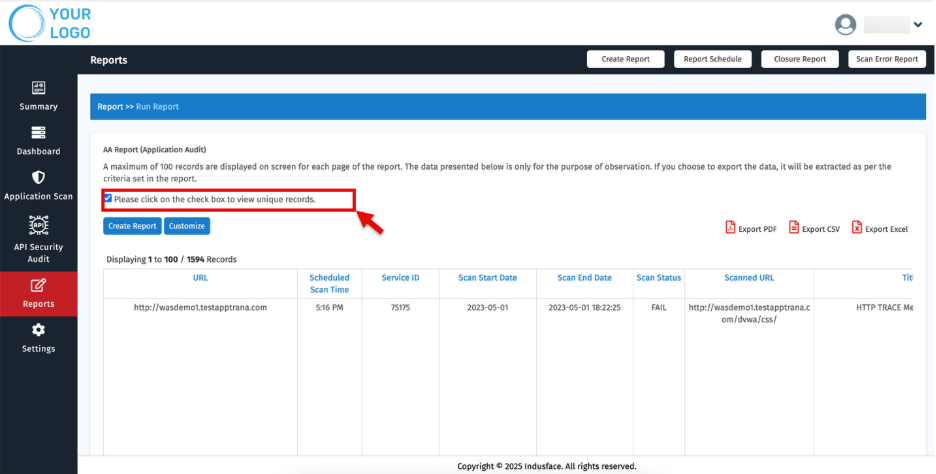
- Select Unique Record option to display only unique entries within the report.
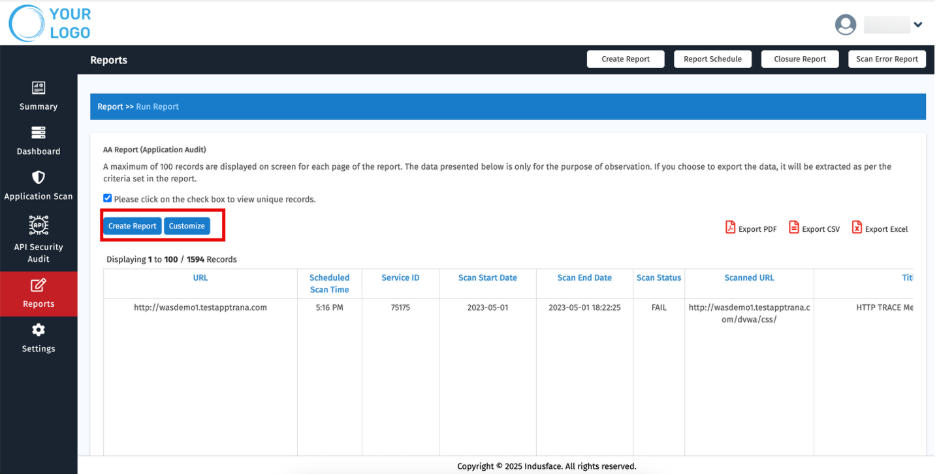
- Use Customize to adjust criteria, columns, or layout of an existing report.
- Use Create Report to generate a completely new report.
- Export the report in CSV or Excel or PDF format.
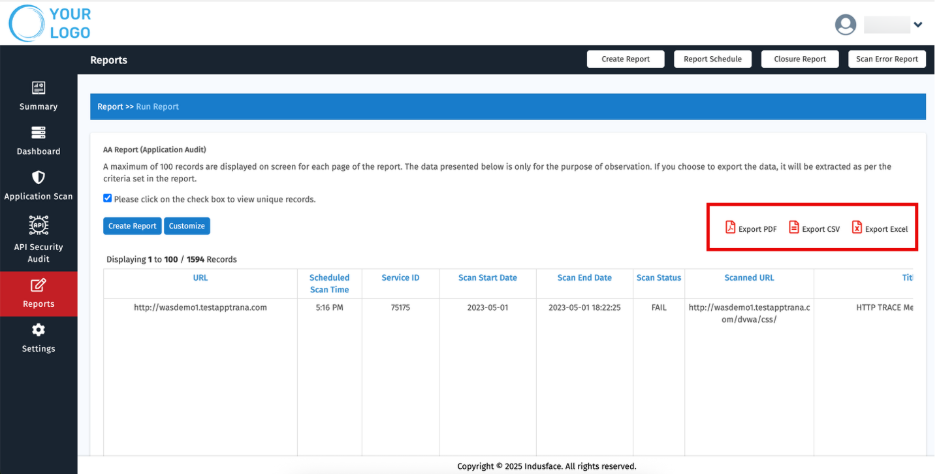
PDF export is available only when the report contains fewer than 2000 records.
2. Report Schedule
The Schedule Reports feature allows you to automate report generation and distribution.
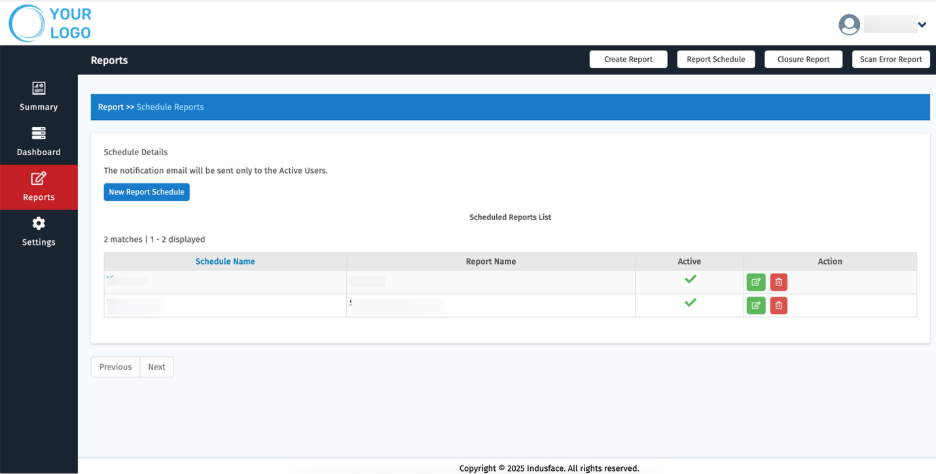
1. Viewing Scheduled Reports
- Navigate to the Reports page and click the Report Schedule tab.
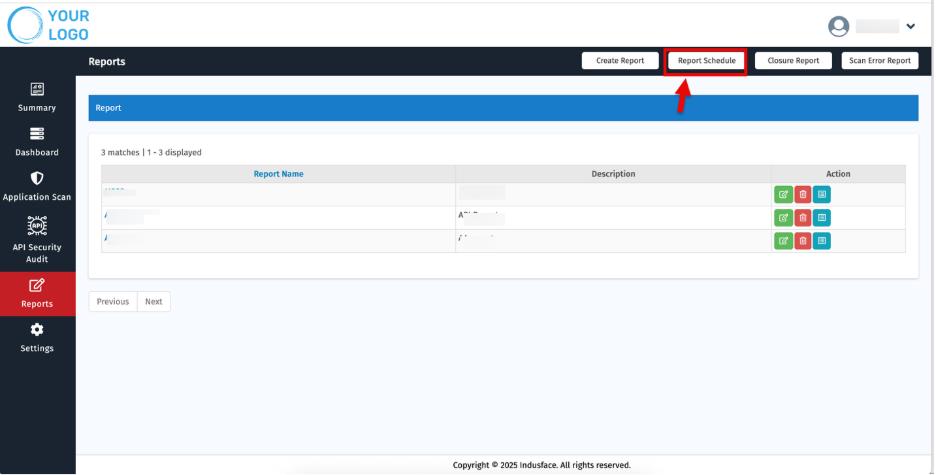
- The Report Schedule page appears.
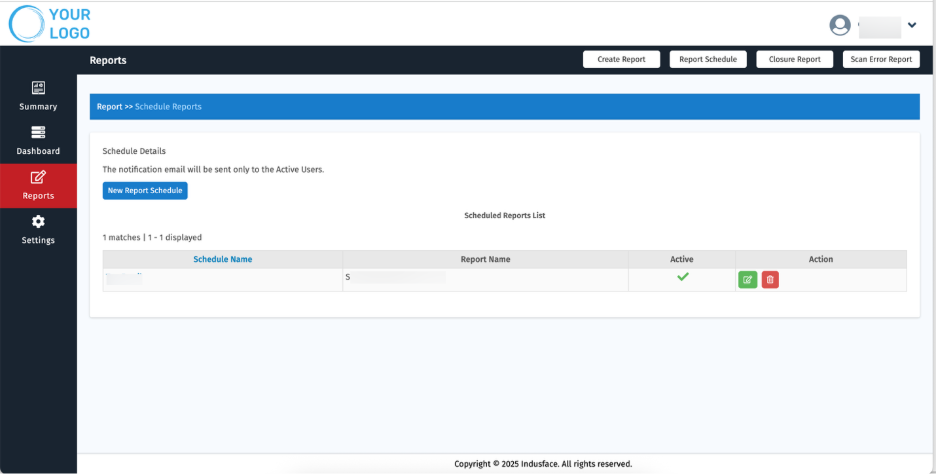
- The list of scheduled reports is displayed with the following columns:
Column | Description |
| Schedule Name | The name of the created schedule. Click to view schedule configuration details. |
| Report Name | The name of the associated report for the schedule. |
| Active | Indicates whether the schedule is active or inactive. |
| Action | Provides available actions such as Edit or Delete for the selected schedule. |
- Click a Scheduled Name to view the Schedule Configuration Details, including Recipient Details.
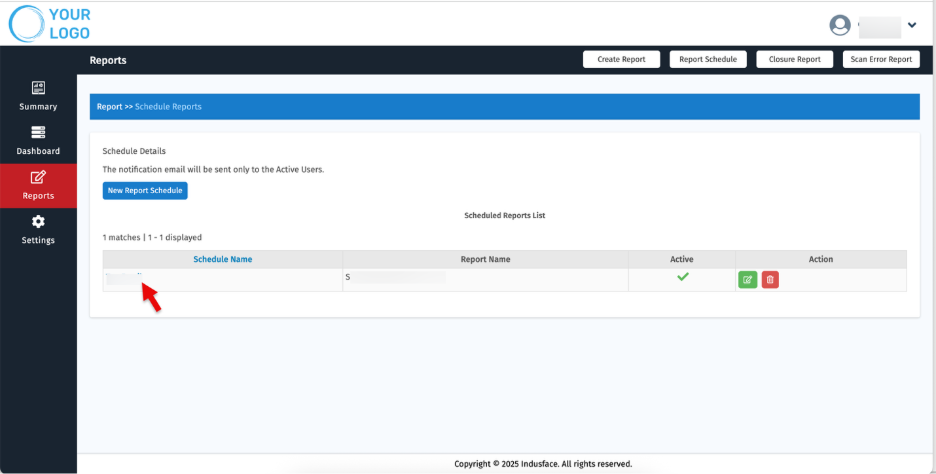
- The Schedule Details page appears.
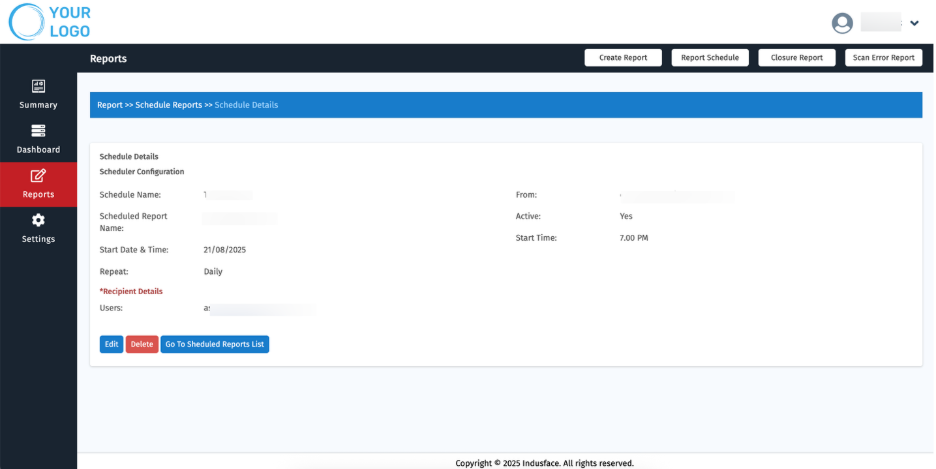
- Click the Go To Scheduled Reports List button to return to the Schedule Reports page.
2. Creating a New Report Schedule
- Click the New Report Schedule button.

- The Create Report Schedule page appears.
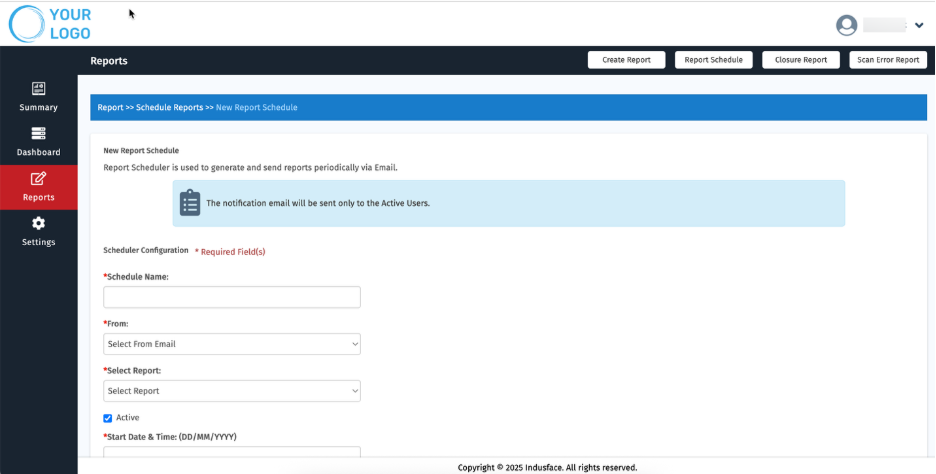
Parameter | Description |
| Schedule Name | Displays the name of the created schedule. Click to update the name. |
| From | Shows the email address of the recipient who generated this schedule. Use the dropdown to update the sender/recipient status. |
| Select Report | Displays the selected report type for the schedule. Use the dropdown to change the report type. |
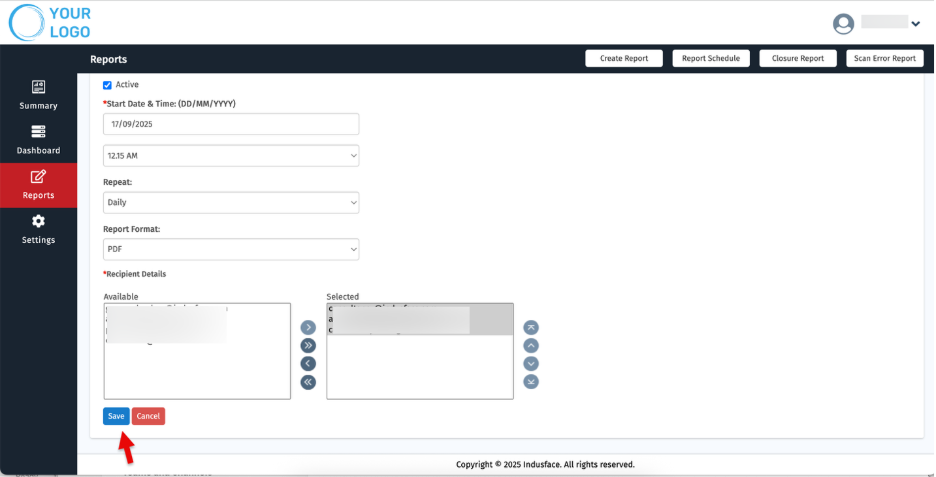
| Active | Indicates whether the schedule is currently active. |
| Start Date | Displays the date when the schedule began. |
| Start Time | Displays the time when the schedule began. |
| Repeat | Defines how often the scheduled report will run. Use the dropdown to modify the frequency. |
| Report Format | Displays the selected report format (e.g., PDF, CSV). Use the dropdown to update the format. |
| Recipient Details | Shows Available and Selected recipients. Use the arrow controls to move recipients between lists. Click Save to confirm changes. |
- Enter the required details in the form.
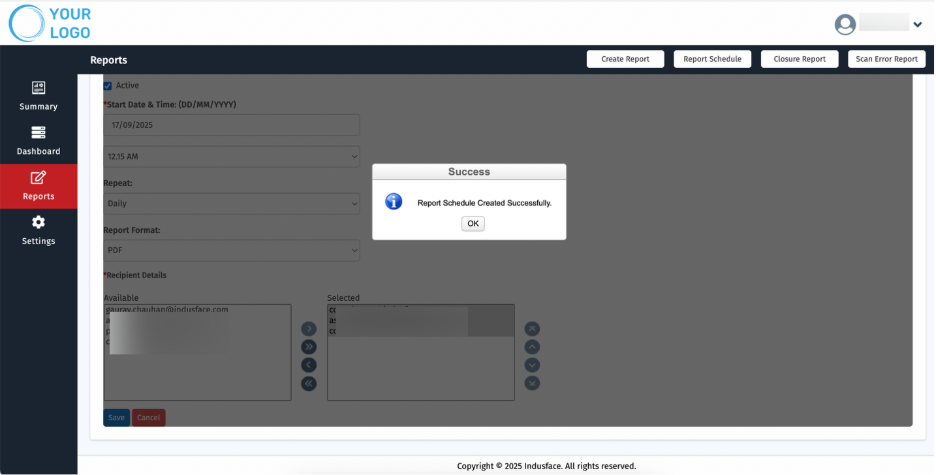
- Click Save to create the new schedule.
- A success message appears: “Report Schedule Created Successfully.”
- The new scheduled report is now displayed under the Schedule Reports tab with the existing schedule.
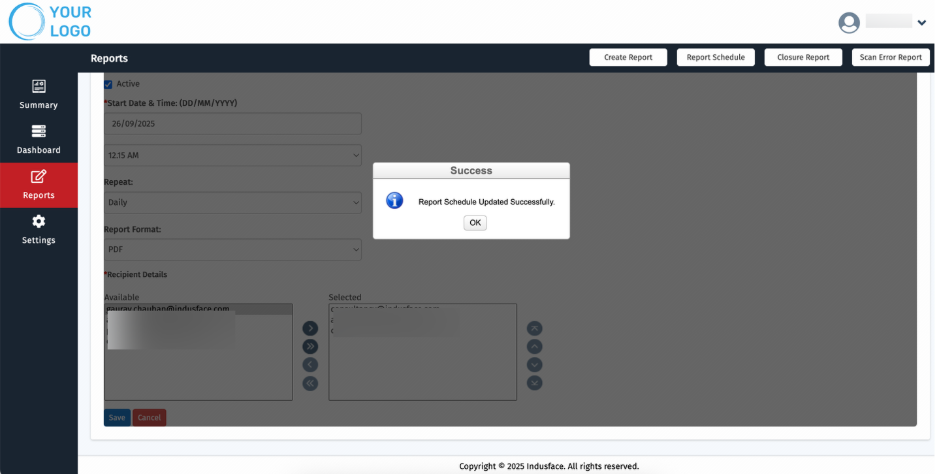
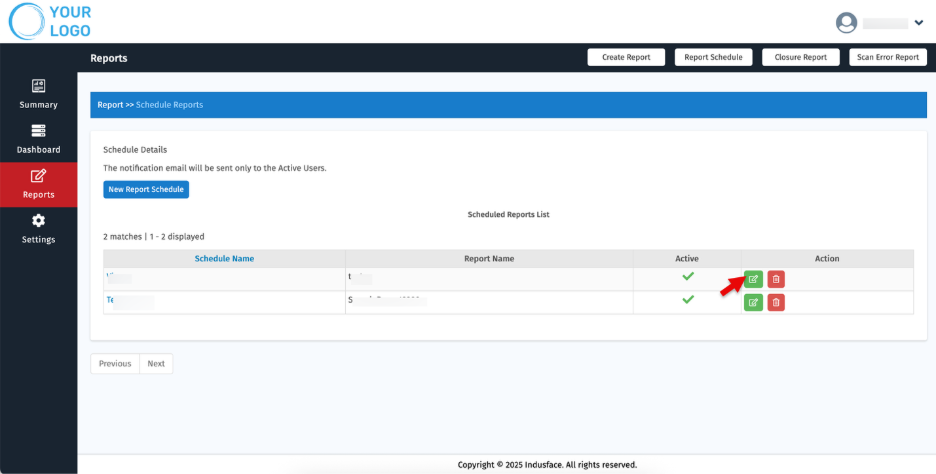
3. Editing a Scheduled Report
- Click the Edit icon in the Action column. The Edit Report Schedule page appears.
- Update the required fields.
- Click Save to apply changes.
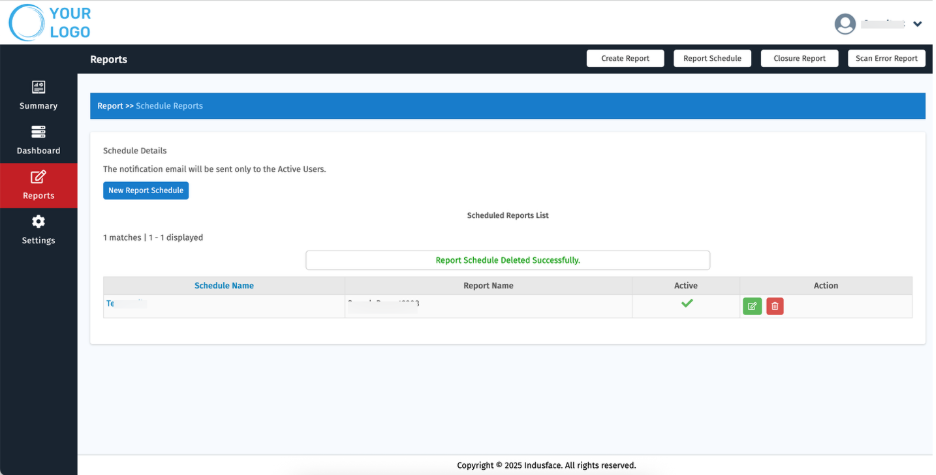
4. Deleting a Scheduled Report
- Click the Delete icon in the Action column.
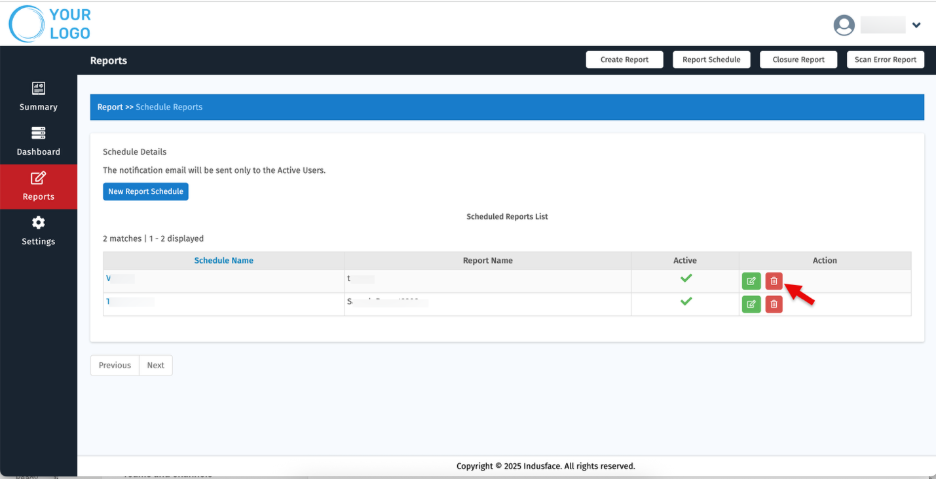
- A confirmation pop-up message appears.
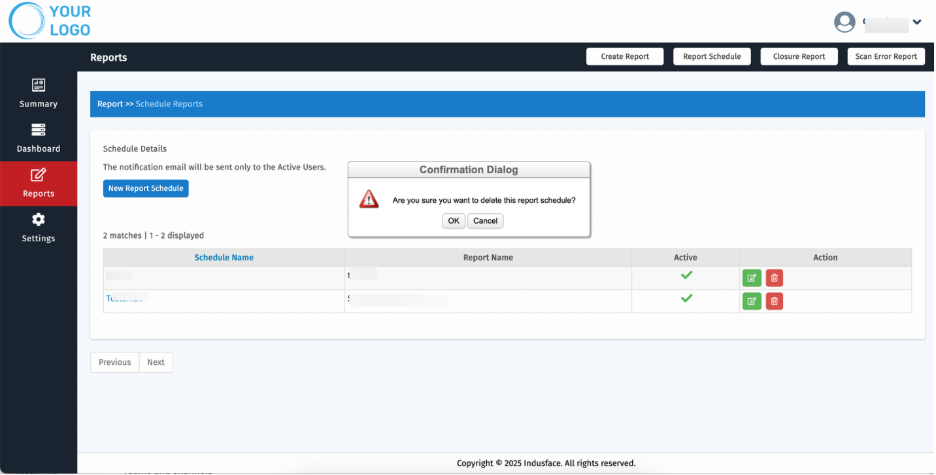
- Click OK to confirm deletion.
3.Closure Report
Closure Reports provide a clear record of vulnerabilities that have been fixed.
The report helps in compliance validation, tracking remediation efforts, and ensuring ongoing security hygiene.
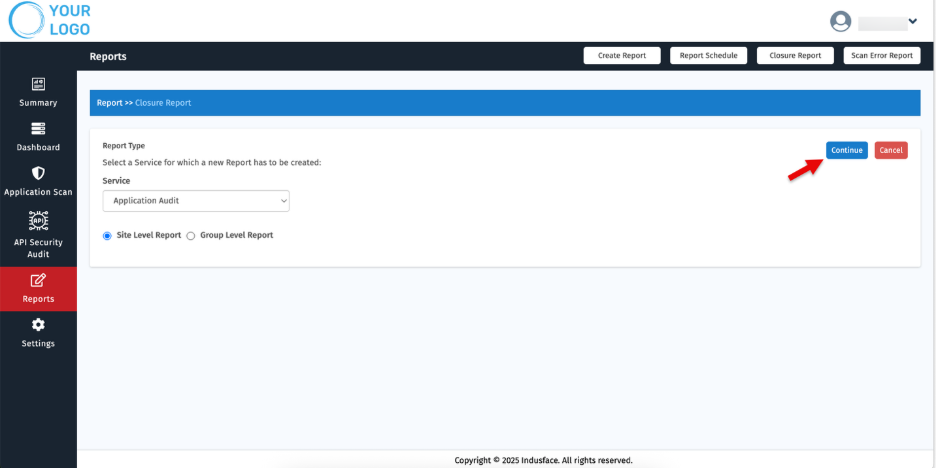
1. Click Closure Report tab on the top

2. Click Service drop down, select a service and click Continue button. Download Closure Report page appears.
3. From the Service dropdown, select the desired service:
- Application Audit
- API Security Audit
4. Choose the report level:
- Site-Level Report – Generates a closure report for a specific website.
- Group-Level Report – Generates a closure report covering a group of sites.
5. Click Continue to proceed.
 Download closure report
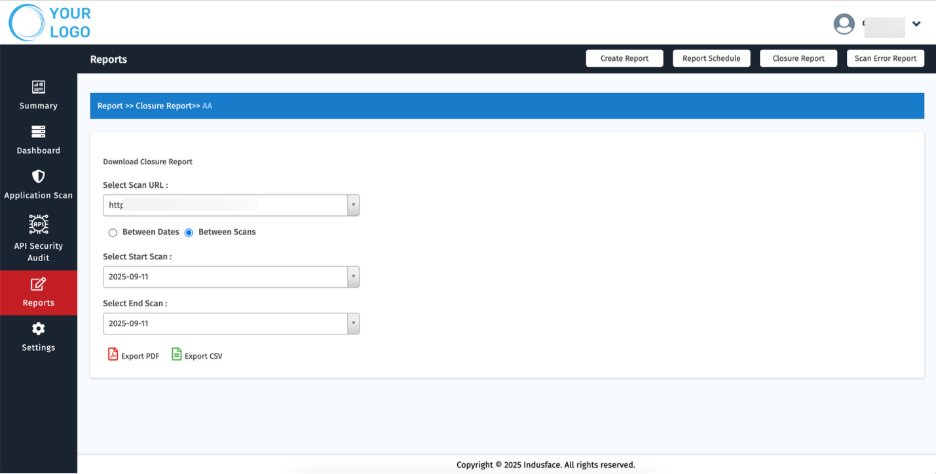
When generating a Closure Report, you can refine the data using the following parameters:
Parameter | Description |
| Select Scan URL | Displays a list of existing URLs. Select the required URL(s) from the list and click Download to generate the report. |
| Between Scan | Allows you to generate a Closure Report between two specific scans. |
| Between Date | Allows you to generate a Closure Report for a selected date range. |
| Select Start Date | By default, the present day is displayed. You can select a different start date from the calendar to define the beginning of the report period. |
| Select End Date | By default, the end of the current month is displayed. You can select a different end date from the calendar to define the end of the report period. |
Choose the desired export format:
- PDF – Generates the report in PDF format.
- CSV – Exports the report data in CSV format for further analysis.
The report will be downloaded to your system in the selected format.
4. Scan Error Report
The Scan Error Report provides details of errors encountered during scans. This helps users identify and resolve issues that may prevent accurate vulnerability detection.