Automate Issue Reporting: JIRA & WAS Integration
Introduction
The Indusface WAS integration with JIRA streamlines the vulnerability reporting process following a scan completion. Previously, vulnerability details were reported manually, which was time-consuming and prone to errors. With the new integration feature, all vulnerability details are automatically displayed on the JIRA dashboard.
This ensures that the relevant teams receive timely notifications about vulnerabilities, allowing them to prioritize and address issues efficiently.
Customers can create an issue for vulnerabilities in 2 different ways.
- Automatically create JIRA issues
- Manually export issues to JIRA
Automatically Create JIRA Issues
- Navigate to Settings > Integration > JIRA.
- Click Add Integration.
- Provide the requested input details.
- Click Save.
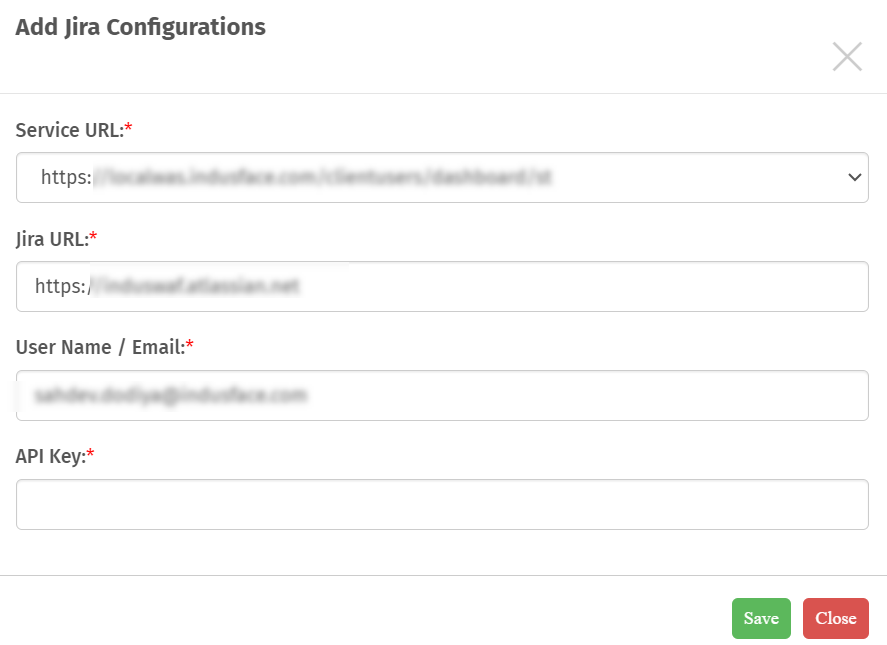
Once the inputs are entered correctly, the Jira integration completes successfully.
Requested Inputs for configuration
- Service URL: A web application URL that requires scanning. Select the URL using drop-down menu.
- Jira URL: A JIRA URL is the web address generated by associating your company or domain with JIRA.
- Example: https://yourcompany.atlassian.net
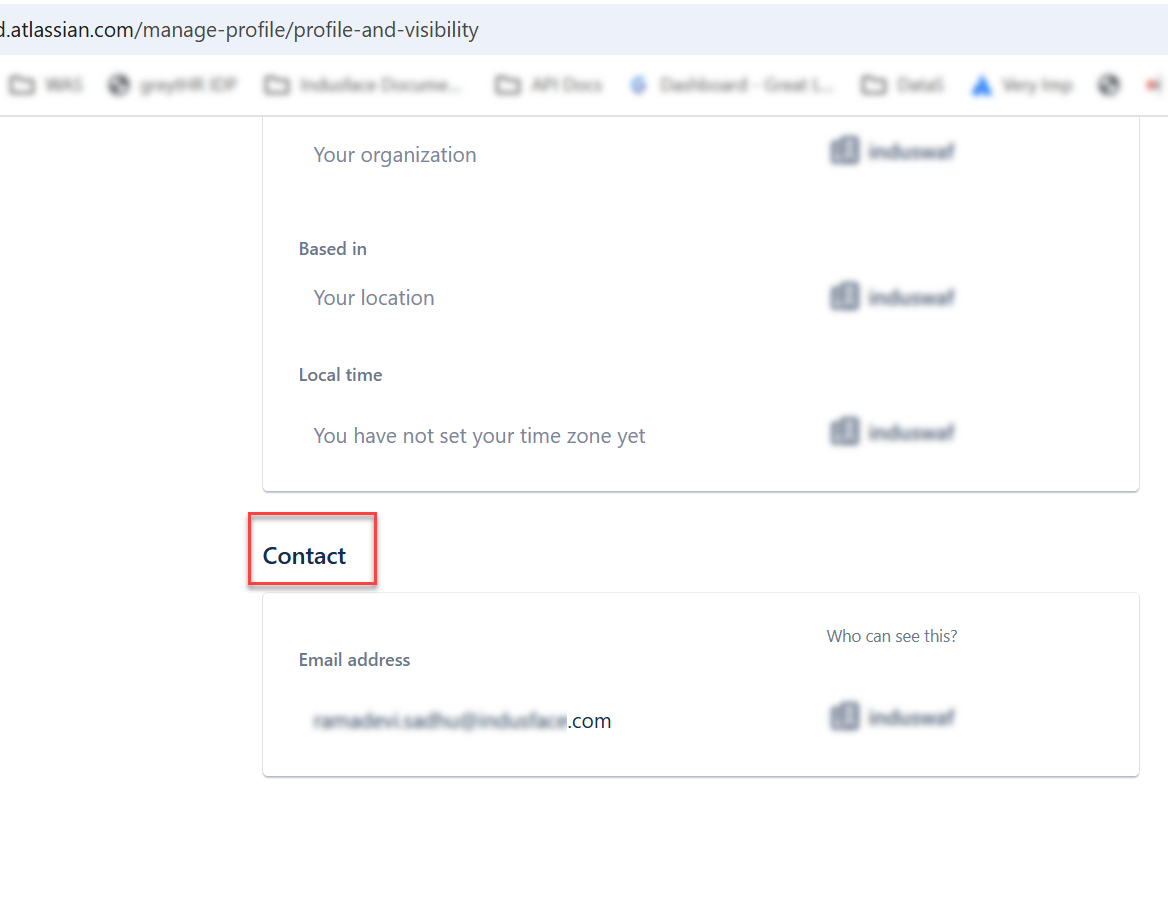
- User Name/Email:
- Login to JIRA.
- In the top right pane, select Your profile and settings, then choose Manage account.
- The system navigates to your Atlassian account.
- On the Profile and visibility page, the user identifies the email address under the Contact section.
- Adding email addresses helps you receive notifications and updates.
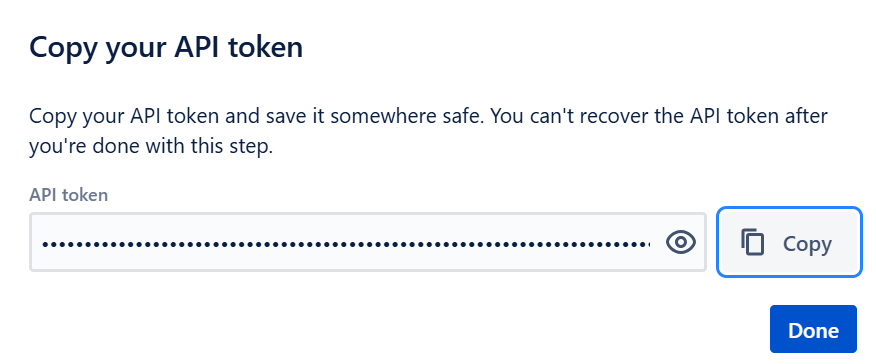
API Key:
- Go to Atlassian Account > Security > API Tokens.
- Click Create and manage API tokens.
- Click Create API Token.
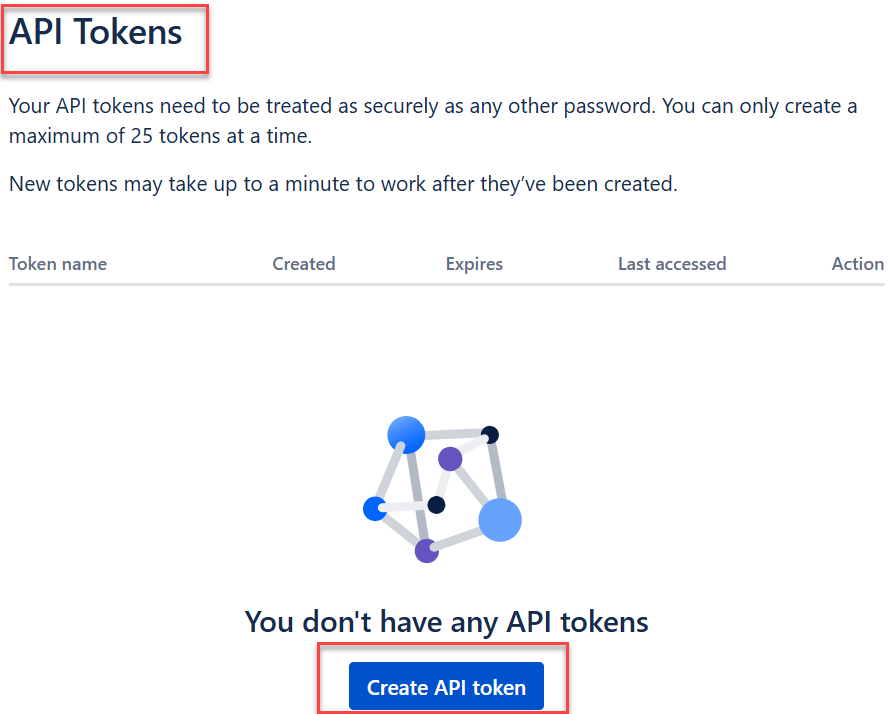
- Enter the token name of your choice and set expiry date for token, read the terms and conditions, and followed by privacy note.
- Click Create.
- A pop–up opens with API token, copy the token and enter in the API Key field.
Project mapping
- Once the Integration is completed successfully, you must map the service URL with JIRA Project.
- Select the URL and click the settings icon.
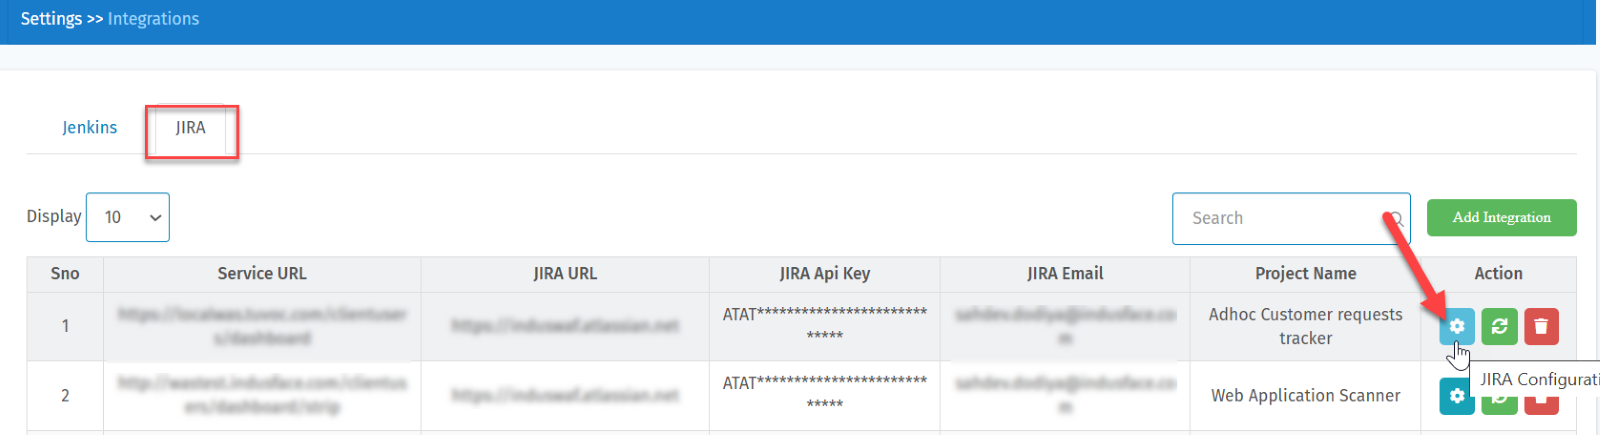
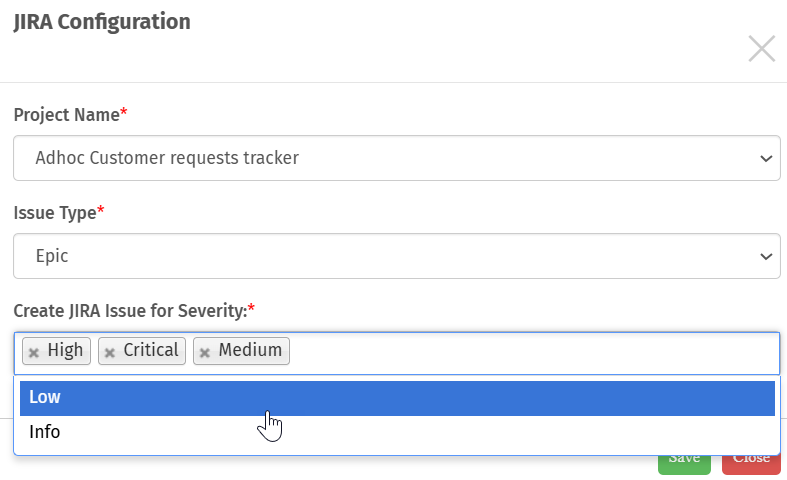
- Result: A pop-up window opens for JIRA Configuration.
- Select the project name and issue type.
- By default, the system creates issues for Critical, High, and Medium vulnerabilities.
- If you want to create an issue for low and info vulnerabilities, select them accordingly.
- Click Save.
Resync JIRA
- Resync allows customers to get the updated project details.
- When a customer clicks on the resync button, the system performs a check on JIRA dashboard and updates the project details.

Manually Export Issue to JIRA
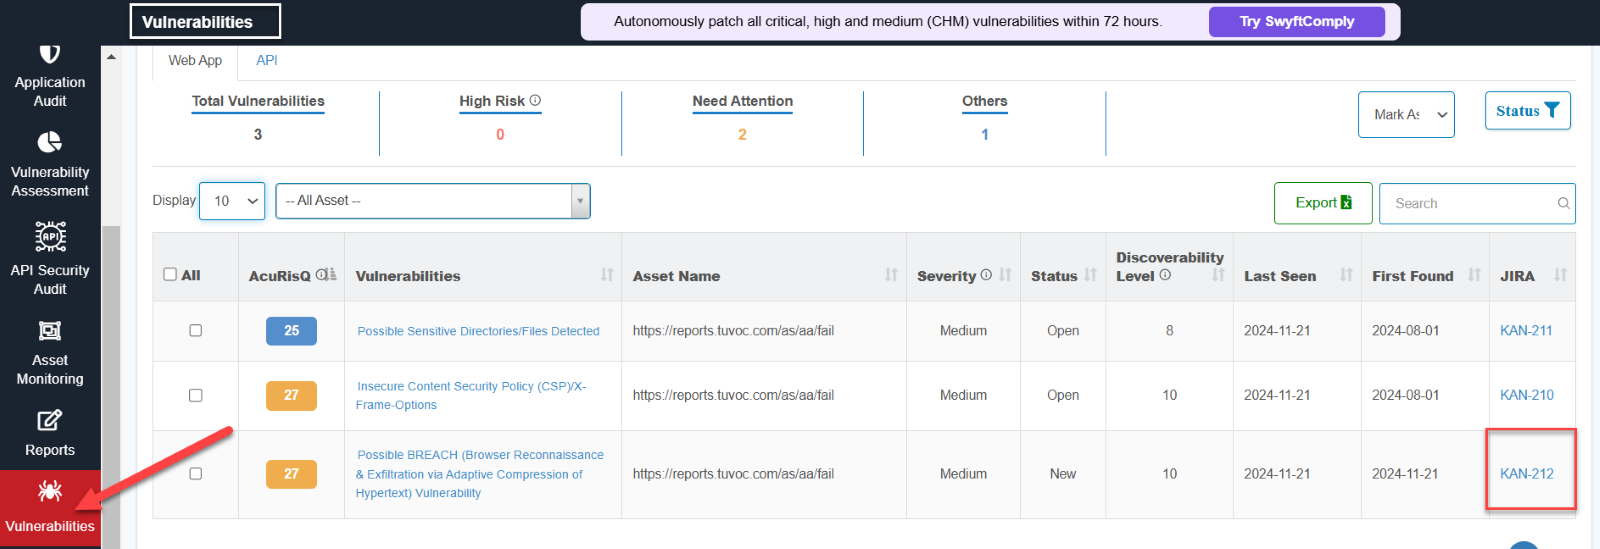
- Navigate to Vulnerabilities > Web App.
- Select a vulnerability for which you want to create an issue.
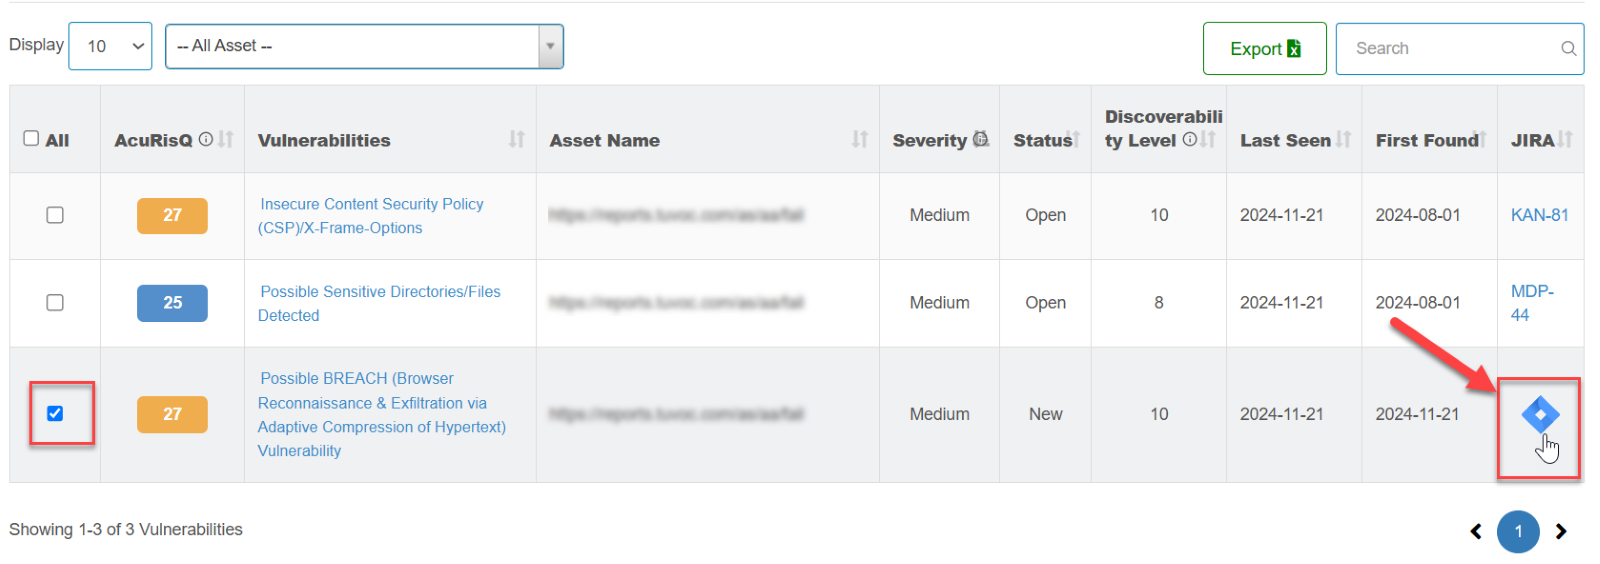
- Result: A pop-up window opens.
- Select the project name and issue type.
- Click Create.
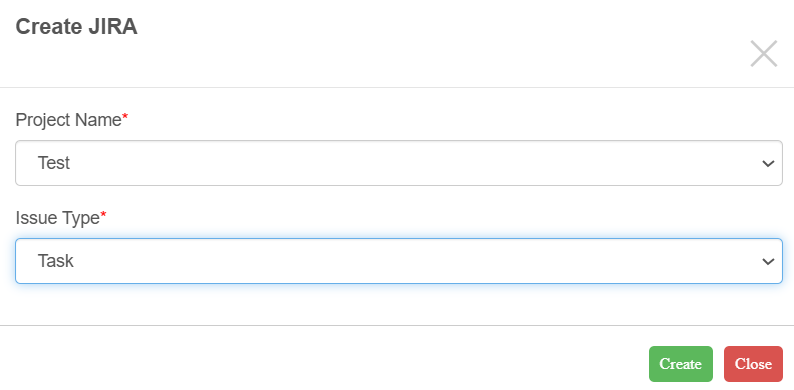
- Ticket created successfully.