
Core and Custom Rules
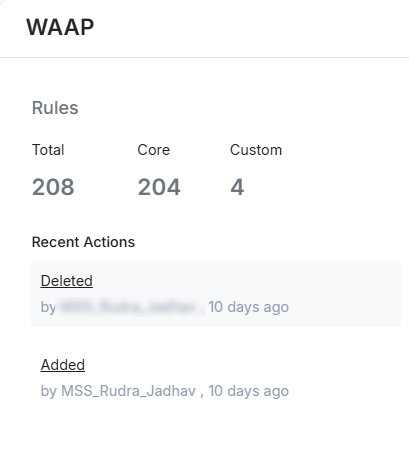
Rules
In WAAP, the Rules section is displayed. We have categorized rules into two types.
- Core Rules – These are predefined.
- Custom Rules- These are created by customers.
This section shows the total rules, and the count of core and custom rules available on the website. Customers can view recent user actions along with the number of days since each action occurred.
List of Core and Custom Rules
This section helps you to understand and configure or create custom rules on your own.
Go to WAAP > List of Rules and Policies > Core and Custom Rules.
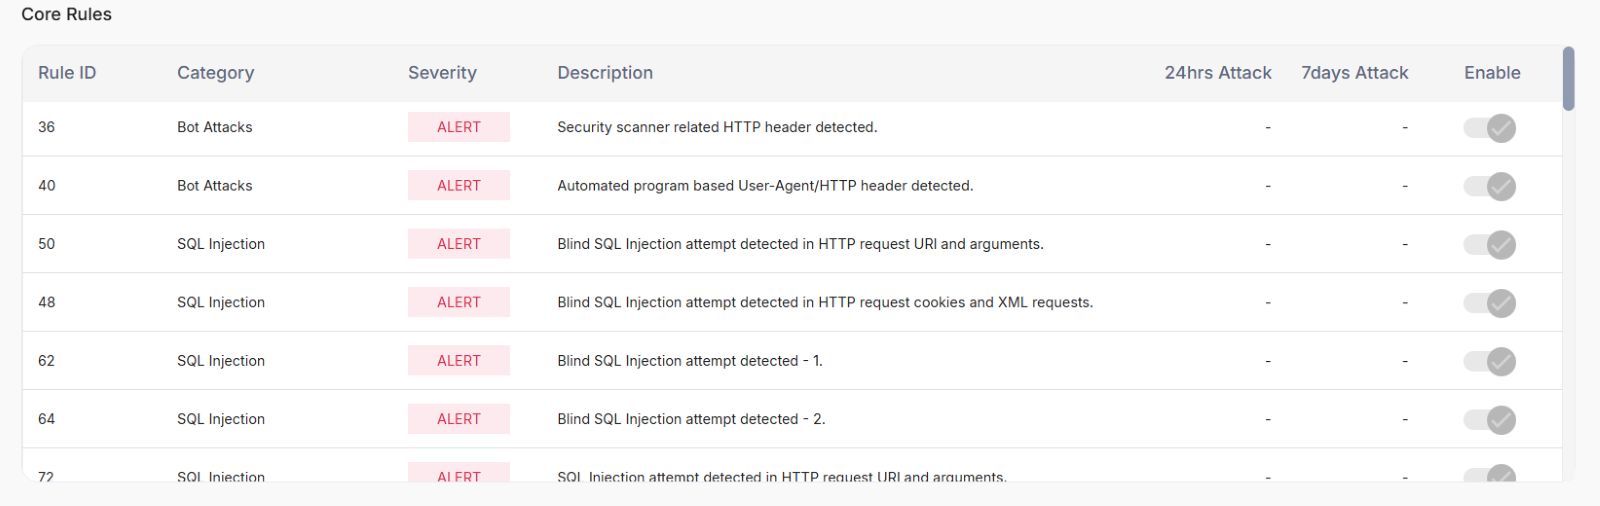
Core Rules
All the core rules are displayed in the table with information like rule ID, category, Rule description, severity, and so on.
By default, all the core rules are enabled.
Custom Rules
This section displays all the list of custom rules created by the users.
Premium customers can create a maximum of 10 custom rules, advance and advance plus customers can create a maximum of 2 custom rules.
| Parameter | Description |
| Rule ID | An ID is assigned to each rule created and this field displays the ID of the rule. |
| Category | This field displays the rule name. |
| Severity | The severity is based on the impact of attacks. |
| Description | The information of the rule which was given by the rule creator is displayed here. |
| 24hrs and 7days attack | The count of attacks received in last 24 hr and last 7 days after the rule is triggered. |
| Enable | A toggle switch is given here to enable or disable the rule. |
| Configure | Click Configure to edit the rule. |
Create a Custom Rule
- Navigate to the Custom Rules section.
- Click Add Custom Rule. Creation involves 3 steps.
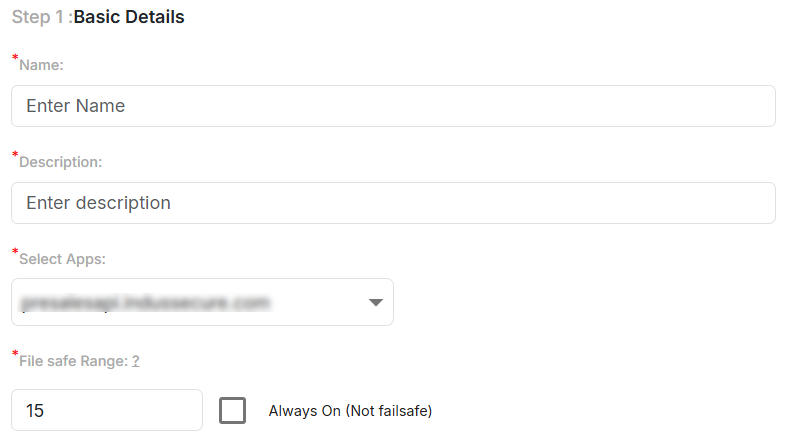
Step 1: Rule Basic Details
- This field consists of basic details of the rule.
- Enter the rule name and description in the respective fields.
- Enter a value in the fail-safe range field.
- Add the applications in Selected Apps field to apply the rule.
Fail Safe Range Use case
- The number entered in the Fail Safe Range field is calculated by percentage.
- Consider a user enters “10” in the field, selects the triggered condition as Geo Block/Allow Criteria > Block request from selected countries, the selected list of countries need to be blocked.
- As per the above condition, fail safe move the rule to log only mode if the percentage of requests blocked by the rule is greater than 10% of all requests received by WAF/ Origin Server.
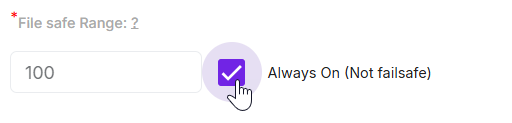
- A check box has also been given in the failsafe range field. The checkbox ensures that the rule is always ON, so it cannot go back to log only mode automatically.
- Once the checkbox is enabled, the user cannot enter the failsafe range value.
- By default, it shows 100 in fail safe range field.
Step 2: Rule Trigger Condition
The section is equipped with three different criteria.
Geo
IP
Others
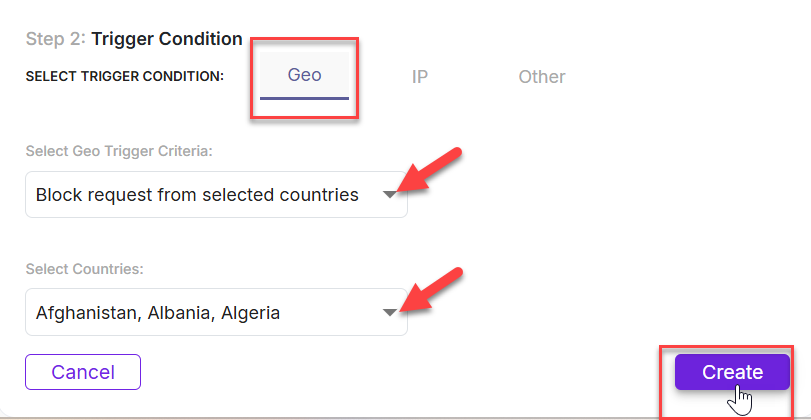
1. Geo Criteria
Users can allow or block requests based on selected countries using the following criteria:
C1: Block Requests from Selected Countries
This condition blocks requests originating from the specified countries.
C2: Allow Requests ONLY from Selected Countries
This condition allows requests only from the specified countries and blocks all other countries.
To implement your choice, select the appropriate condition and use the drop-down menu in the “Countries Selected” field to add the desired countries. Finally, click the Create button.
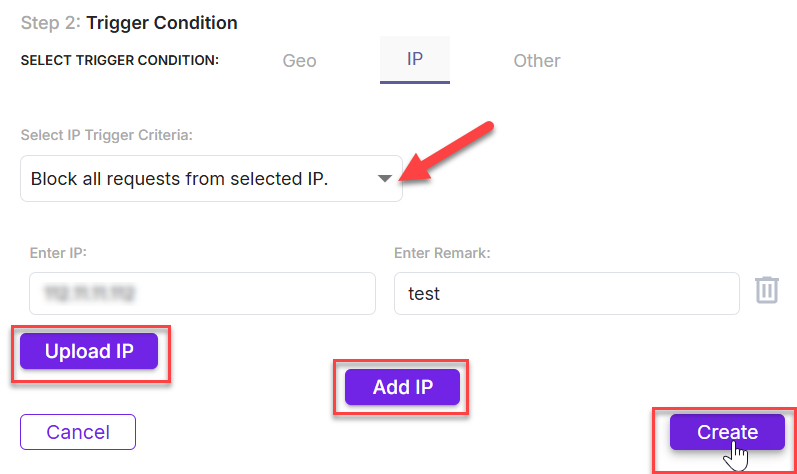
IP Criteria
Users can allow, block, or whitelist selected IP addresses based on the following criteria:
Allow Requests ONLY from Selected IP Addresses
This condition blocks all requests from other IP addresses.
Block All Requests from Selected IP Addresses
This condition prevents all requests from specified IP addresses.
Whitelist Selected IP Addresses
- This condition allows traffic from specified IP addresses while blocking others.
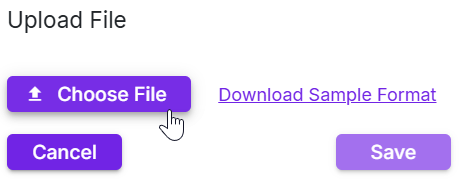
- To configure these settings, select the appropriate condition, enter the IP address, and add any remarks. Use the +Add IP button to add multiple IP addresses, or the Upload IP button to upload a list of IPs all at once.
- Once the IPs are successfully added, click Create.
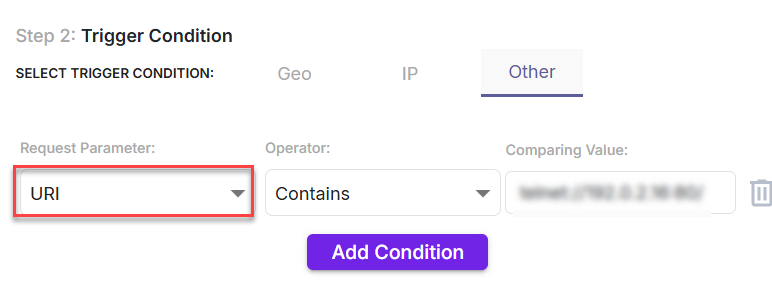
Other Criteria's
- Users can create rules based on multiple parameters, including URI, User Agent, HTTP Method, HTTP Referrer, Args, Bot Score, and IP.
- For each parameter, users can select a corresponding rule action.
For URIs
Multiple operators are available for URIs, including:
- Starts With
- Does Not Start With
- Ends With
- Does Not End With
- Contains
- Does Not Contain
- Equals
- Does Not Equal
To set a rule for URIs, select URI in the request parameter field, choose the appropriate operator, and enter the value in the comparing value field.
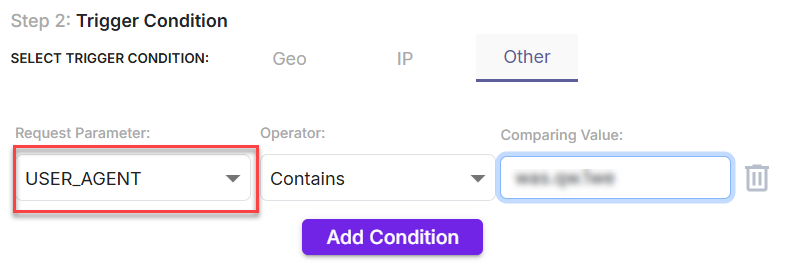
For User Agents
For User Agents, four operators are available:
- Starts With
- Does Not Equal
- Contains
- Does Not Contain
To set a rule for User Agents, select User Agent in the request parameter field, choose the desired operator, and enter the comparing value. Users can enter multiple values in the comparing value field using a comma-separated format.
Case Study
A user enters two values in the comparing value field: chrome/116.0.0.0 safari/537.36 and chrome/117.0.0.0 safari/537.36, with the operator set to Contains.
If either of the values matches any user agent, or if both values match multiple user agents, the rule trigger condition is activated.
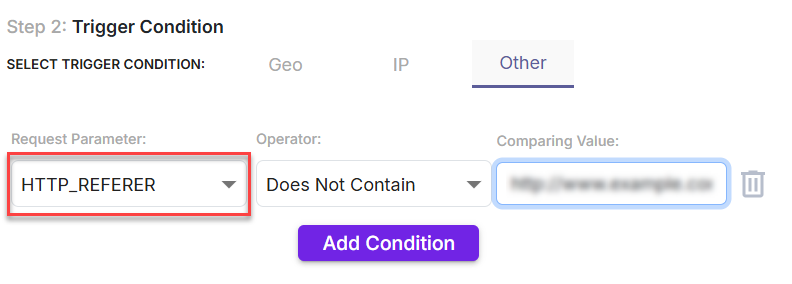
For HTTP Referrer
For HTTP Referrer, multiple operators are available:
- Starts With
- Does Not Start With
- Ends With
- Does Not End With
- Contains
- Does Not Contain
- Equals
- Does Not Equal
To set a rule for HTTP Referrer, select HTTP Referrer in the request parameter field, choose the appropriate operator, and enter the comparing value.
For HTTP Methods
For HTTP Methods, two operators are available:
- Equals
- Does Not Equal
To set a rule for HTTP Methods, select HTTP Methods in the request parameter field, choose the appropriate operator, and then select the HTTP method in the comparing value field.
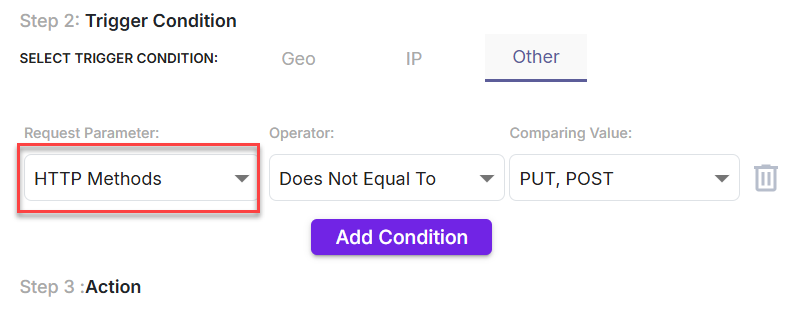
In this case, any HTTP request will be checked to see if the selected methods are used. If the specified methods are found, the rule action is triggered.
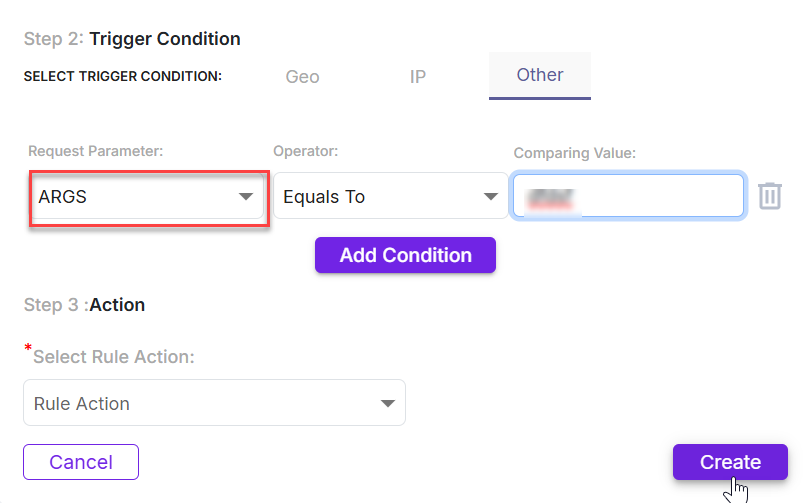
For ARGs
For ARGS, four operators are available:
- Starts With
- Ends With
- Contains
- Equals
To set a rule for ARGS, select ARGS in the request parameter field, choose the appropriate operator, and enter the value in the comparing value field.
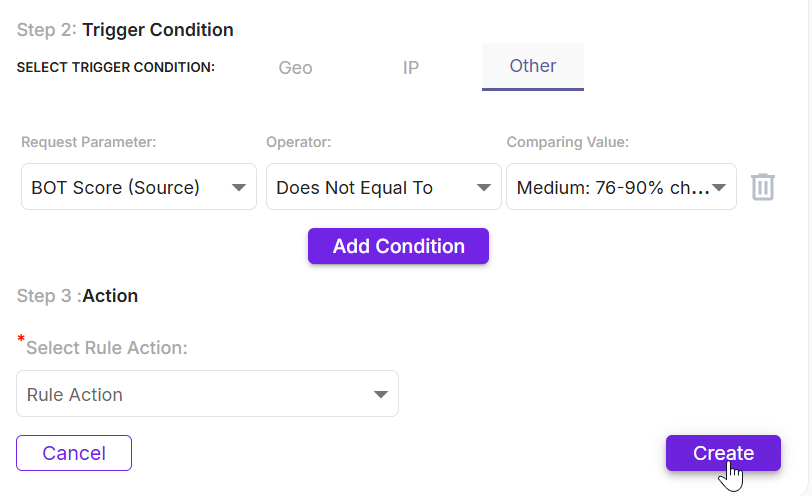
BOT Score
For BOT Score, two operators are available:
- Equals
- Does Not Equal
To set a rule for BOT Score, select BOT Score as the parameter, choose your desired operator, select the BOT score value, and then click Create.
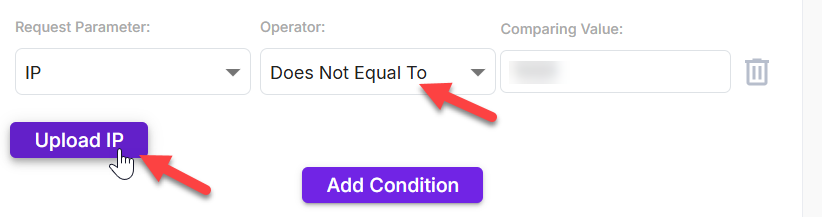
For IPs
For IPs, two operators are available:
- Equals
- Does Not Equal
Select the parameter and operator, then enter the value in the comparing value field.
Click Upload IP to add multiple IPs at once.
Click Add Condition to add multiple parameters.
If a user selects ARGS method, other parameters cannot be selected.
A maximum of 3 parameters can be added for one rule.
Step 3: Rule Action
This section is available only for the Custom rule Criterion.
Also, the rule action list is the same for all the parameters except ARGS method.
A rule can only have 1 action irrespective of the number of conditions added to match a request.
Actions for rules with conditions URI, USER AGENT, HTTP METHODS, HTTP REFERRER, BOT Score, and IP:
- Whitelist Request
- Skip Rule Category (Whitelist Rule)
- Skip Rule
- No action
- Block Request and Log
- Move to log only
- Captcha
- Drop
- Crypto challenge
- Increased BOT score
Rule Action for rules with ARGS condition: Skip Rule for Selected ARG.
Complete the three steps and click Create.