Jenkins Security Scan
Introduction
CI/CD Implementation Using Jenkins
The practice of identifying vulnerabilities early helps prevent potential issues from affecting applications. It allows developers to find and fix vulnerabilities more quickly, rather than discovering them later during DAST scanning after deployment.
How does Jenkins Integration Work?
The integration is carried out in four steps.
Install and configure the WAS Plugin in Jenkins
Begin by installing and configuring the WAS Plugin in Jenkins to enable seamless integration between your build environment and Indusface WAS.
Configure Scan Build Pass/Fail Criteria in Indusface WAS
Set up the scan build criteria to ensure that your build process accurately reflects the defined vulnerability thresholds.
Retrieve the Scan Summary, Results, and Download the Report
After the scan, access the summary status, review detailed results, and download the comprehensive scan report.
Manage Vulnerabilities in the JIRA Dashboard
Once the build completes successfully, configure and manage the identified vulnerabilities directly within your JIRA dashboard.
Integrating Jenkins with WAS
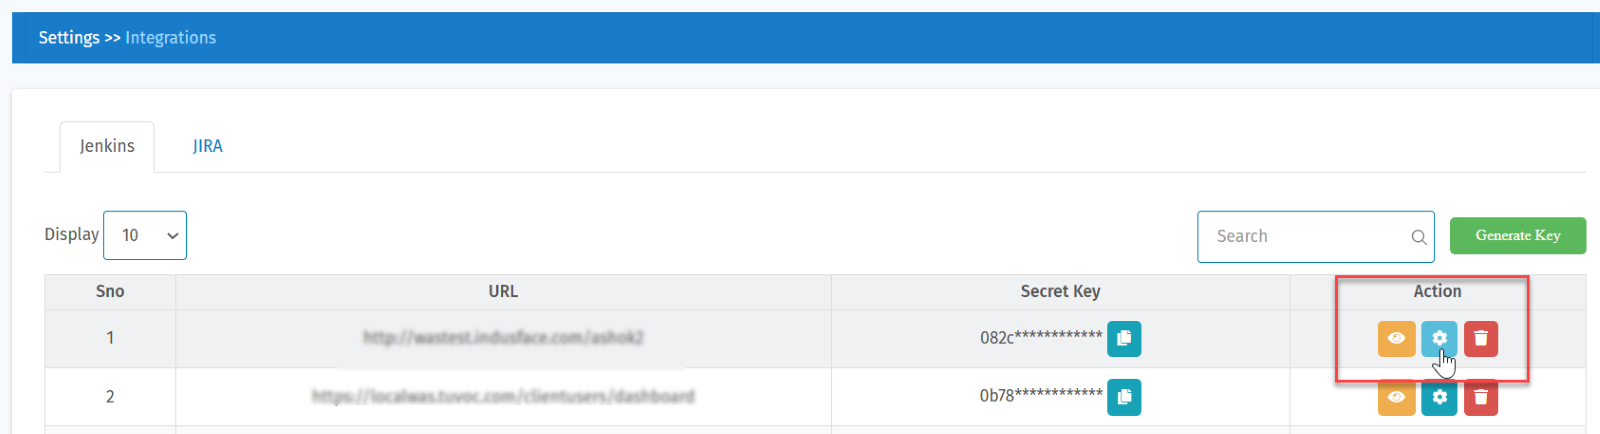
- Navigate to Indusface WAS Settings > Integration > Jenkins.
- This section lets you generate a security key to integrate the site with Jenkins.
- Click Generate Key.
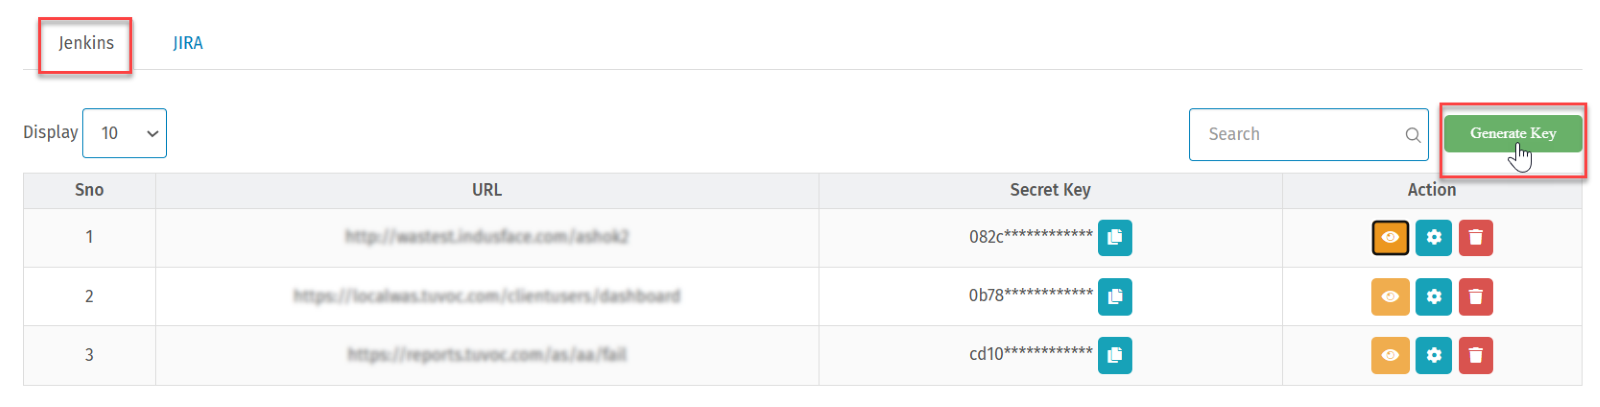
- Result: A pop-up window opens.
- Select the service URL and then click Generate.

- Result: The system generates a security key for the URL.
- The table displays the security keys of all the sites and allows you to configure the scan build criteria.
- Click the eye icon to view the secret key.
- Click the delete icon to remove the security key for a selected URL.

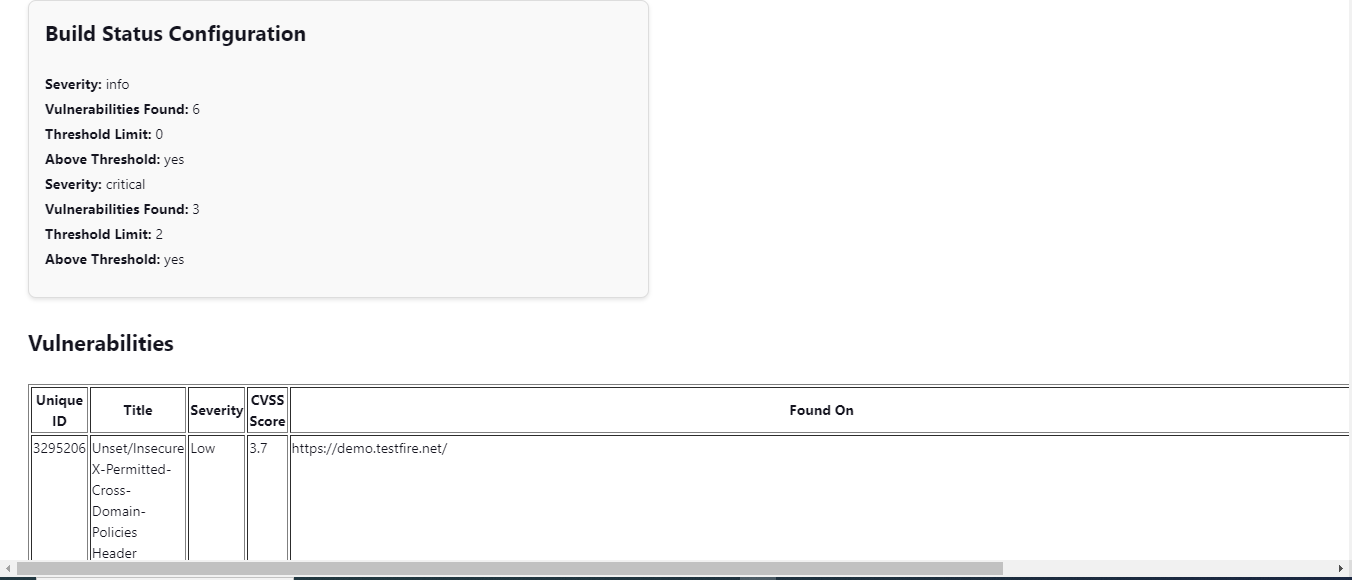
Configure Scan Build Pass/Fail Criteria
Users must set the pass/fail criteria for scan build. The Fail/Pass criteria are determined based on the threshold set by the customer for vulnerabilities found at different severity levels.
- Click the settings icon in the Action column.
- Result: A pop-up window opens.
- Click the toggle switch to set threshold value and configure scan build Pass/Fail criteria.
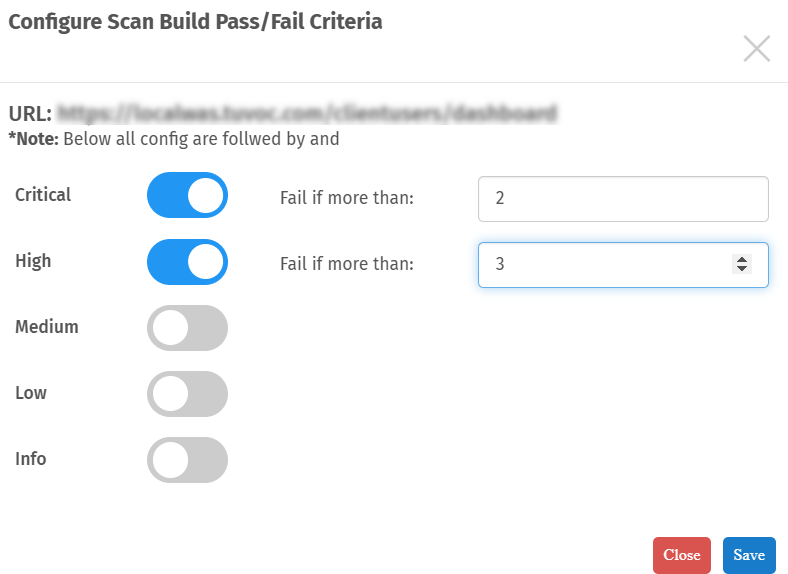
Example case
- A user sets the threshold at 2 critical and 3 high vulnerabilities.
- The build is considered Fail if it has 2 or more critical vulnerabilities and 3 or more high vulnerabilities.
- If either condition is not met, the build Fails.
| Critical Vulnerabilities | High Vulnerabilities | Result |
| 2 | 5 | Fail (Critical count is below 2) |
| 3 | 3 | Fail (High count is equal to threshold) |
| 2 | 3 | Fail (Both High and Critical equal to threshold) |
| 4 | 5 | Pass (Both critical and high met conditions) |
Install WAS Plugin in Jenkins
- Go to Jenkins Dashboard > Manage Jenkins.
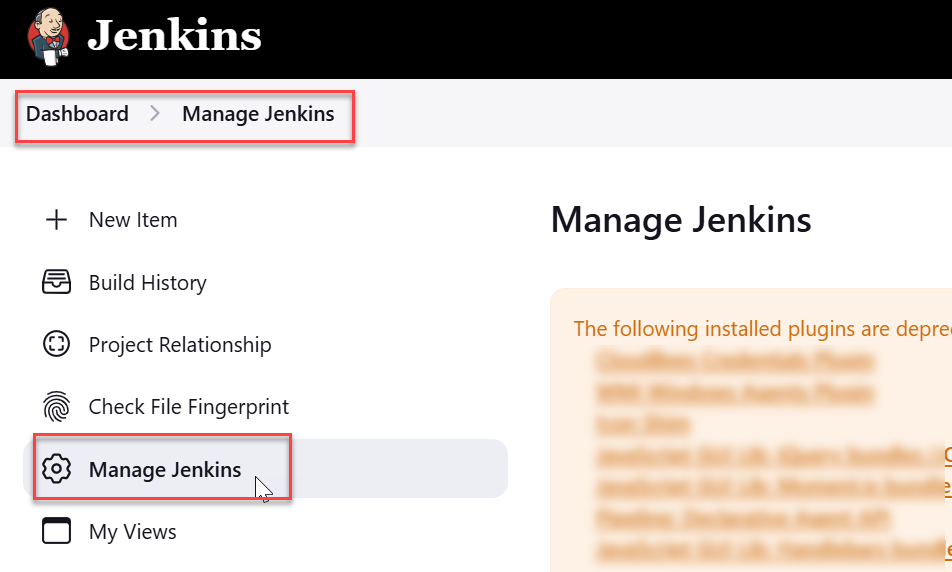
- Click Plugins from System Configuration section.
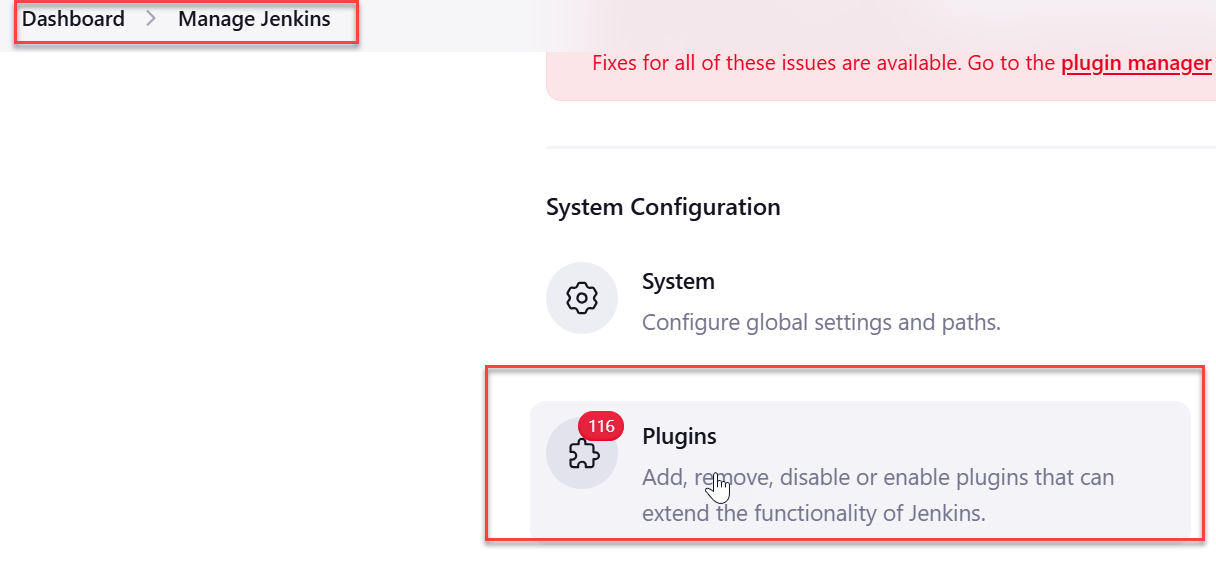
- Go to Available Plugins and in the search box, type Indusface-WAS-Plugin.
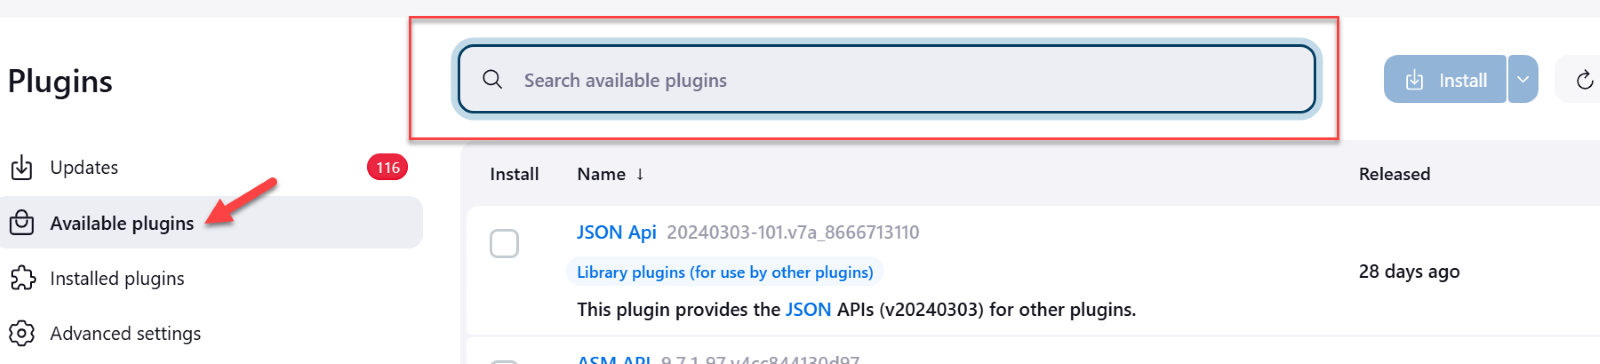
- Indusface-WAS-Plugin is reflected on the available items, click on the check box and then click Install.
- After successful installation, restart the Jenkins.
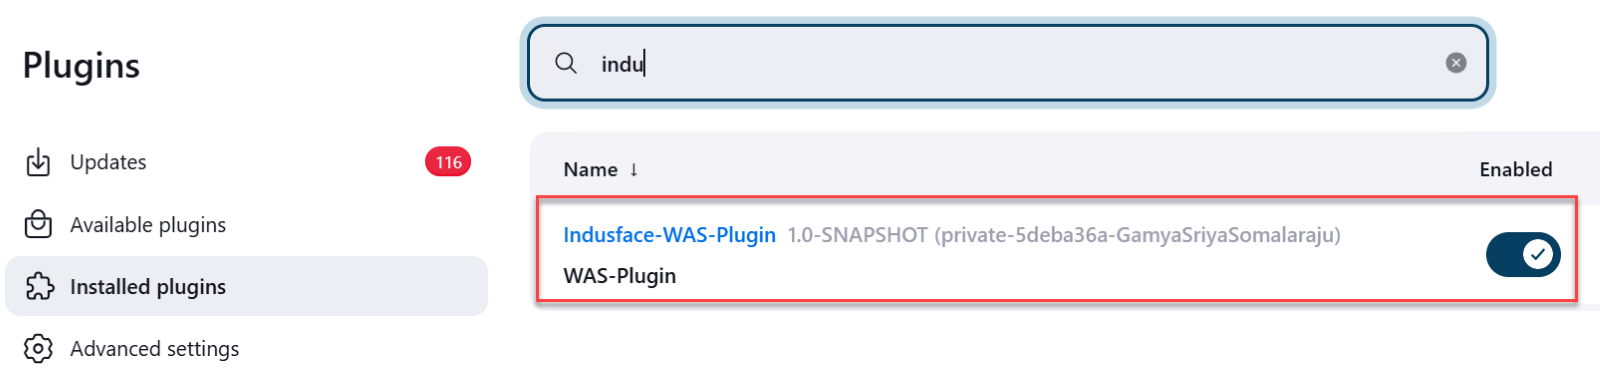
Enable Plugin
- Go to Installed Plugins.
- Search Indusface-WAS-Plugin.
- Click the toggle button to enable plugin.
Plugin Configuration
- Select the Job from Dashboard menu.
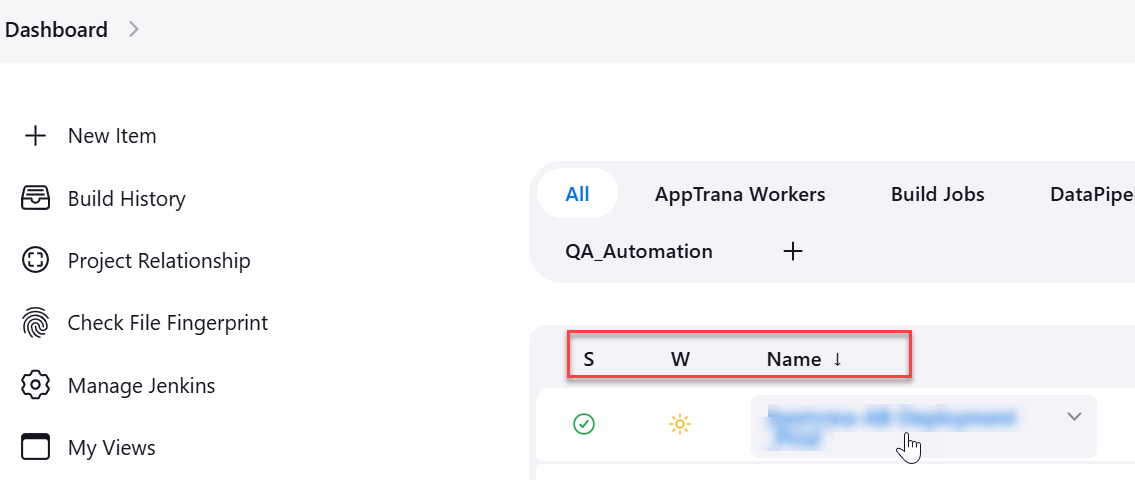
- Click Configure.
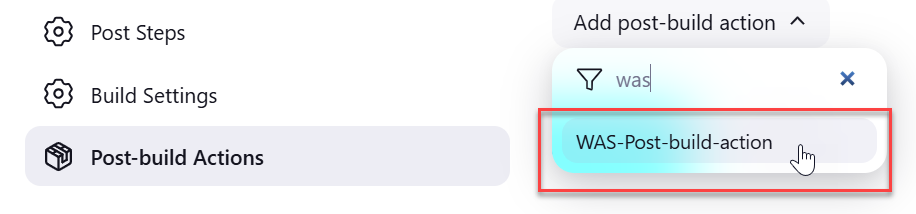
- In the Post-Build Actions section, click on Add-post build action.
- In the post build action prompt, Enter WAS-Post-build-action.
- Provide the build details, such as Build Name and Access Key.
- (Suggested build name: Website name).
- Copy the access key for your website from Secret Key field (Indusface WAS > Settings > Integration > Jenkins > Secret Key)
- Enter in WAS Post build action > Access Key.
- Click Save.

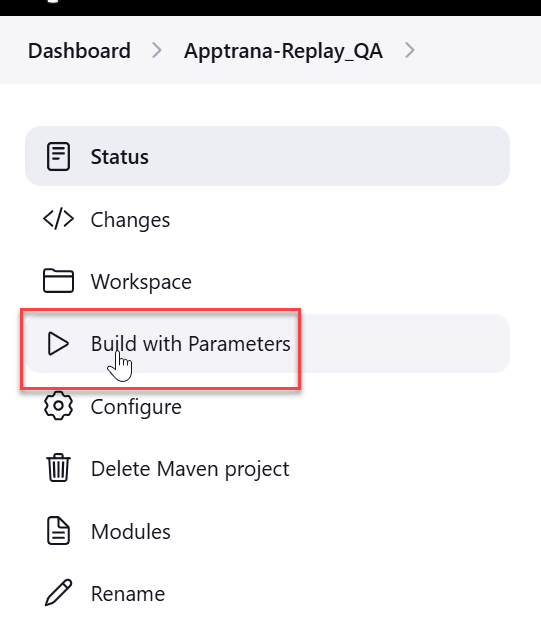
Initiate Scan
Once the post-build action is added, return to the build page and click Build with Parameters to run the job.
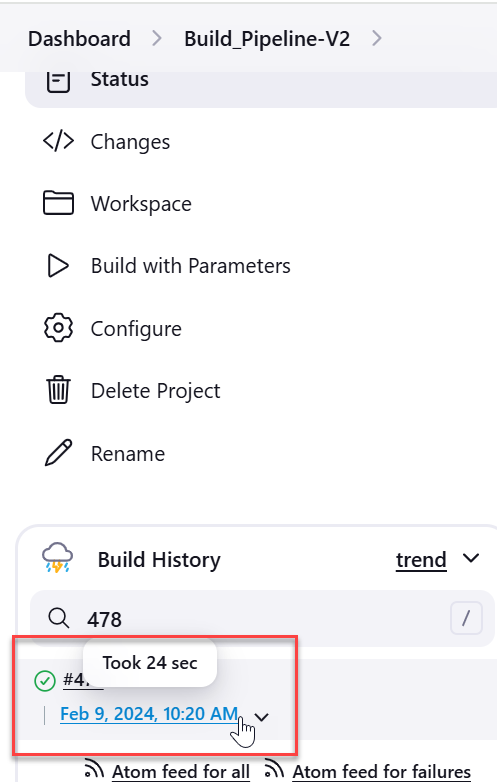
Check Build Scan Status
- Navigate to the build page and locate the status in the build history. The build history displays the status of each scan as follows:
- Success (Green): The scan was completed successfully, and the post-build action was executed.
- Fail (Red): The scan failed.
- Aborted (Yellow): The scan was interrupted.
- The build history displays the scans performed both earlier and recently, along with their build number, date, and time.
- Use the filter option to view a specific scan result by entering its build number in the search field.
- Scroll to the build date and time to see how long it took the scan to complete.
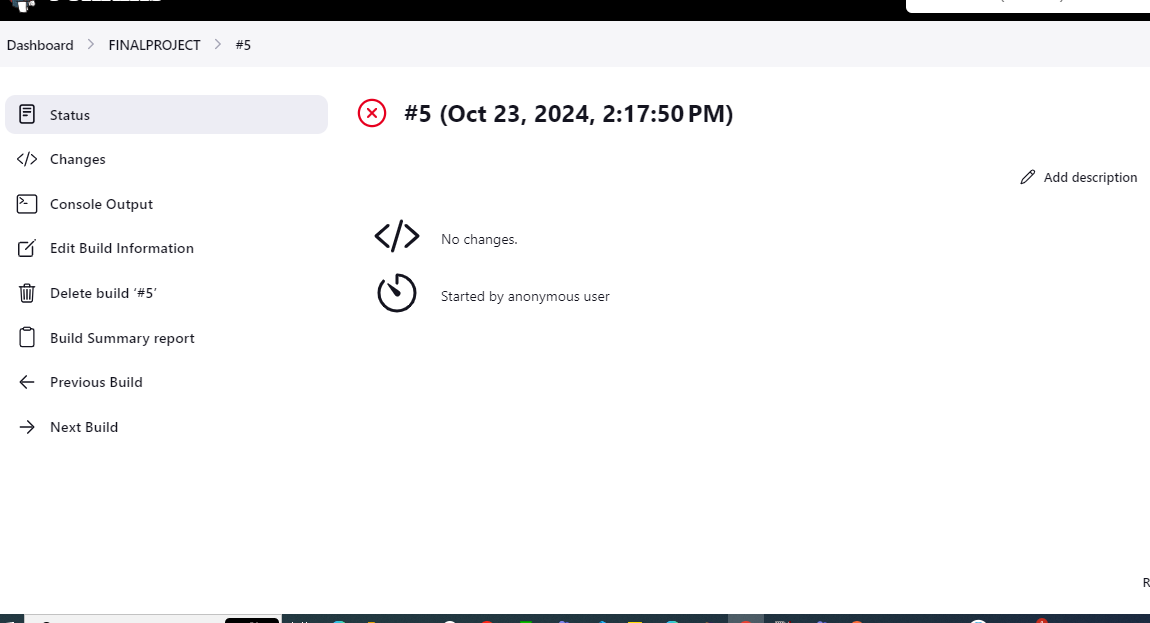
- Click on the build number and go to Scan Status.
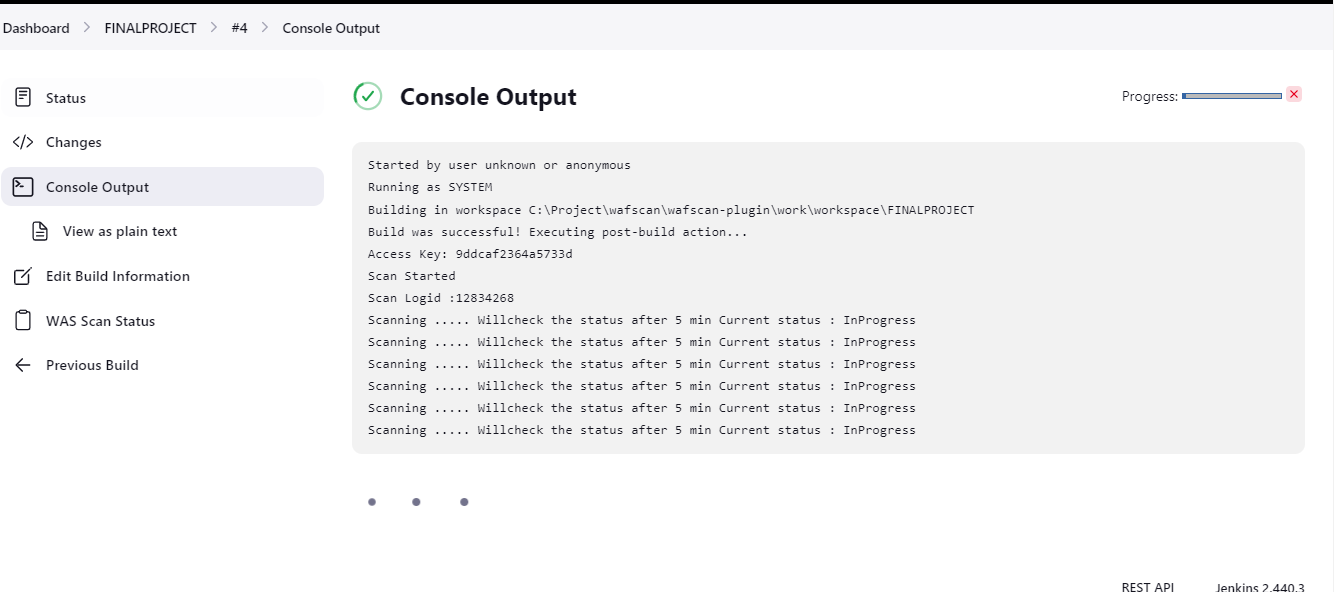
- Click Console Output to see the scan results clearly.
Download Report
To download the scan report, click WAS Scan Status, then click Download Report.
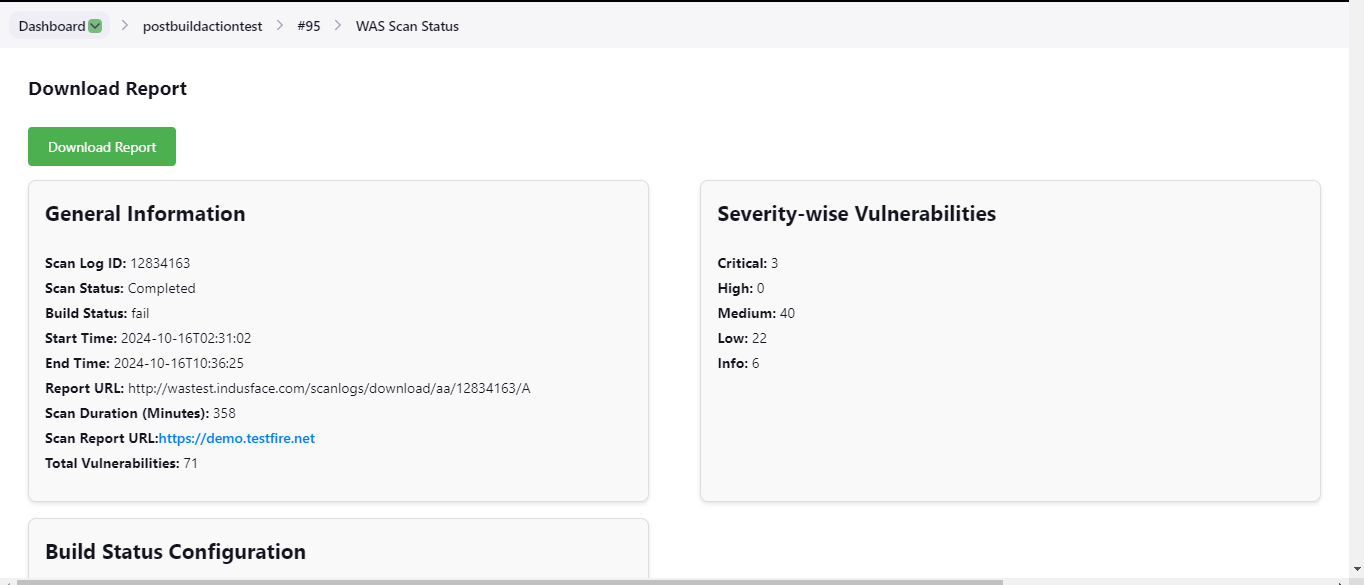
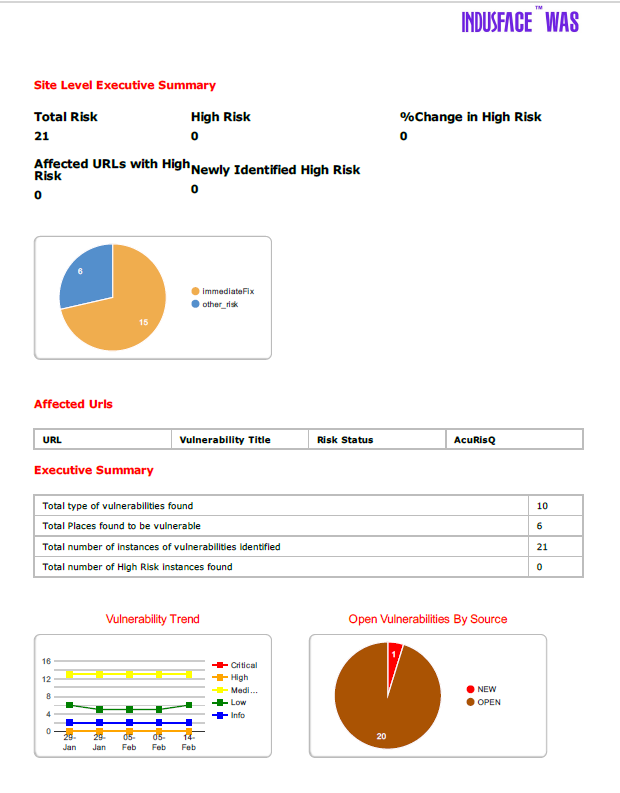
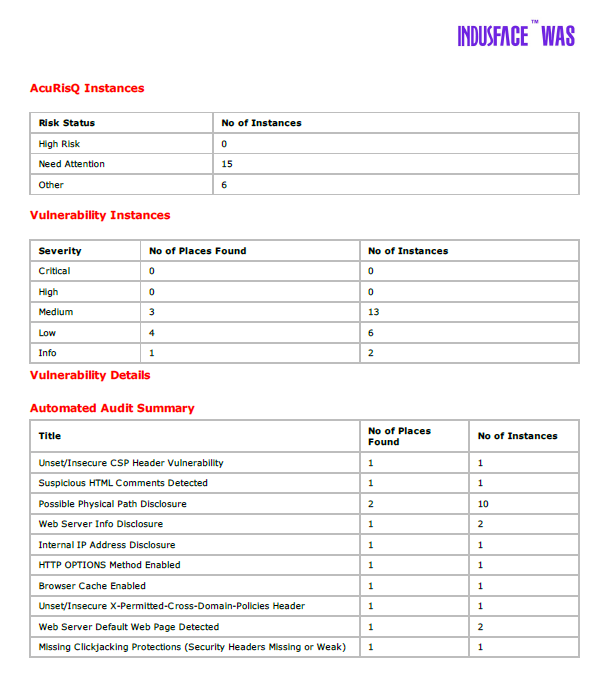
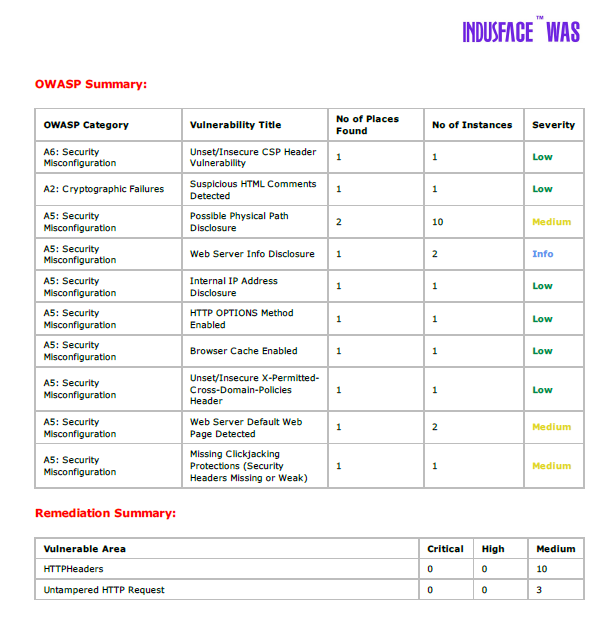
The downloaded report provides information of each vulnerability found and their details.