SAML Integration with Entra ID for Single Sign-On - AppTrana WAF
Introduction
This document describes the configurations required to access the AppTrana WAF portal via Entra ID (Formerly known as Azure Active Directory) by connecting through SAML settings.
By configuring SAML-based SSO (Single Sign-On) with Entra ID, you enable your users to access the AppTrana WAF portal using their Entra ID credentials. This removes the need for separate passwords for different applications. Users will only need one account to log in to the AppTrana WAF portal.
Required Inputs from Entra ID
You will need the following items from Entra ID to configure SAML in AppTrana WAF. The steps below explain how to obtain these from Entra ID:
- Certificate (Base64)
- Login URL
- Logout URL
Steps to configure SAML
Create a New Application
Only the admin has access.
- Sign into your Microsoft Entra ID portal as an admin.
- Under Entra ID services, click on the Microsoft Entra ID button (or) search for Active Directory using the search bar at the top.
- In the left navigation menu, click Enterprise applications under the Manage section.
- Select All Applications > New Application > Create your own application.
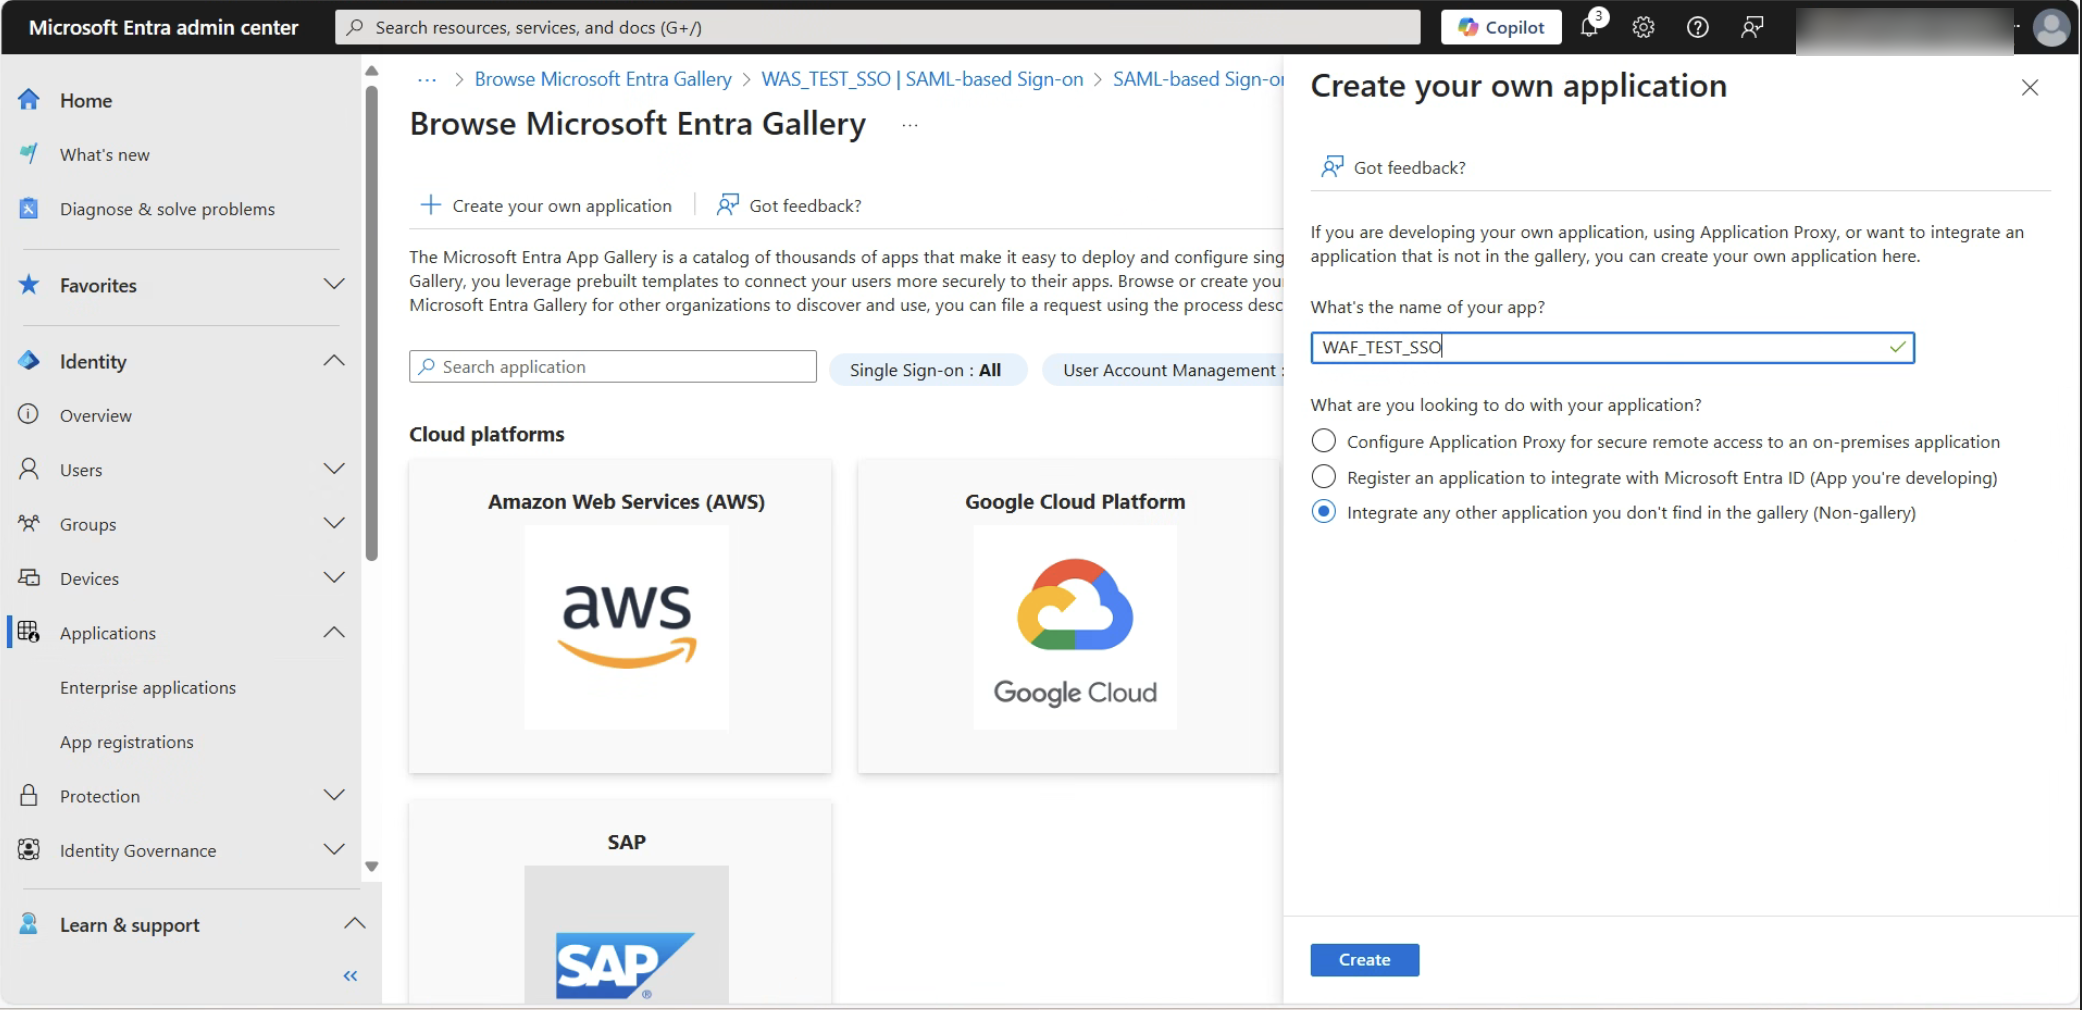
Add Application Name
5. Enter a name for your application under: What's the name of your app?
6. Select Integrate any other application you don't find in the gallery, then click Create.
Once created, you will be redirected to the application’s page.
Configure AppTrana WAF Details in Entra ID for SSO
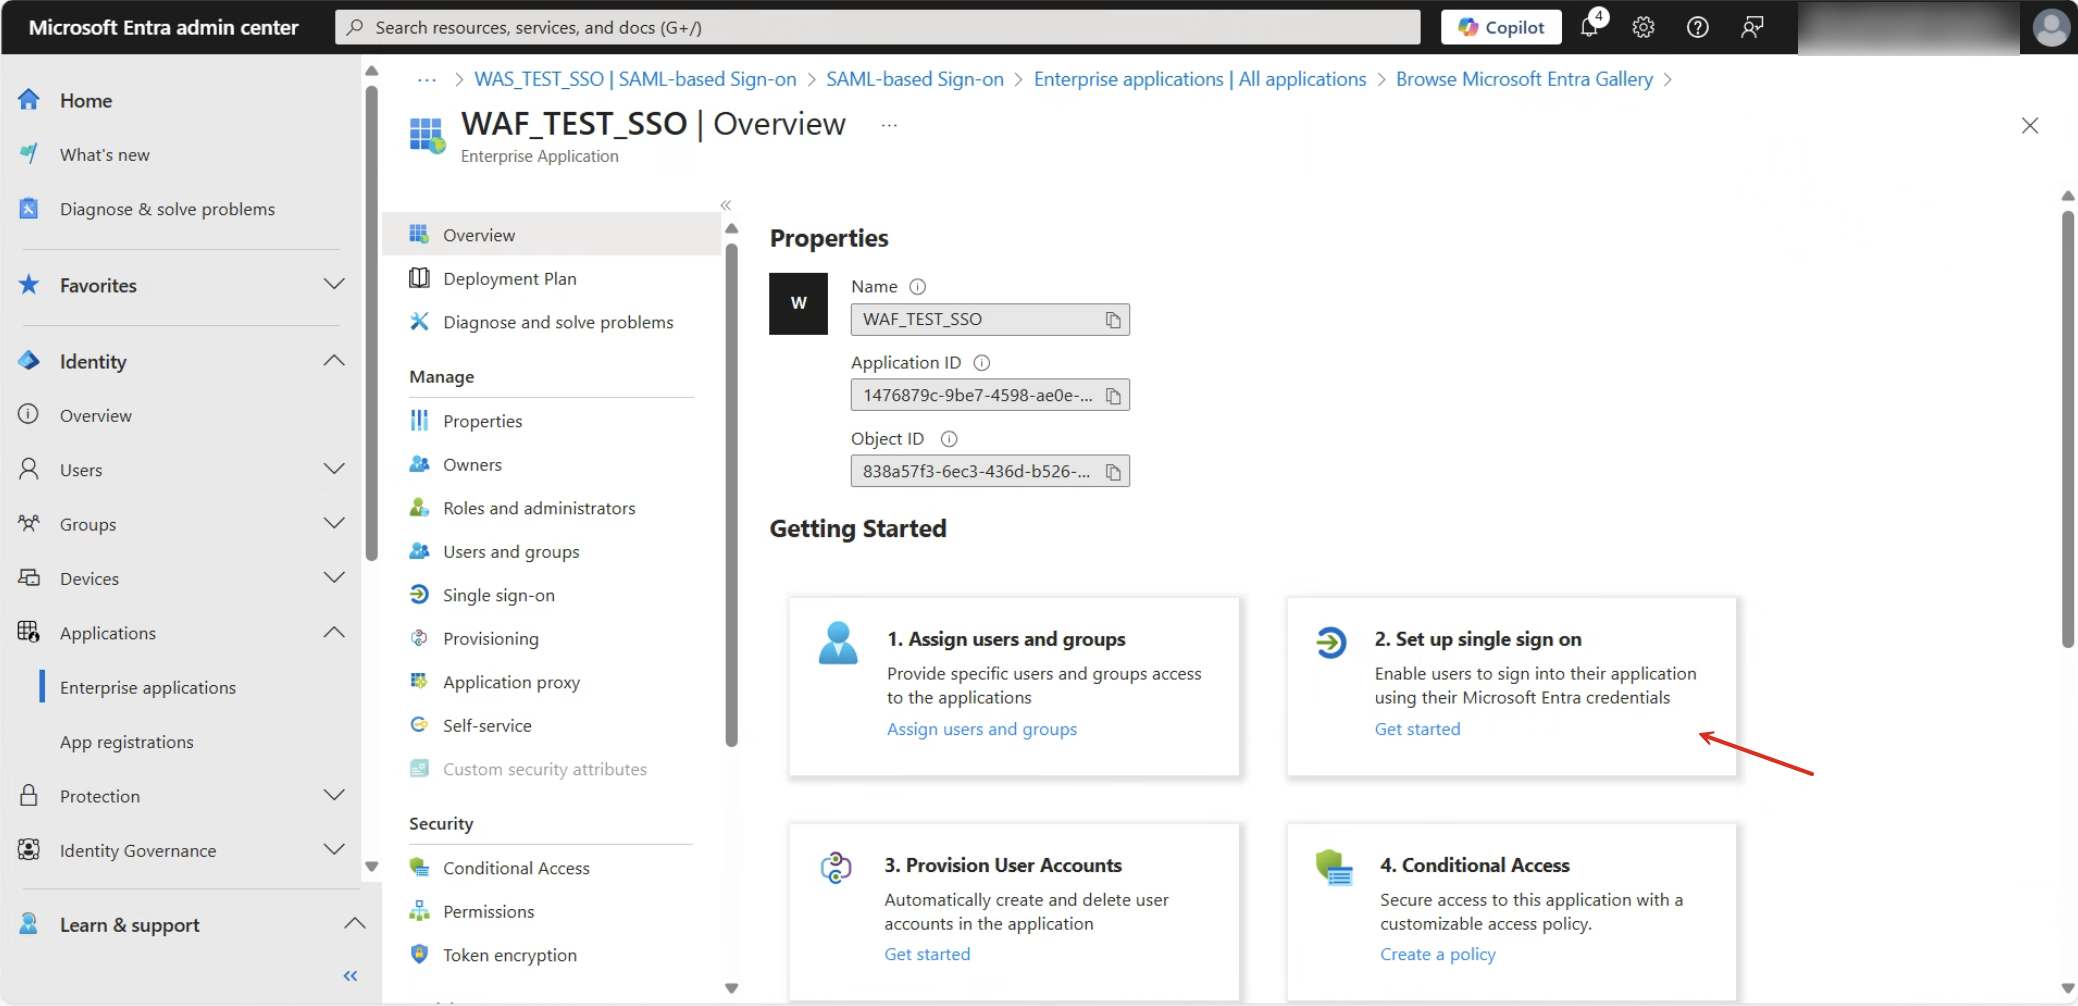
1. Navigate to Set up single sign-on in your application’s page.
2. Click Get Started as shown in the corresponding screenshot.
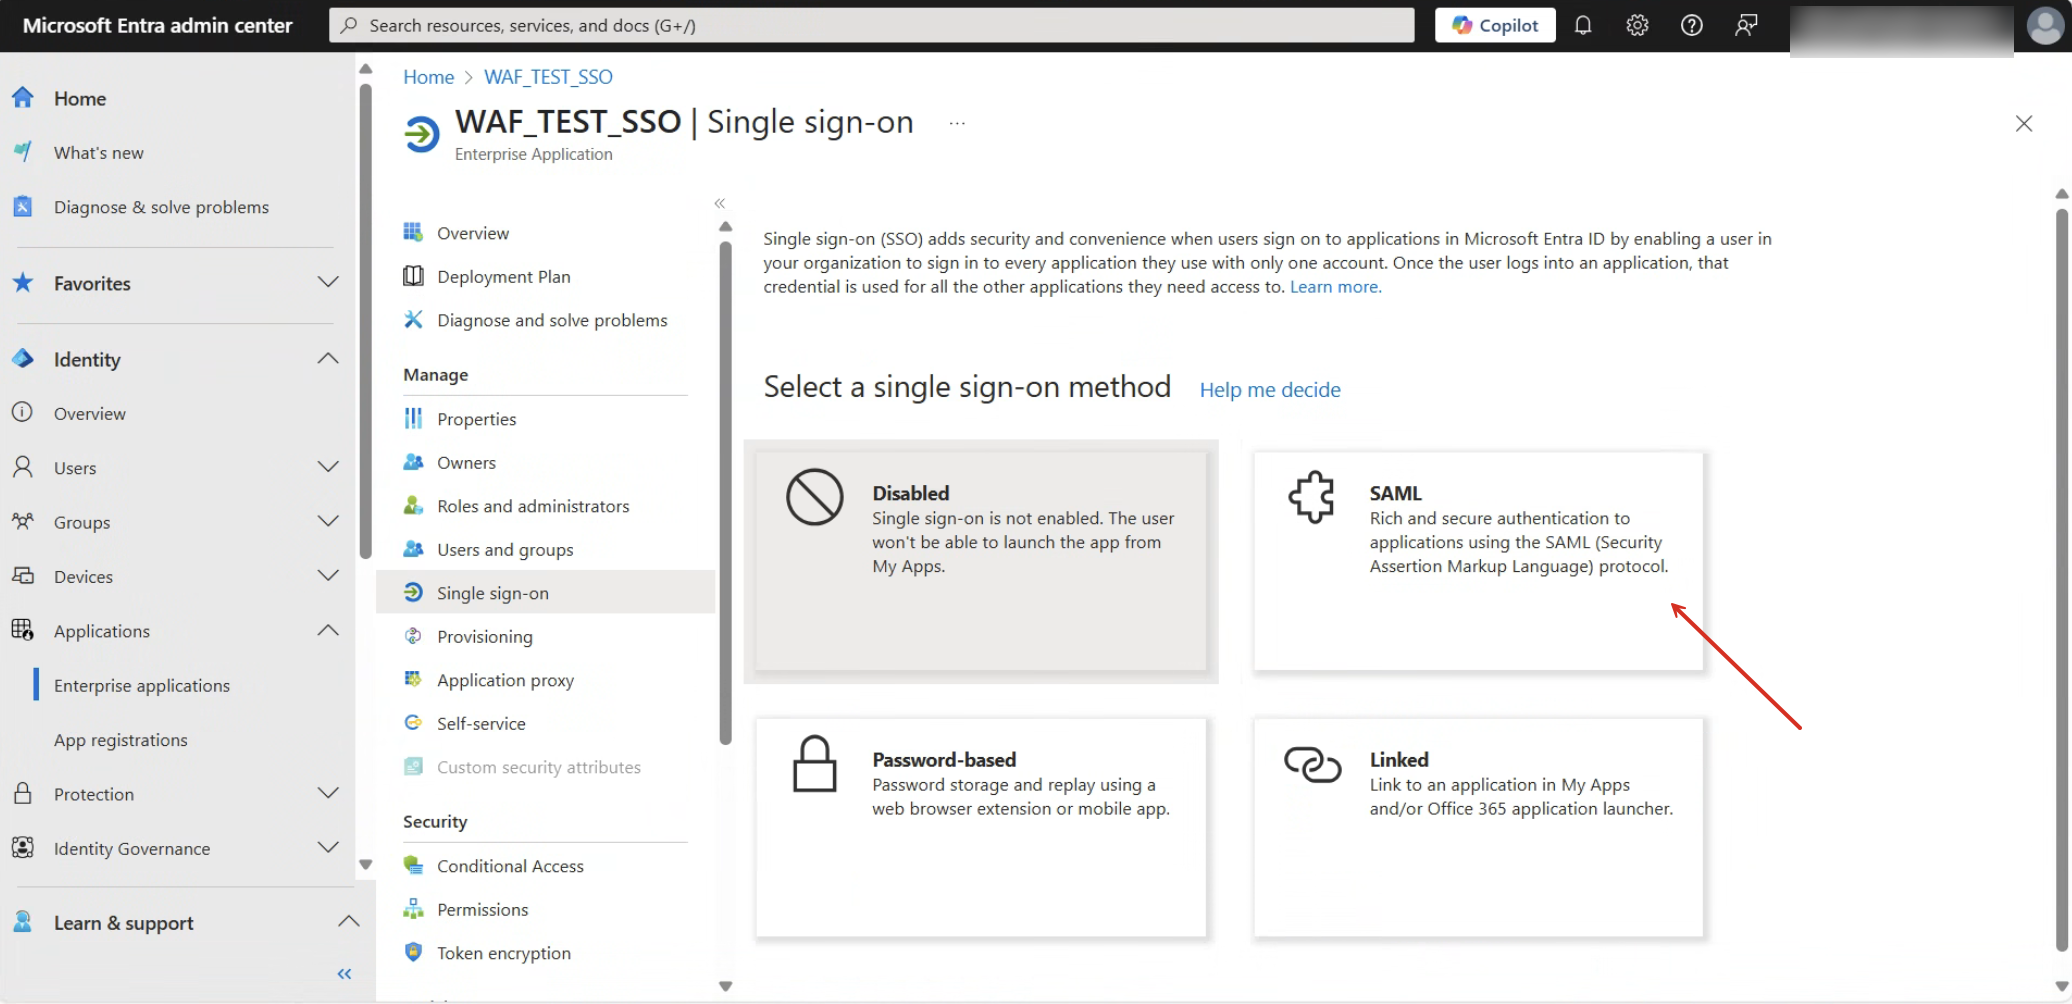
3. Choose the SSO method from the available options.
4. Select the SAML option as suggested in the below screenshot:
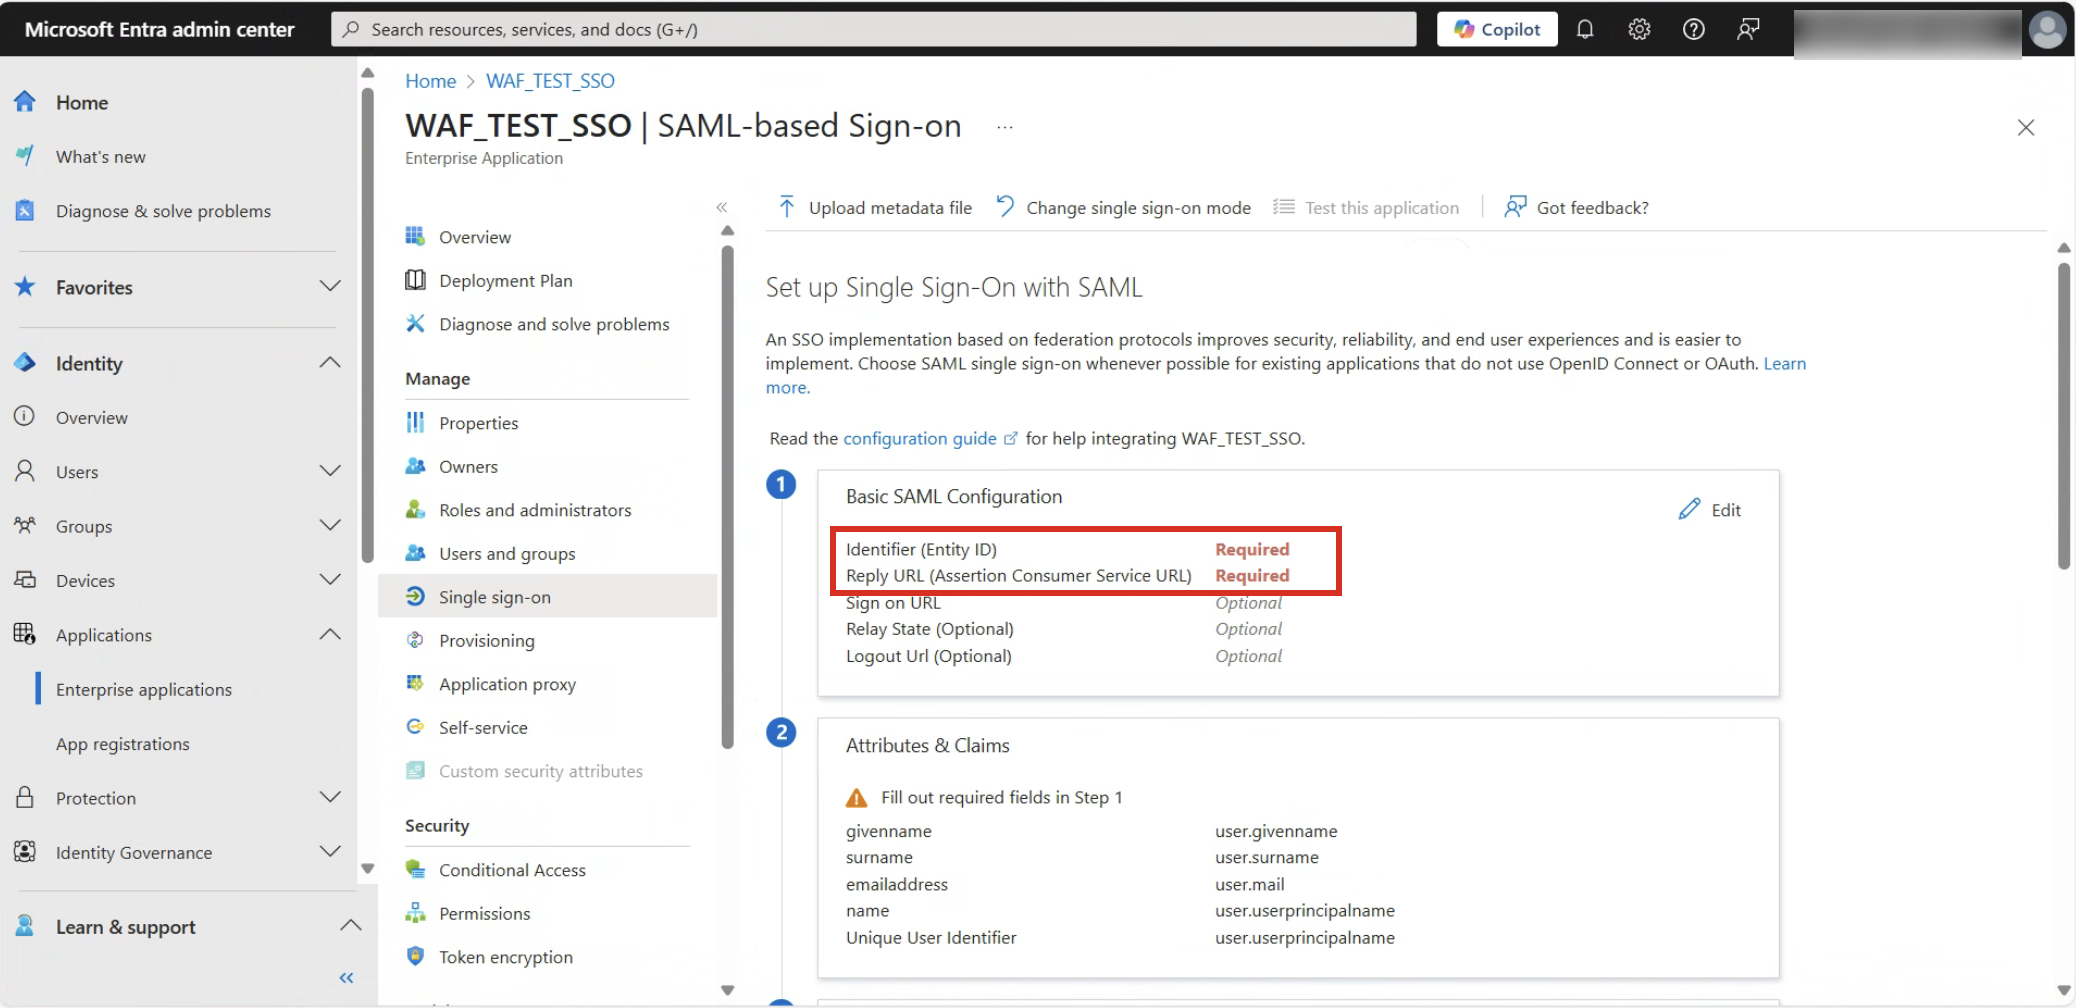
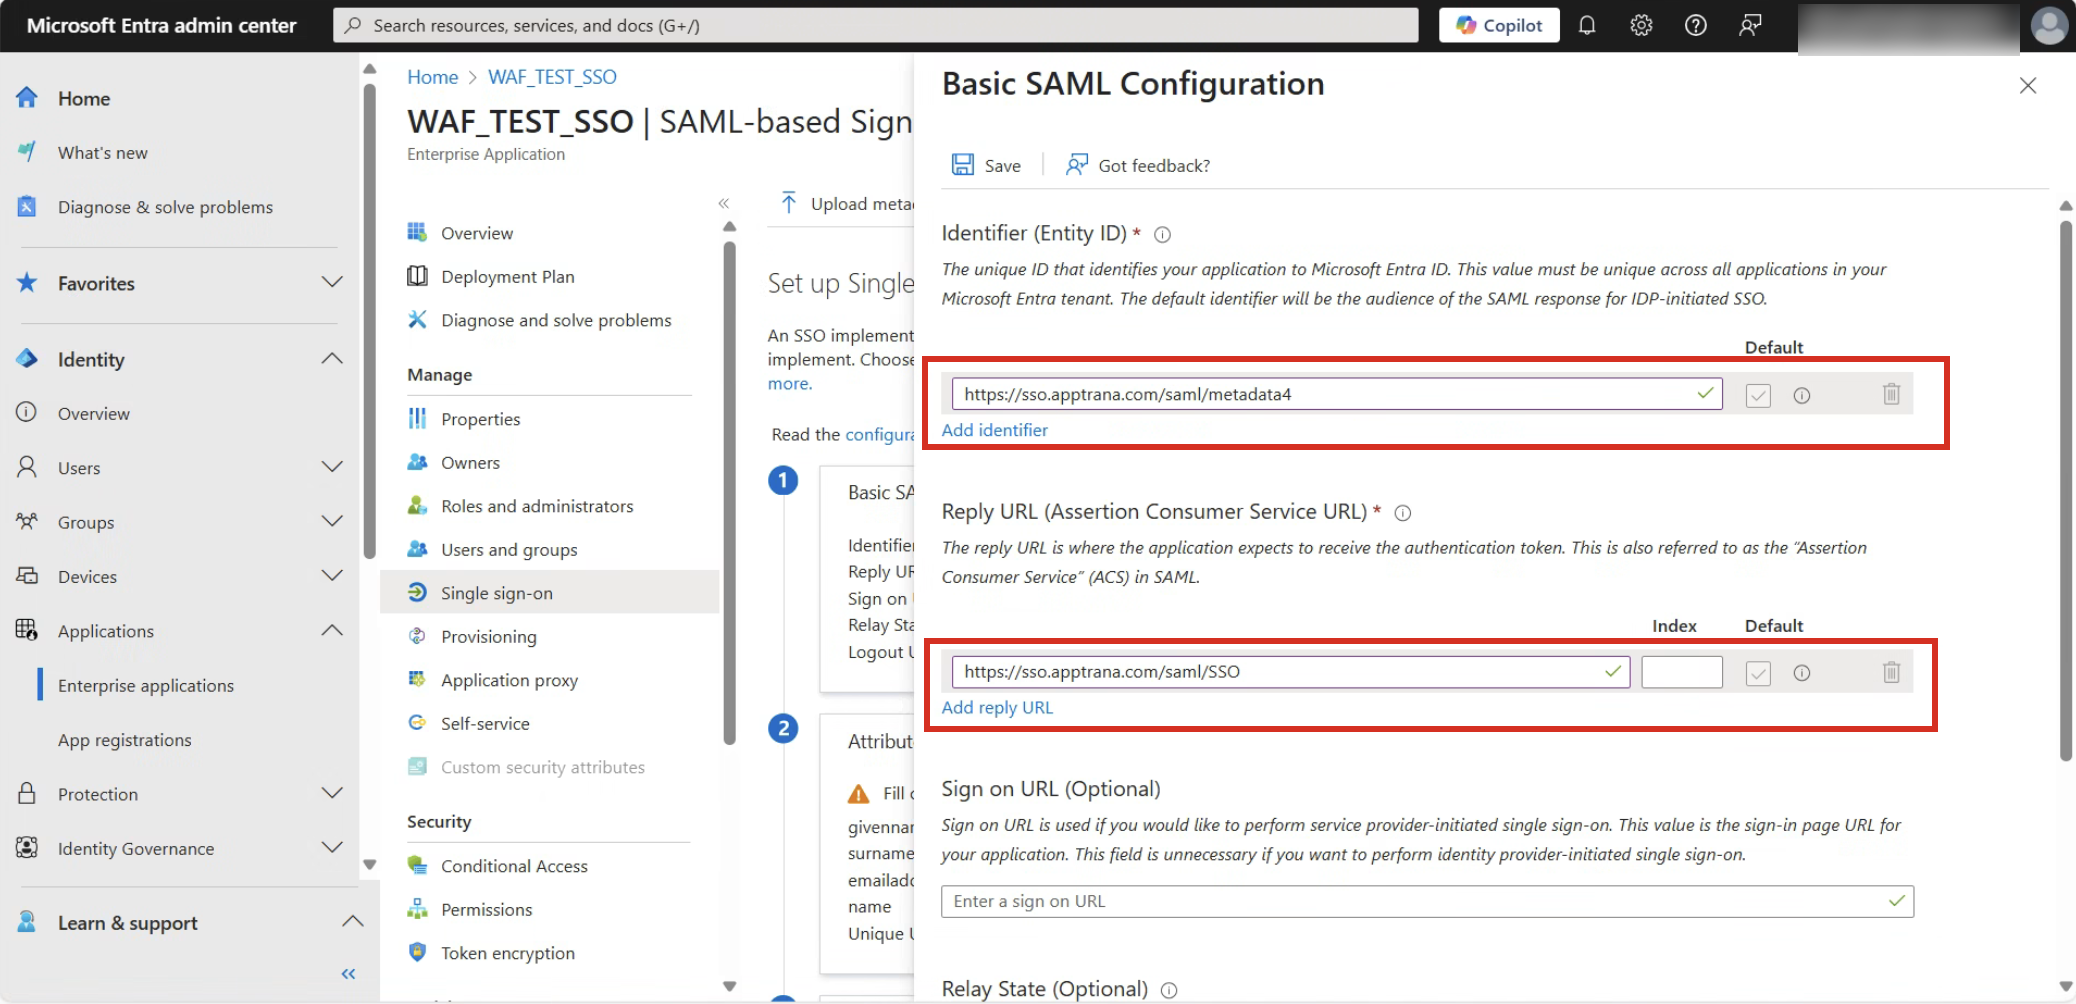
5. In the Basic SAML Configuration, click Edit to update the requested URLs:
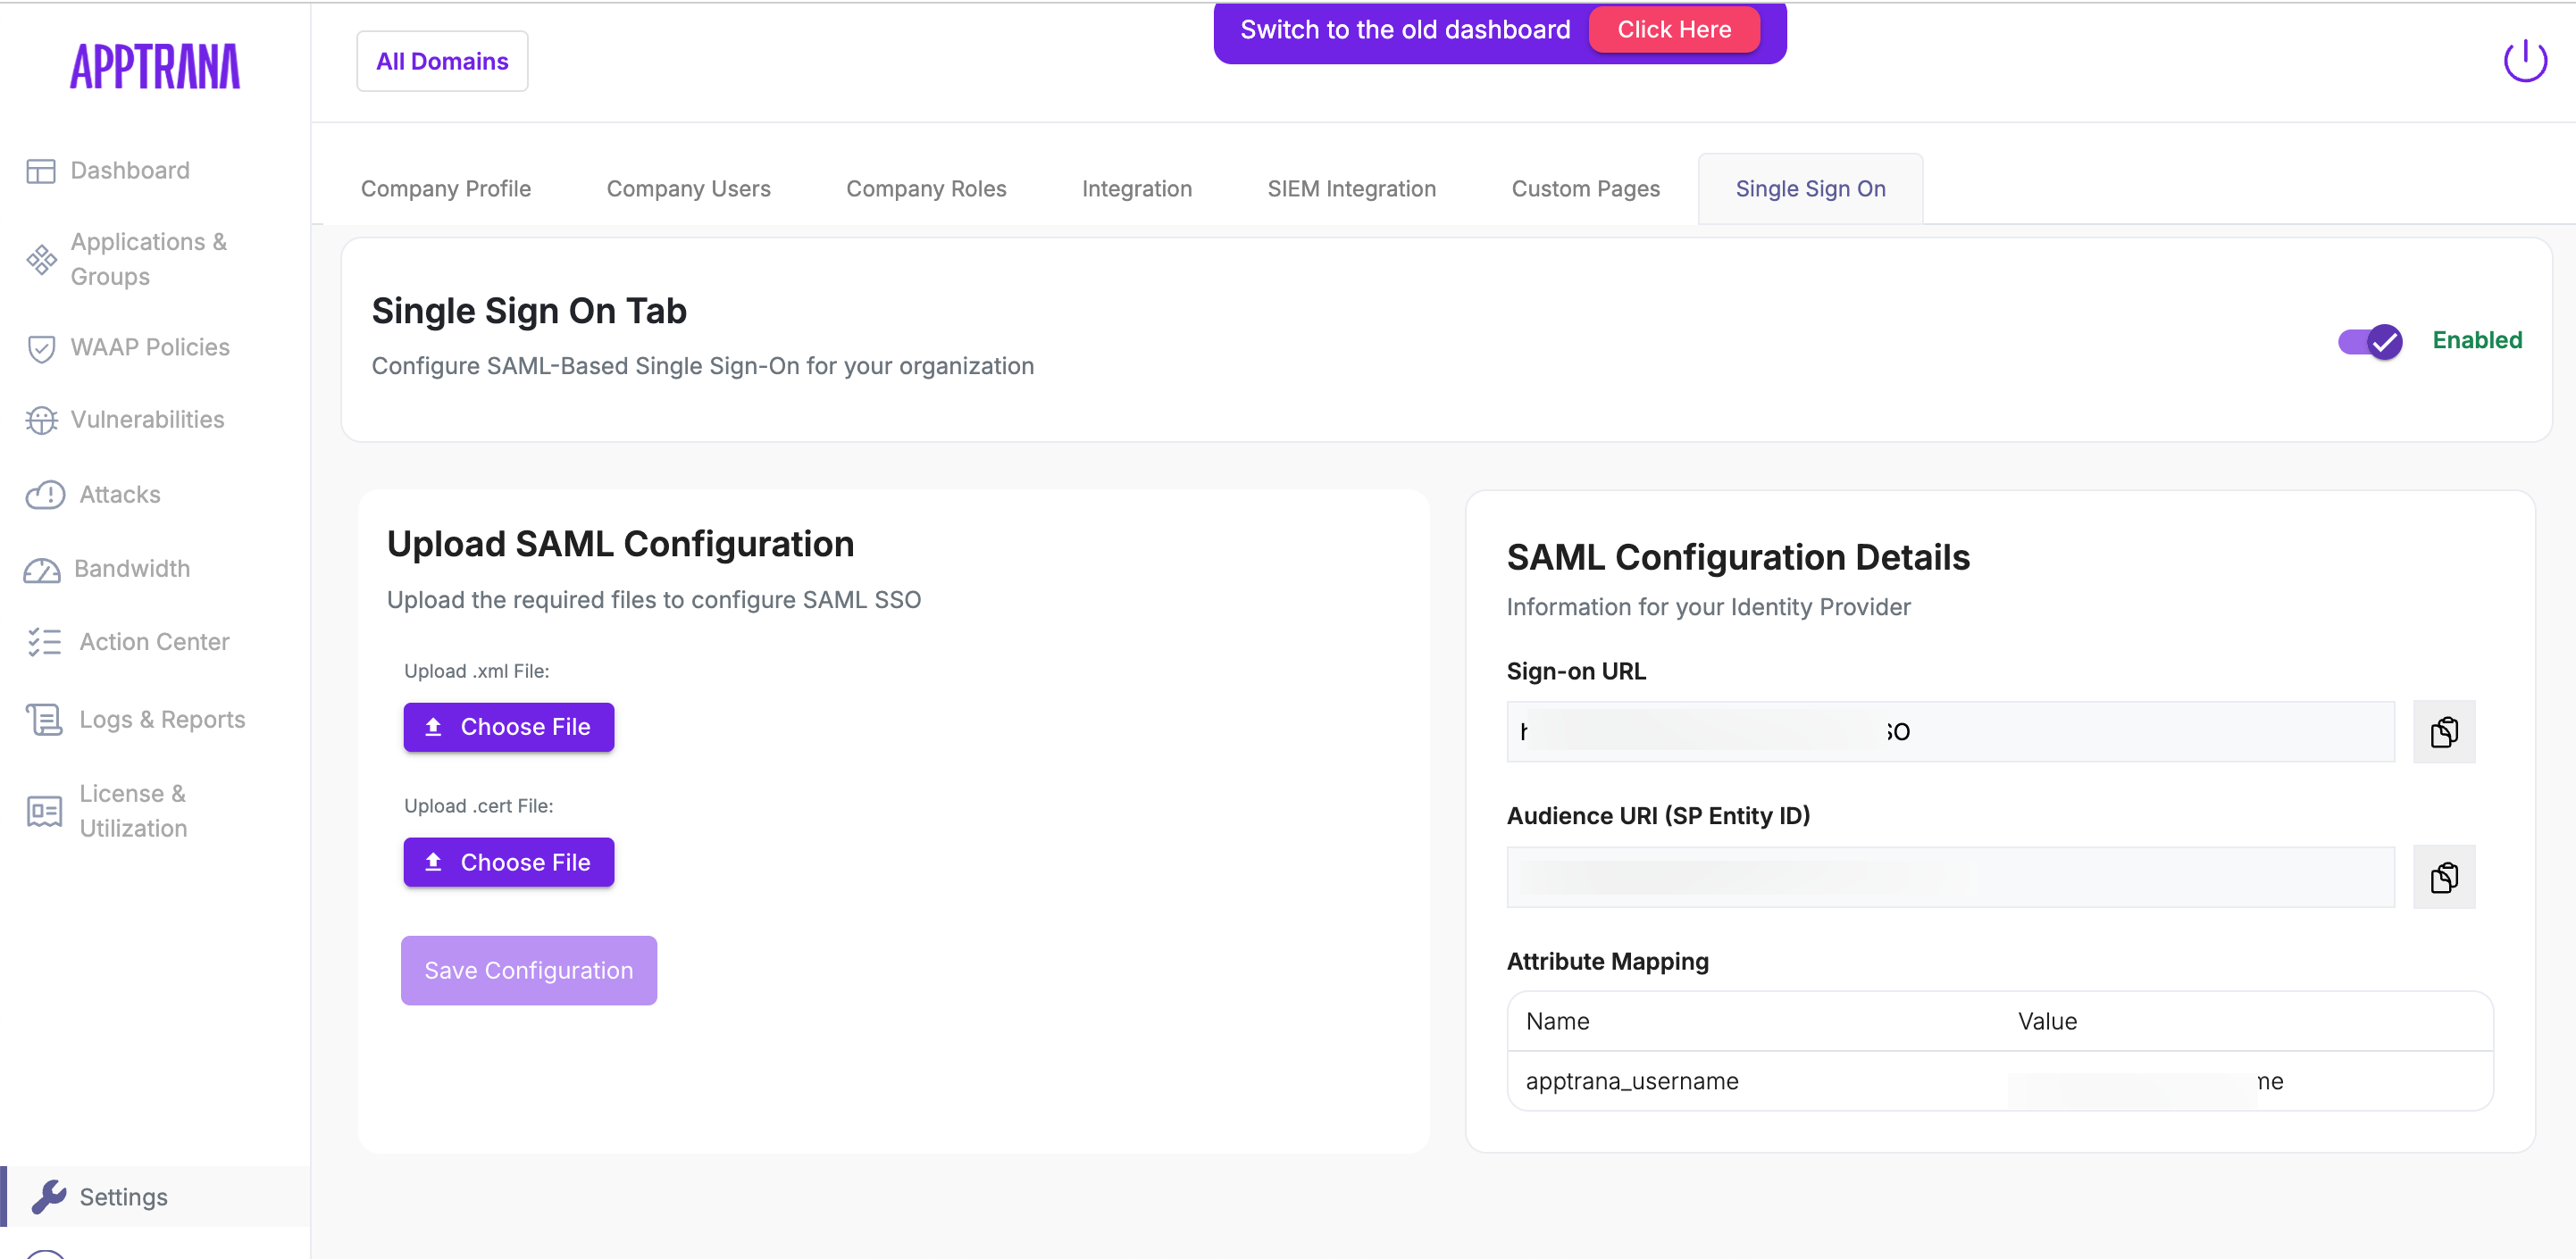
- Identifier (Entity ID): Enter the Audience URI (SP Entity ID) you obtained from the AppTrana WAF portal’s SSO configuration, for example https://sso.apptrana.com/saml/metadata.
- Reply URL: Enter the Single Sign-On URL from the WAF portal’s SSO configuration, for example https://sso.apptrana.com/saml/SSO.
6. After entering these values, click Save and continue.
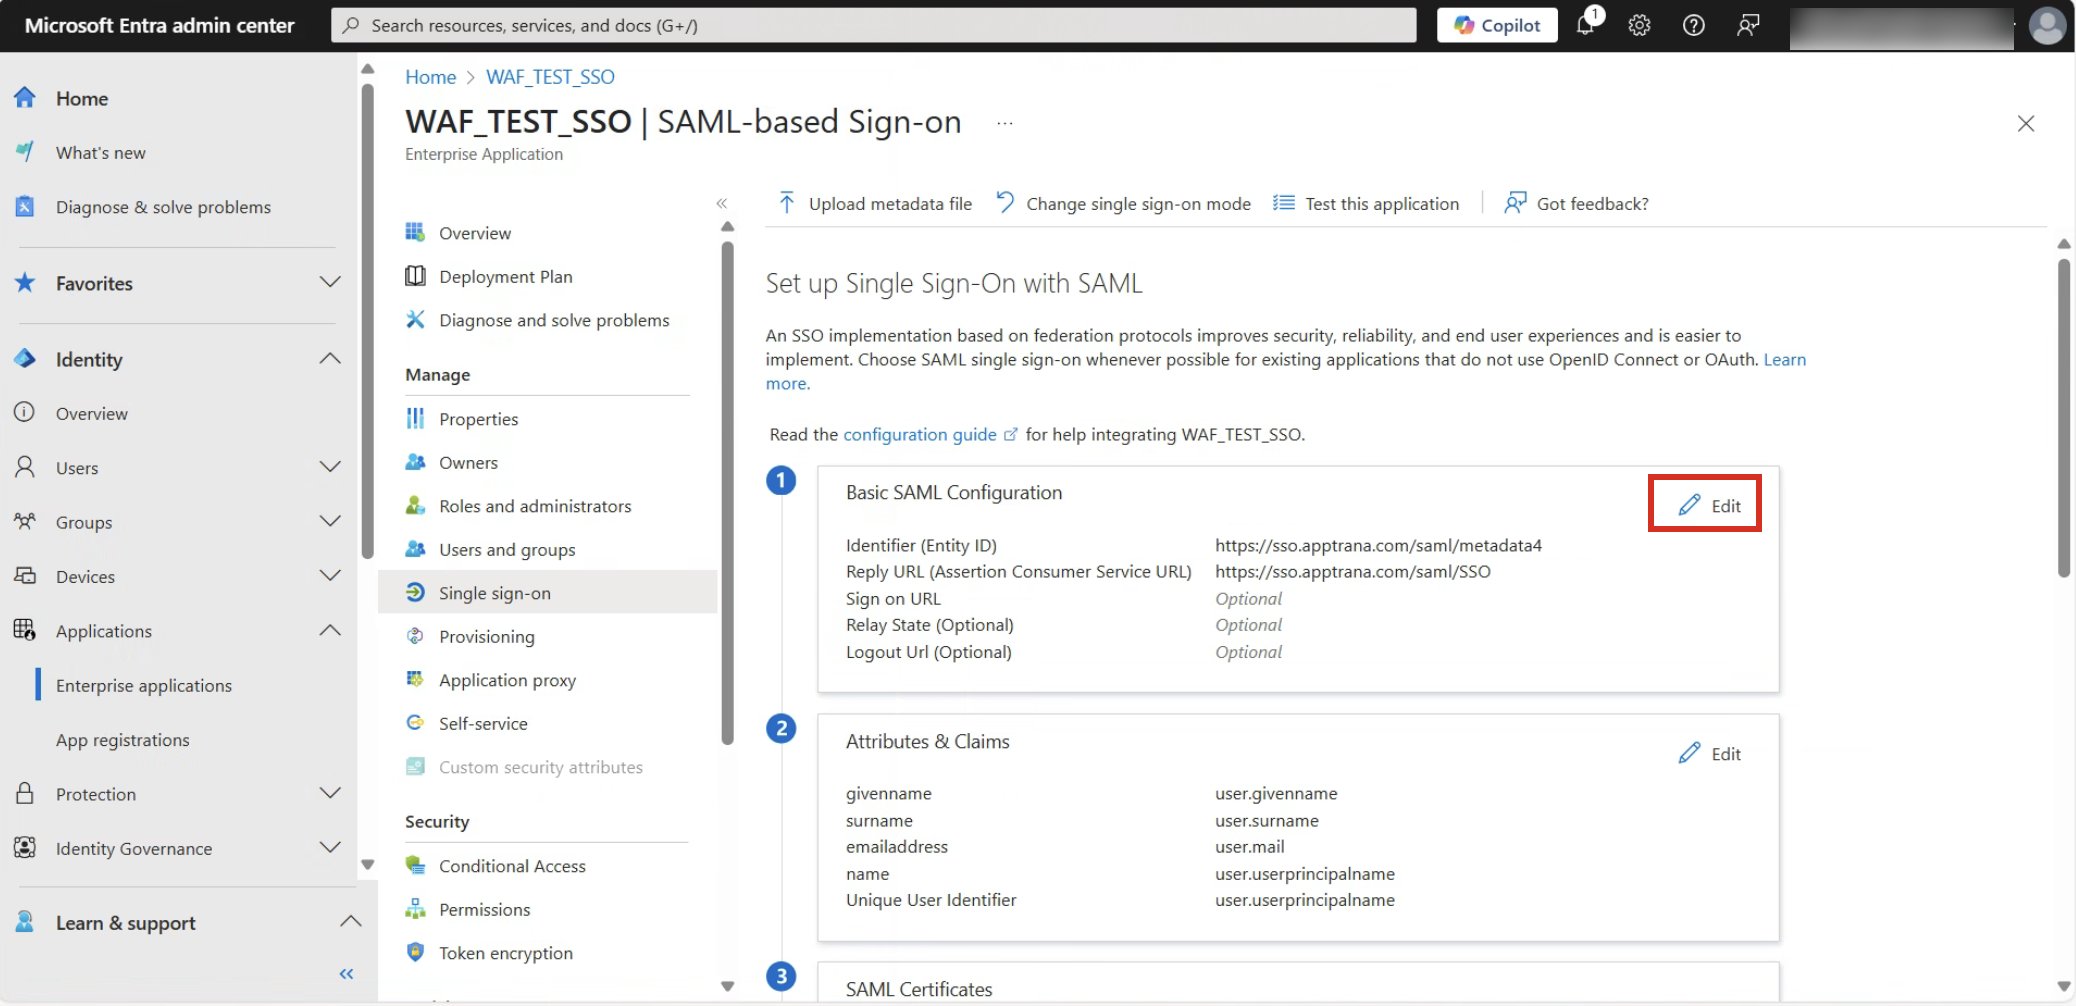
Add Attributes
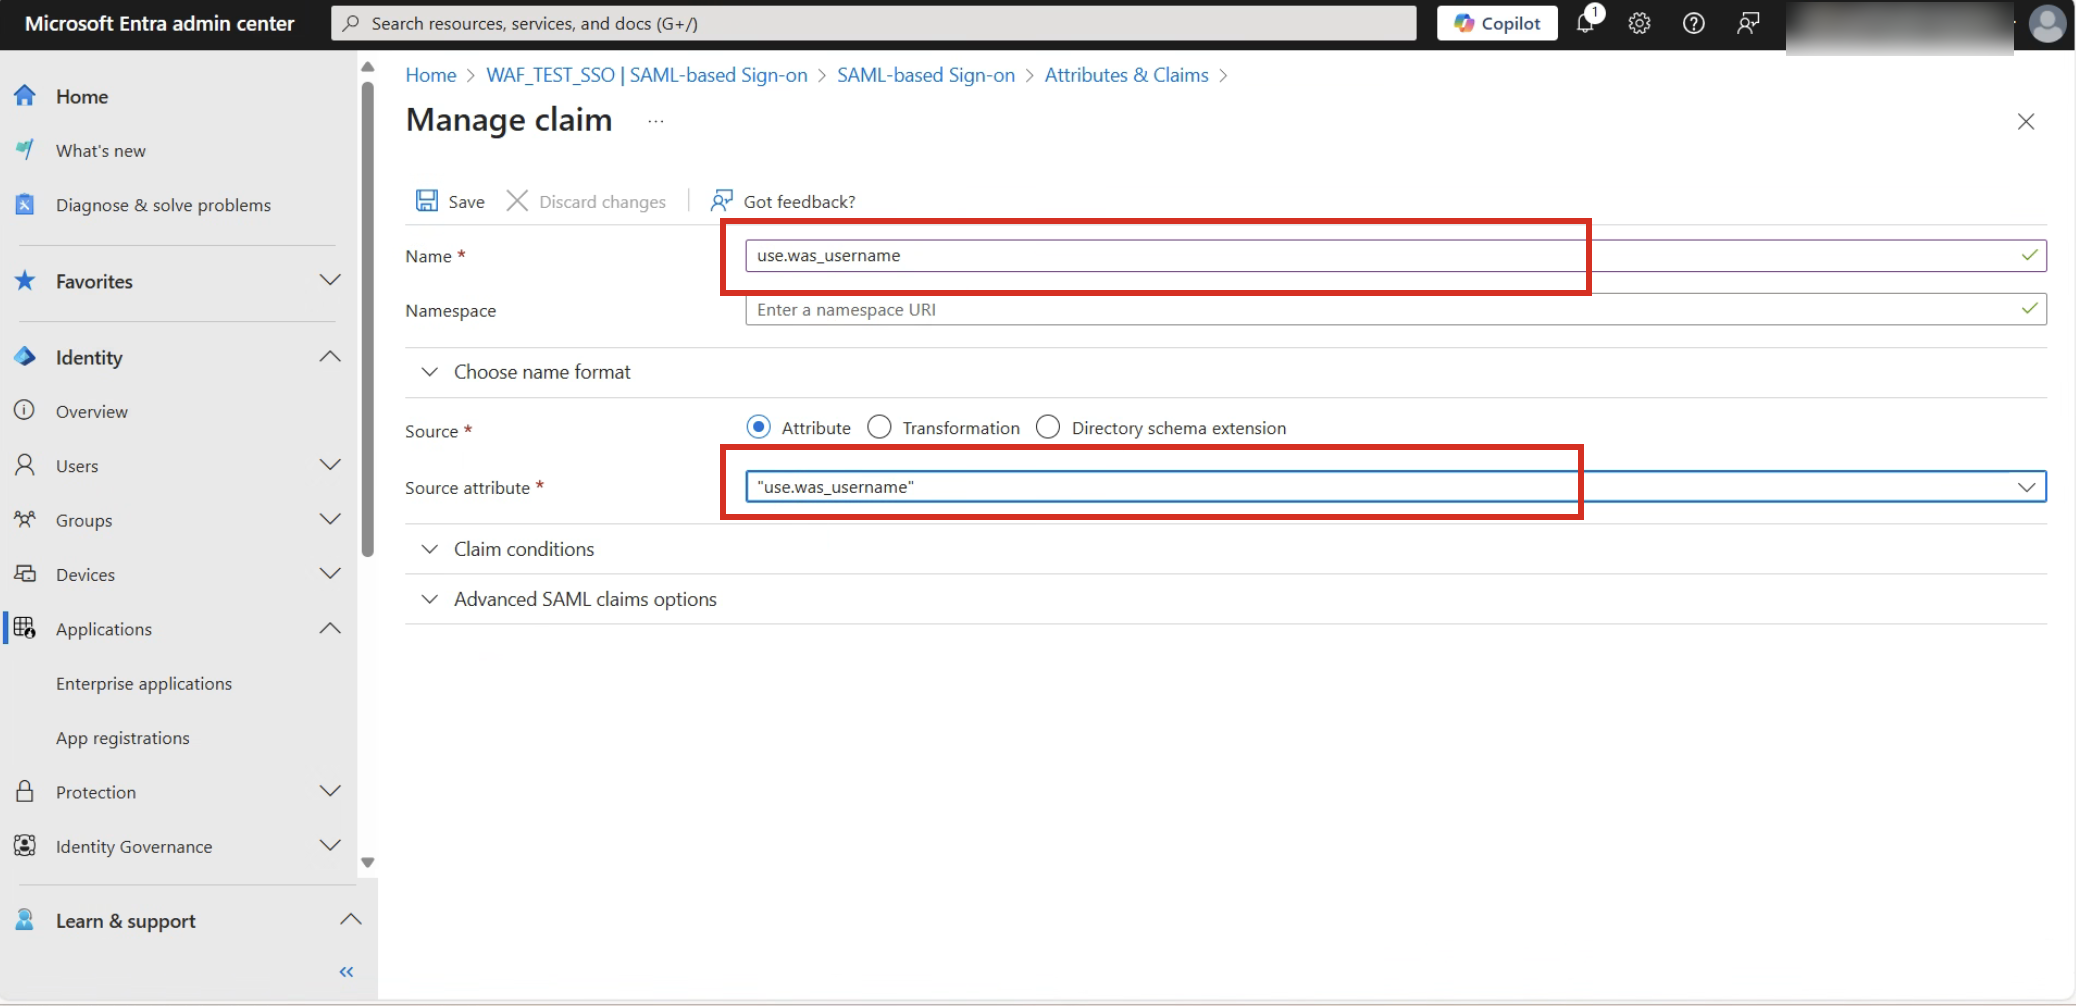
1. Click Edit in the Attributes & Claims section.
2. Click Add new claim.
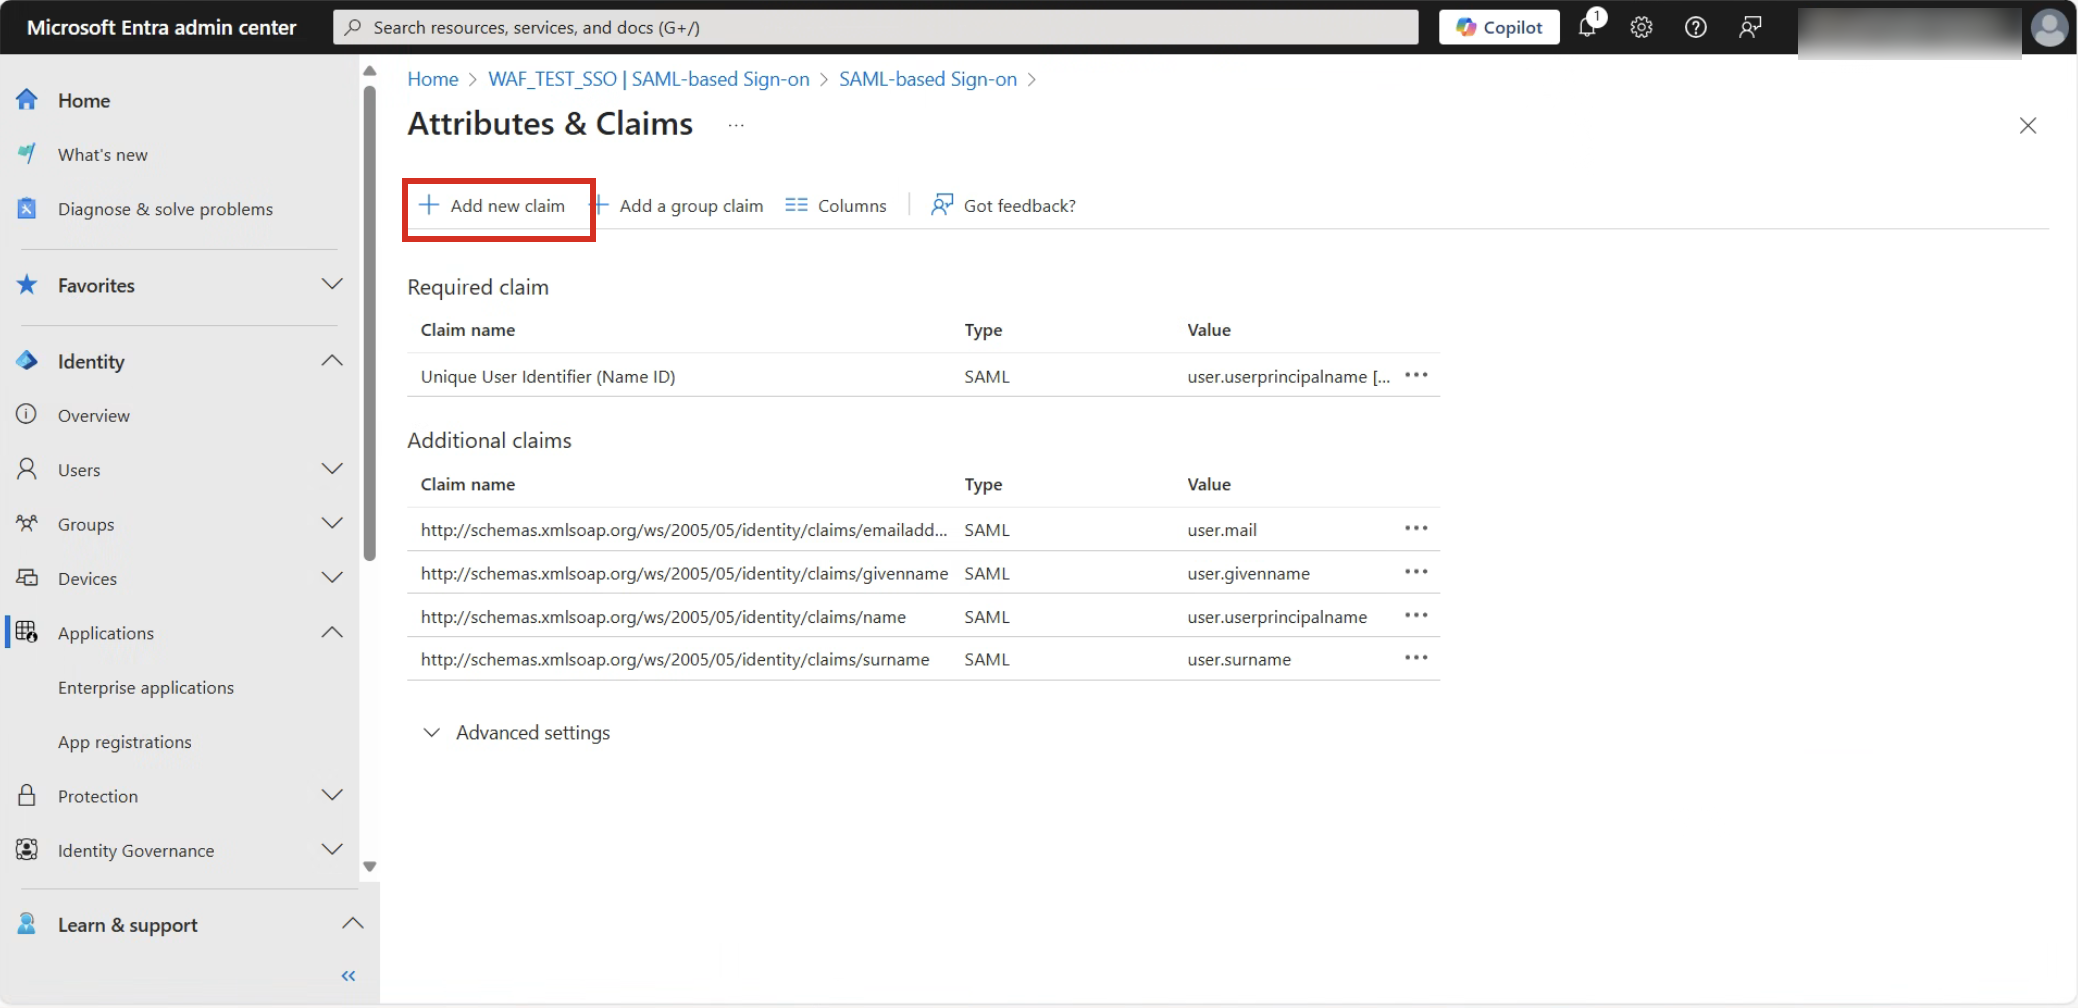
3. Add the attribute details obtained from the WAF portal’s SSO configuration:
- Name: use.was_username (example)
- Source attribute: use.was_username (example)
4. Click Save once completed.
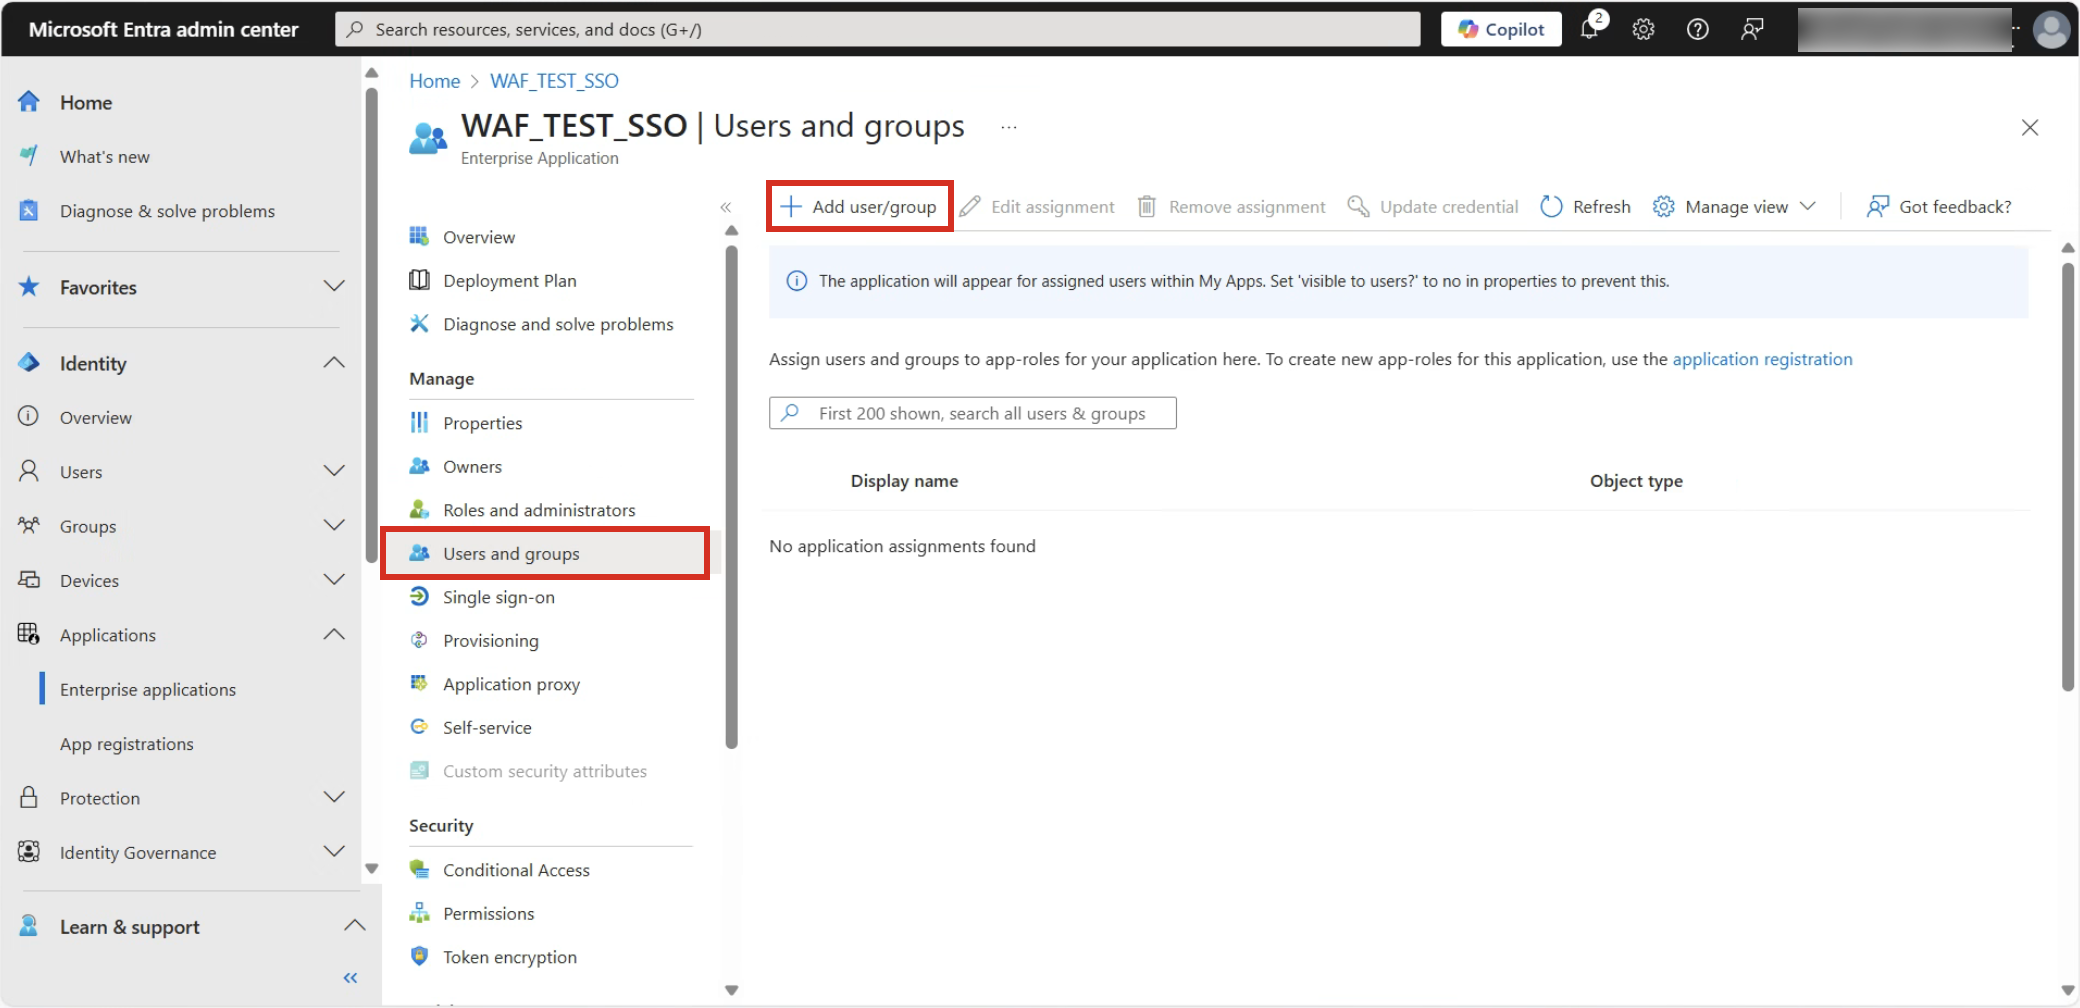
Assign User/Group to the Application
- Select the application you created.
- Navigate to the Users and Groups section.
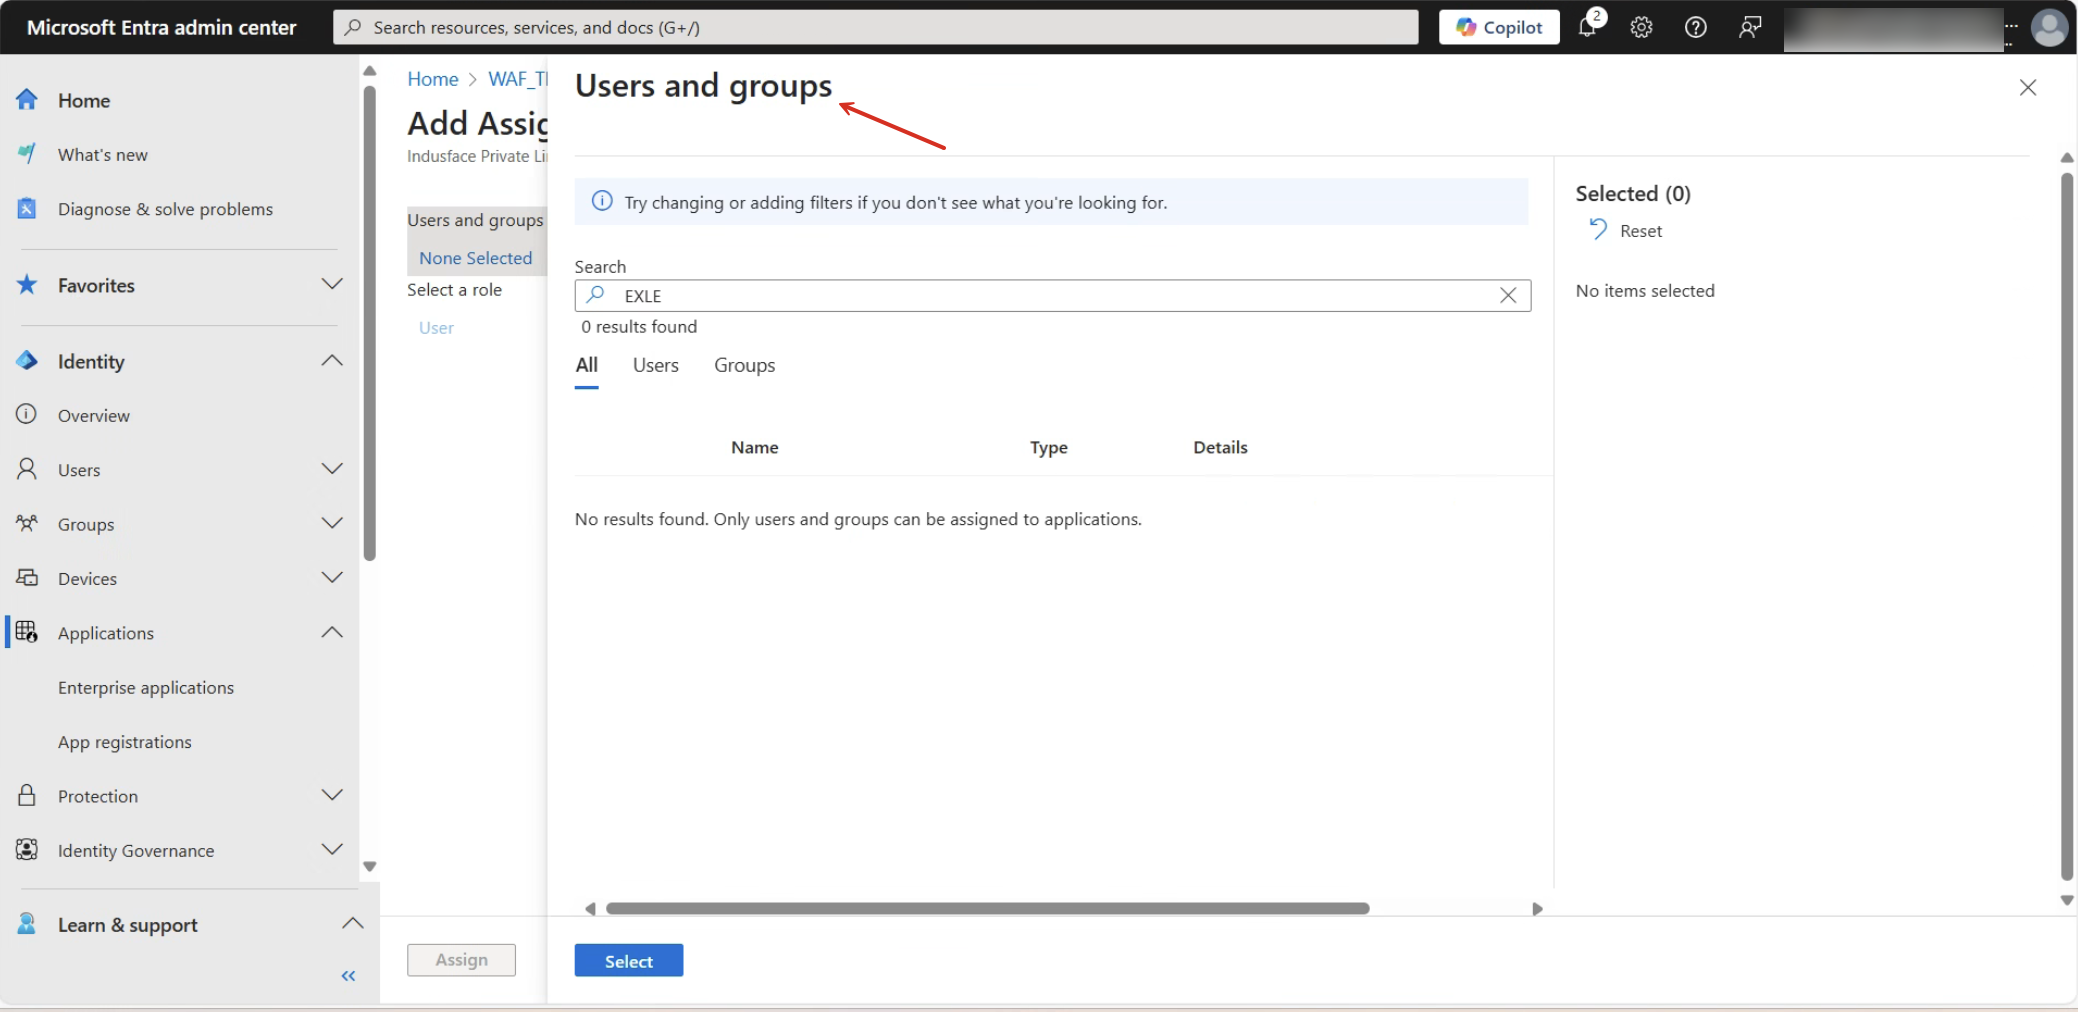
- Click Add user/group.
- Select and add the users or groups who need access to the application.
- Click Save. After saving, the Entra ID configuration for SSO is complete.
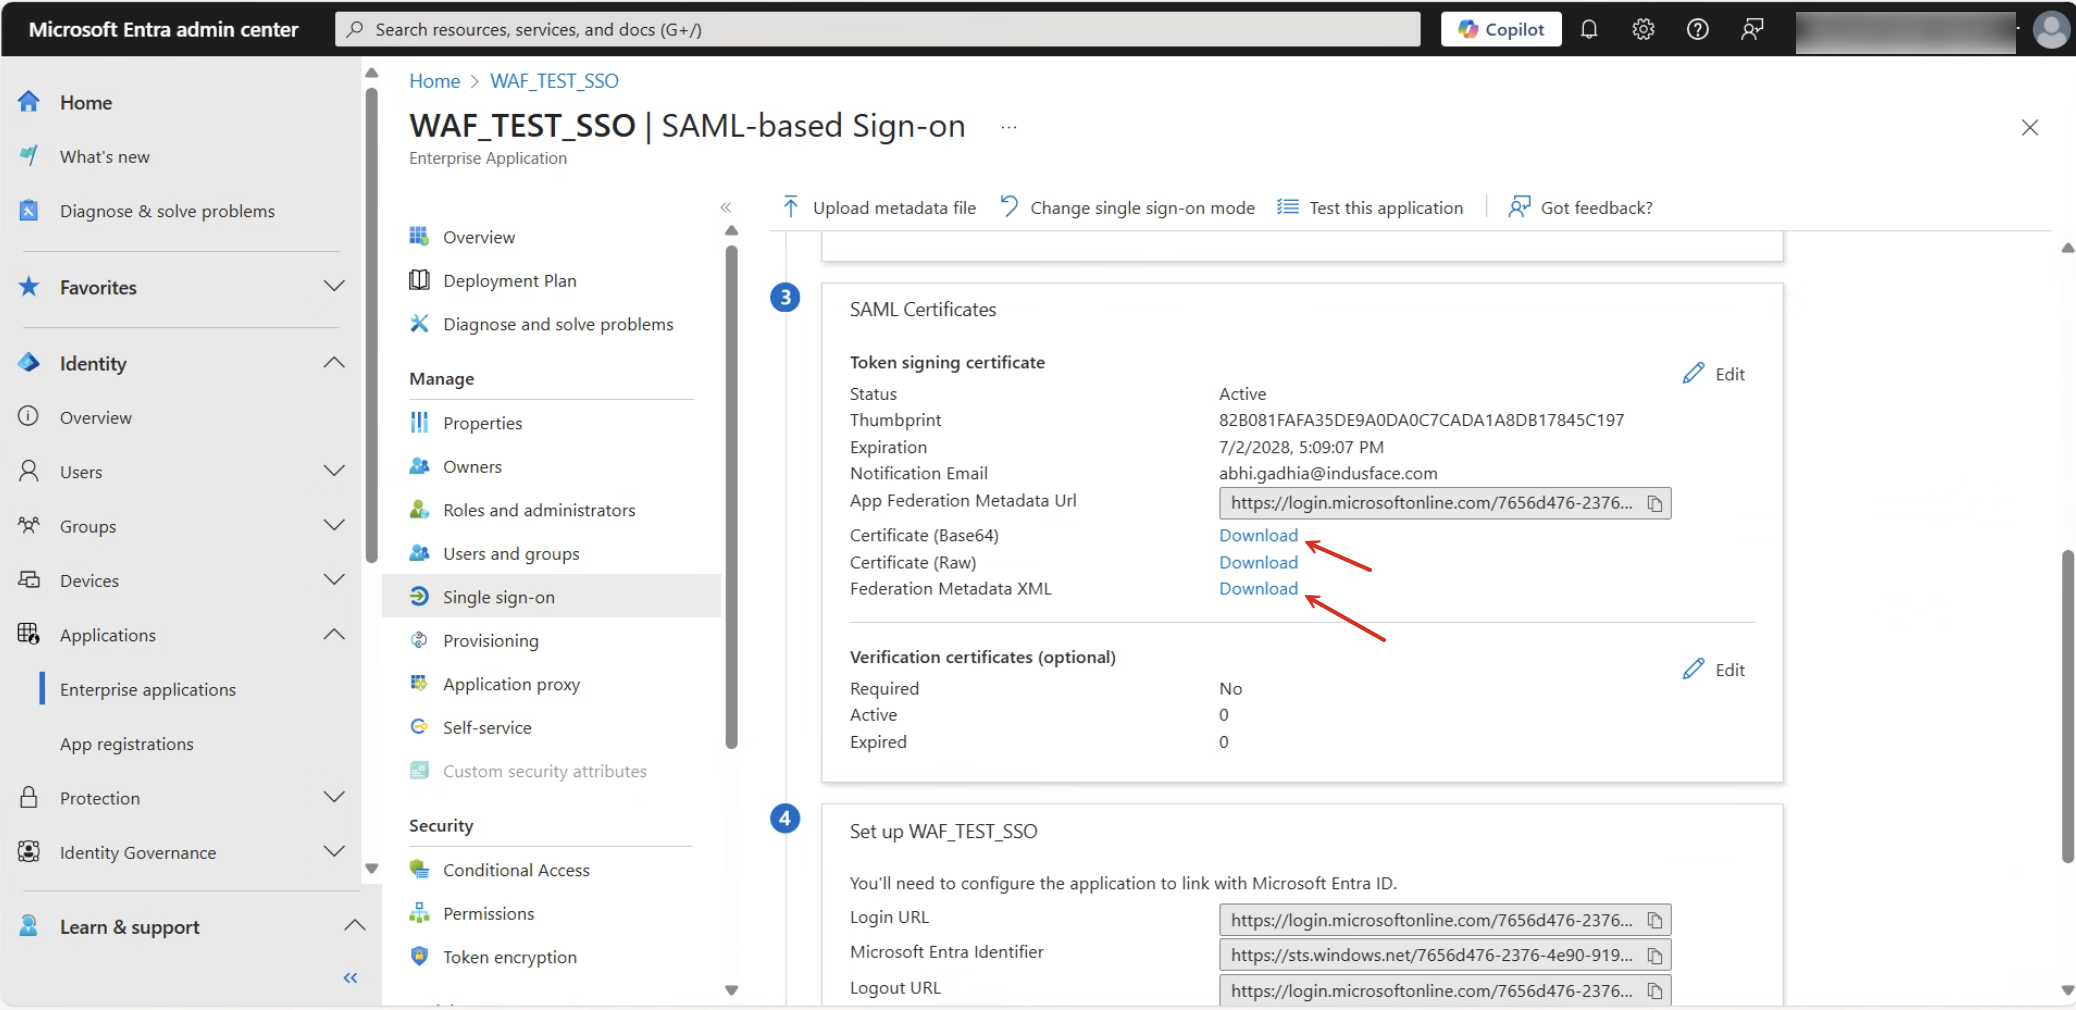
Download the SSO Application Certificates from Entra ID
Now, as your app is configured, you need to navigate to the Single sign-on application again that you created recently.
- Open the Single Sign-On configuration page for your application.
- Scroll to the SAML Certificates section.
- Download both the Certificate (Base64) and the Federation Metadata XML.
- Save these files in an easily accessible location.
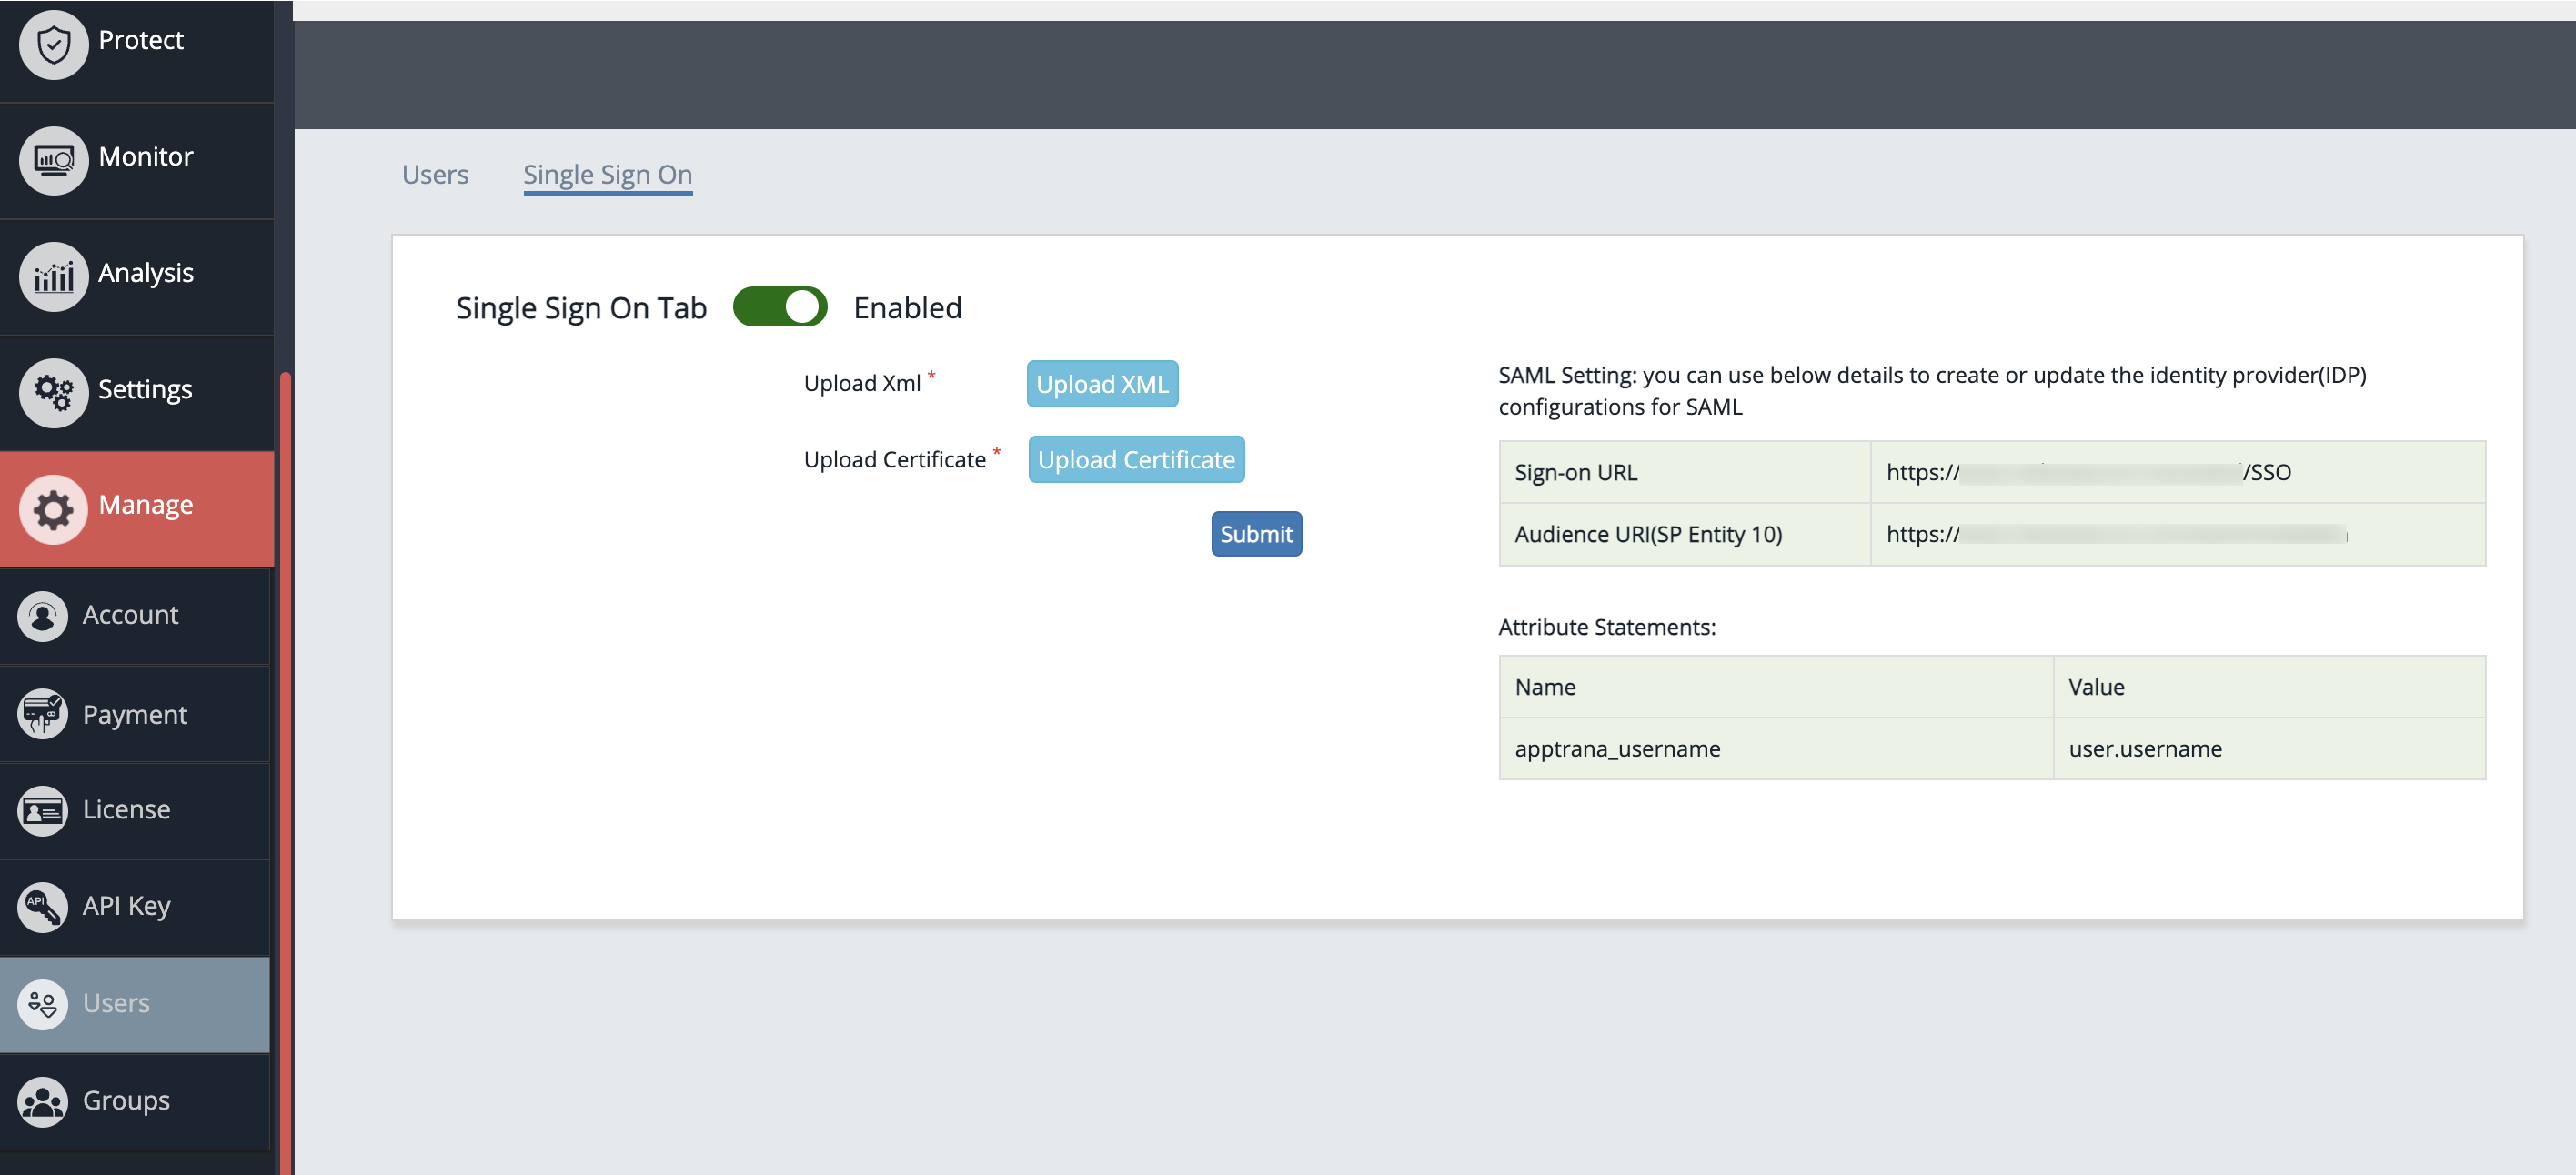
Configure Entra ID Details in AppTrana WAF Portal
Steps in the WAF Portal
- Navigate to the SSO Configuration section under Settings in the WAF portal.
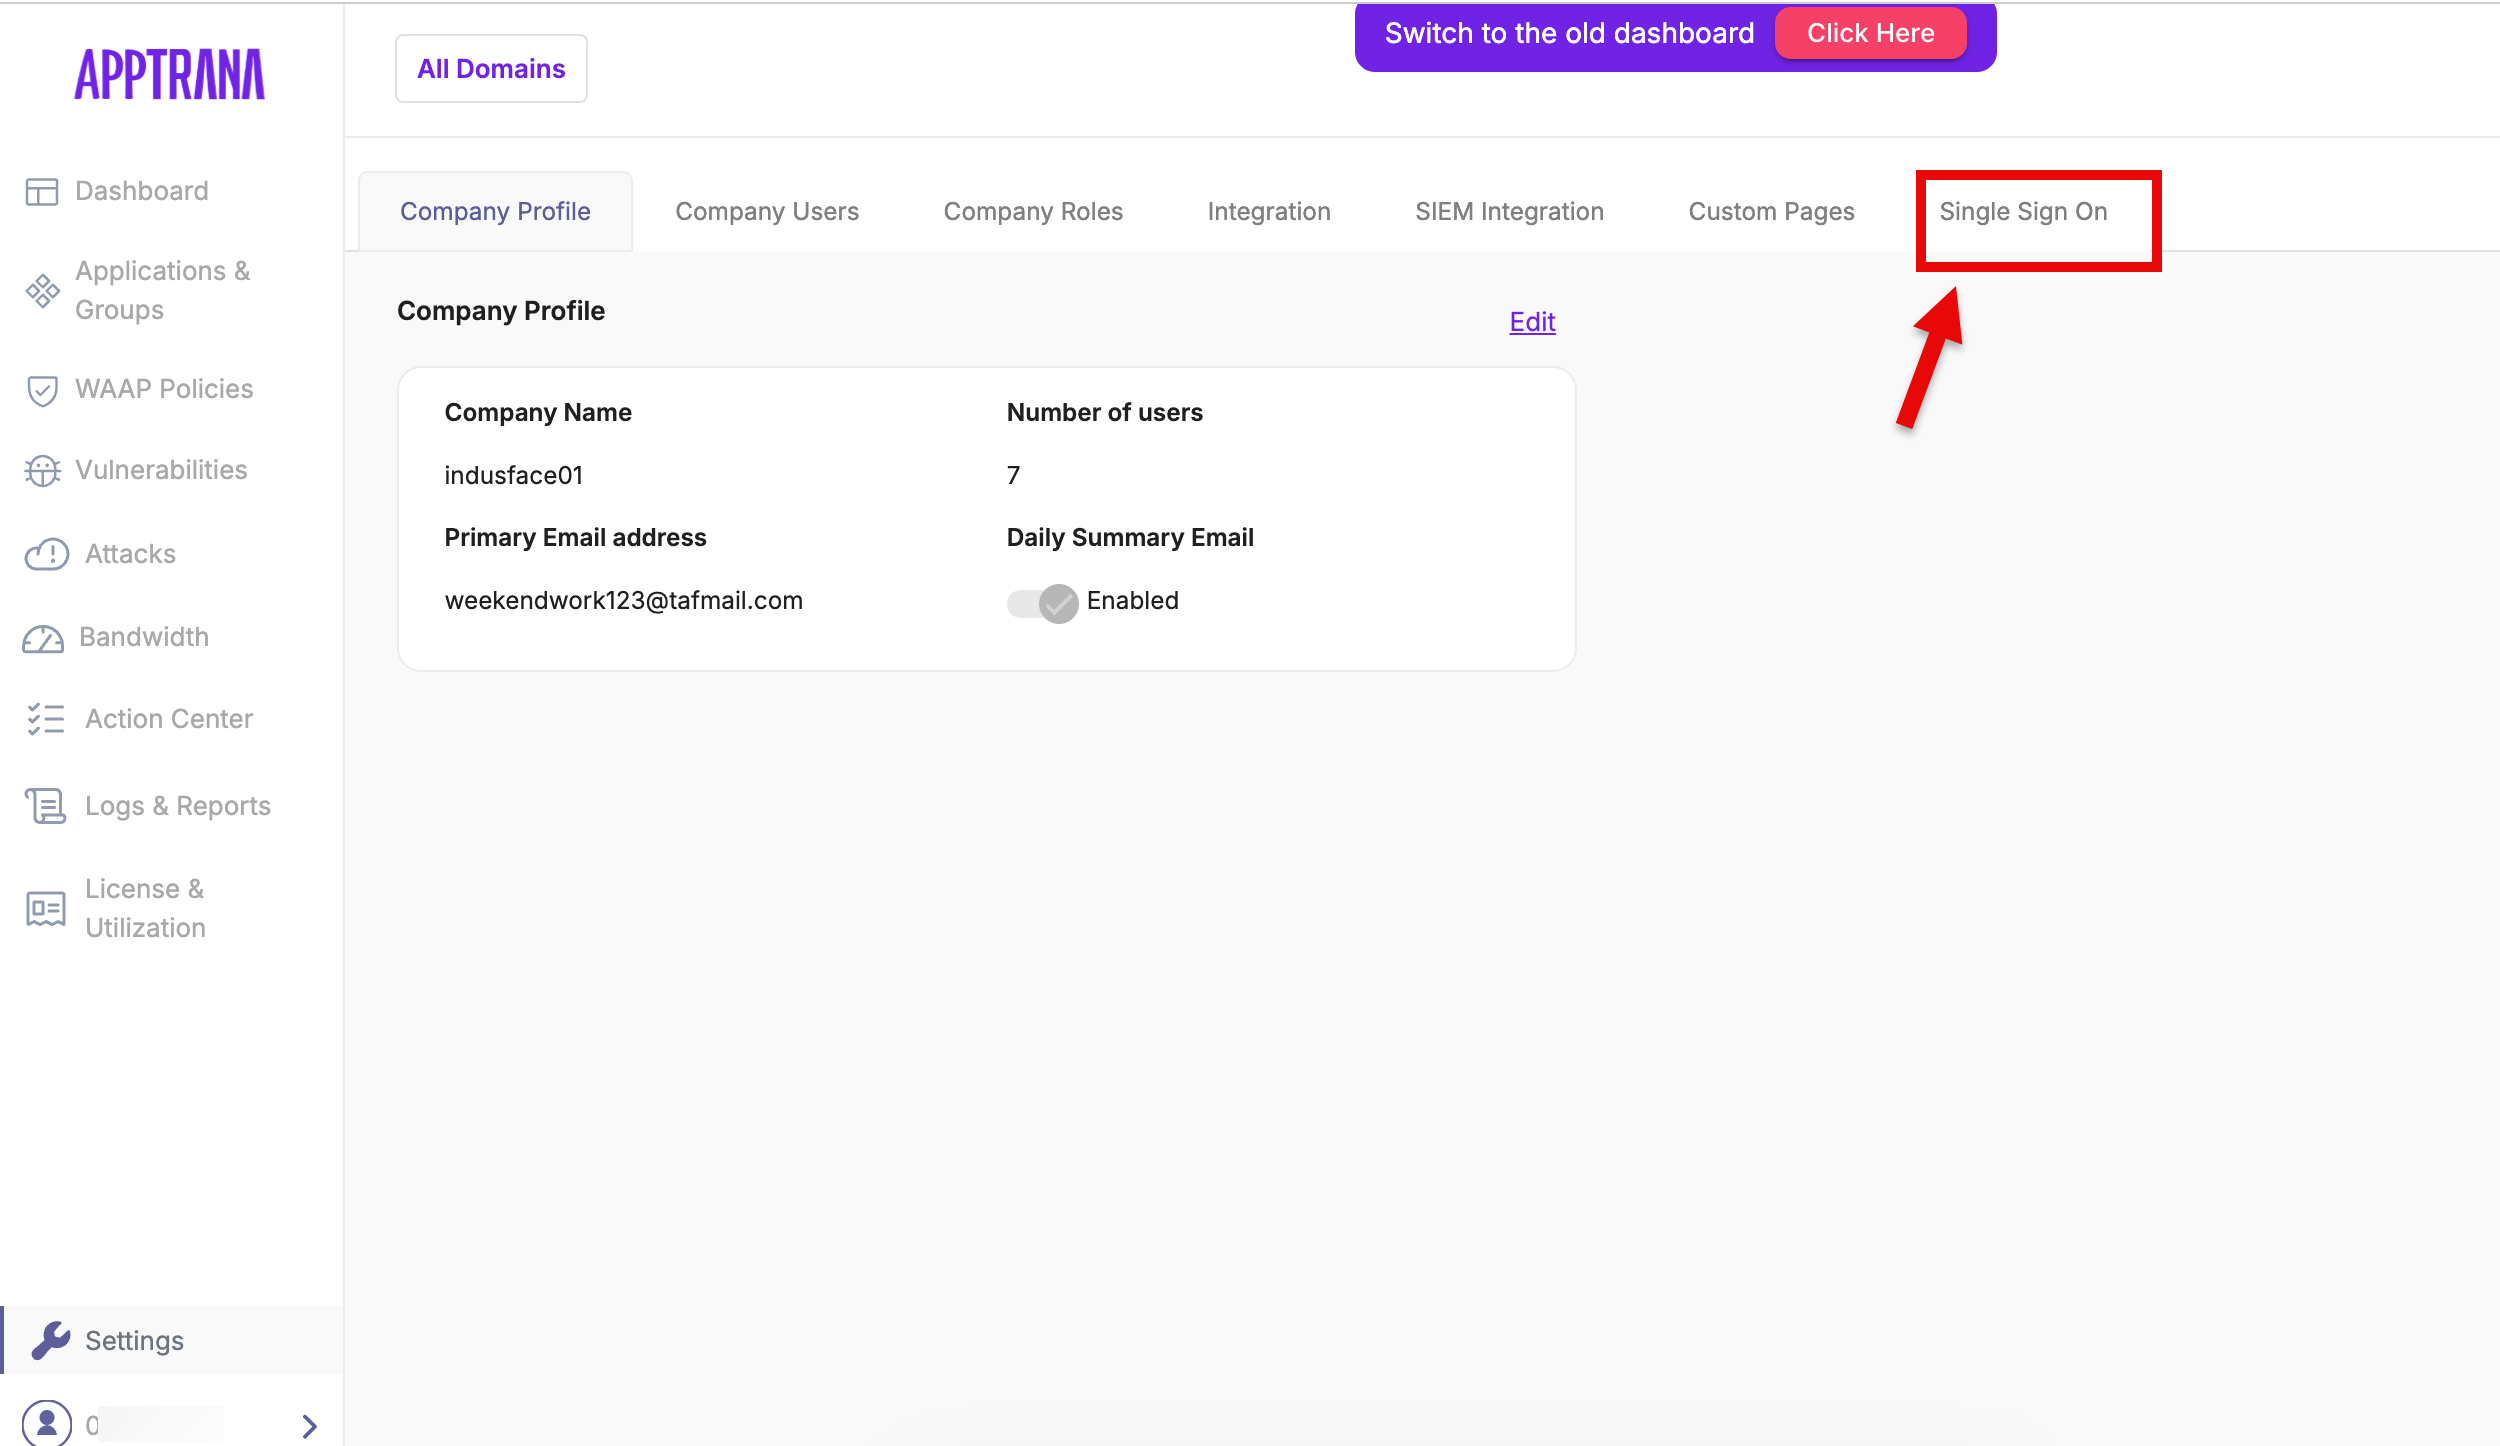
2. Enable the Single Sign On Tab

3. Upload the XML file and the Certificate (Base64) you downloaded earlier.
4. Allow up to 24 hours for the WAF portal to process the uploaded files.
5. Once processing is complete, you will be able to access the WAF portal using your Entra ID account.